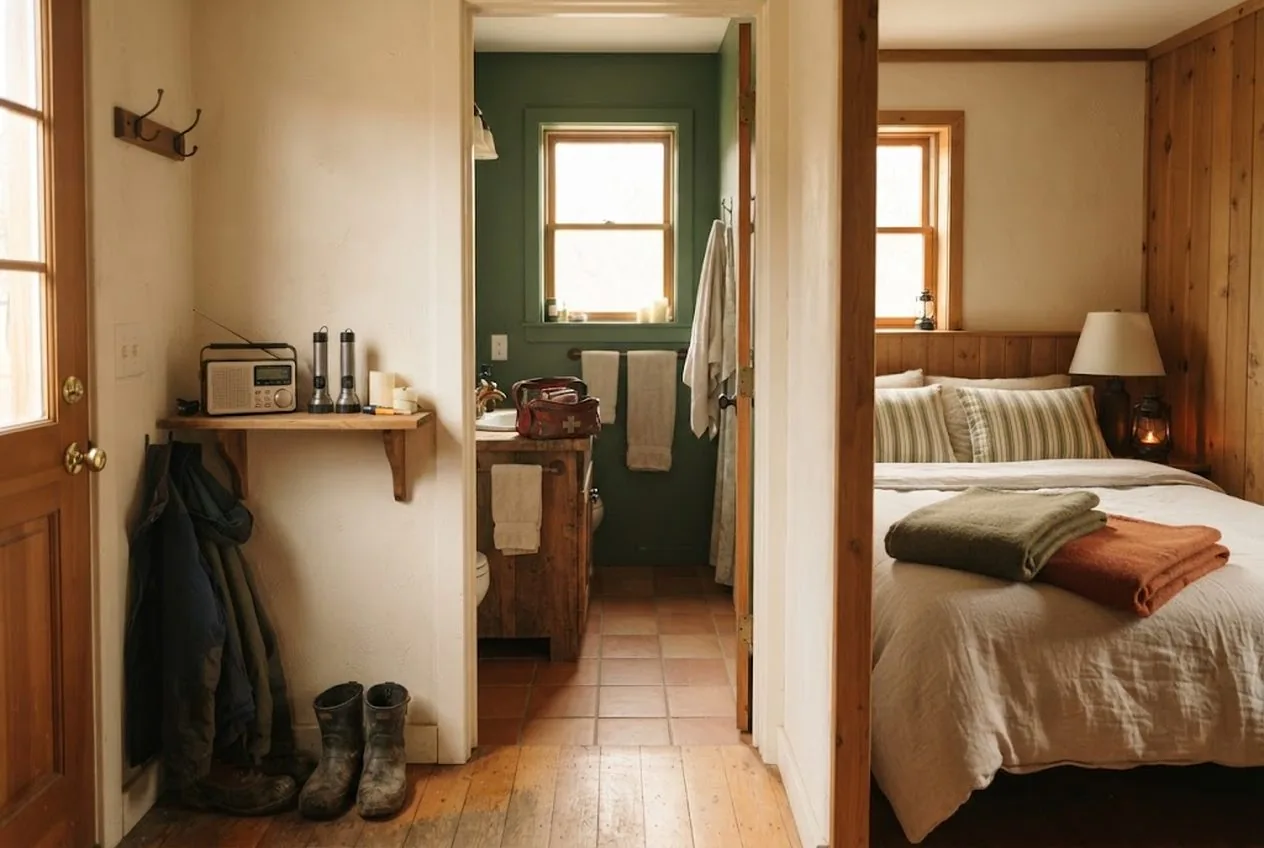
Most blackout kits fail for the same reason: everything’s crammed into one tote in the basement, and when the power actually drops, you’re crawling through a dark house trying to remember where you put it. The gear was fine. The staging was the problem. A kit only works if the light is where you need light, the first-aid kit is where you’d tend a cut, and the radio is somewhere you’ll actually reach for it — which means building the kit room by room, around how you’d really move through the house in an outage.
The short version: stage an information-and-light “command shelf” by the door, stock the kitchen for no-cook food and water, center the bathroom on first-aid and hygiene, prepare every bedroom for warmth and personal light, turn the living room into the family hub, and keep power, fuel, and tools in the garage. Here’s exactly what goes where, and why that beats a single bin every time.
Why Room-by-Room Beats One Big Bin
The single-container approach assumes you’ll have the time, light, and calm to unpack and distribute supplies at the moment the lights go out. You won’t. A real outage is dark, often cold, sometimes at 3 a.m., and shared by a household that’s now all trying to move at once. Distributing the kit in advance means the flashlight is already in the drawer you’re standing at, the emergency blanket is already on the bed you’re in, and no one has to make a trip through a black stairwell to fetch what they need.
It also matches supplies to function. Each room in a house already has a job — the kitchen feeds you, the bathroom is where you tend to hygiene and wounds, the bedroom is where you keep warm and sleep. Stage the kit along those same lines and it becomes intuitive: everyone already knows the first-aid kit is “in the bathroom,” so no one has to be told where it is during the emergency. That intuition is worth more than any single fancy piece of gear.
Disclosure: some links below are affiliate links, so we may earn a commission if you buy through them at no extra cost to you. Our room-by-room approach follows FEMA (Ready.gov) and Red Cross (American Red Cross) preparedness guidance; the gear is the part we can point you to, but the staging is what makes the kit actually work.
The Command Shelf: Information and Light by the Door
Start here, because this is the shelf your whole household will reach for on reflex. Pick one central, obvious spot — a shelf by the main door, in the entry, or in a hall closet everyone passes — and put the two things you need first in any outage: light and information.
Light means a flashlight or lantern you can find by feel, plus a clearly labeled box of spare batteries so a dead light is a thirty-second fix, not a dead end. Information means a hand-crank weather radio — the one device that still works when the cell network jams and the internet drops. It pulls in NOAA Weather Radio, which broadcasts official warnings, watches, and other hazard information around the clock (National Weather Service), and because it’s hand-crank or solar, it never runs out of power to run out of. Keep it on the command shelf, not buried in the basement bin, because the whole point is to grab it the instant you need to know what’s happening.
If you want the full case for why this is the one device to keep by the door, our hand-crank weather radio review breaks down what to look for and what to skip.
The Kitchen: No-Cook Food and Water
With the stove, microwave, and eventually the fridge out of action, the kitchen’s blackout job is to feed you without power. Stage a lantern for the counter so you have hands-free workspace light, and build a shelf of no-cook, shelf-stable food — canned proteins and vegetables, peanut butter, crackers, nuts, dried fruit, and ready-to-eat pouches — with a manual can opener kept right beside it. A pantry of cans is useless if the only opener is electric.
Water lives here too: the planning floor is one gallon per person per day, stored in food-grade containers, dated, and rotated every six months if it isn’t commercially bottled (Ready.gov). Keep coolers accessible so that when the power first drops, you can move the most perishable fridge and freezer food into them and eat that first while it’s cold — our guide to keeping food cold without power stretches that window before you fall back on the shelf-stable stash. If the outage runs long and your stored water runs low, know your backup plan for making more water safe; our roundup of ways to purify water when the power’s out covers the ranked options, and a no-power gravity filter — see the Big Berkey vs Platypus GravityWorks comparison — is the set-and-forget way to cover the kitchen.
The Bathroom: First-Aid and Hygiene Central
The bathroom is where a household naturally goes to tend a cut, take medication, and stay clean, so it’s the logical home for the medical layer of your kit. Anchor it with a well-stocked first-aid kit and a full supply of any daily prescription medications — an outage is exactly when a missed refill becomes dangerous, so keep a buffer. Add hand sanitizer, wet wipes, a small light, and stored non-drinking water in a jug or two for flushing the toilet and washing hands.
A stocked first-aid kit is worth more if you know how to use it, and a blackout is a poor time to be learning. Keep a compact first-aid manual with the kit, and practice the basics before you need them — our list of first-aid skills every prepper should practice walks through the ten that matter most.
The Bedrooms: Warmth and a Light You Can Wear
Every bedroom needs two things: a personal light and a way to stay warm. For light, a headlamp beats a flashlight because it keeps both hands free — for gripping a stair rail, carrying a child, or tending the fire — so put one within reach of each bed. For warmth, the star of a cold-weather kit is the humble Mylar emergency blanket: it weighs almost nothing, packs flat, and reflects a remarkable amount of body heat back at you, which in a winter outage is a genuine safety issue rather than a comfort.
Layer the warmth: Mylar blankets over ordinary wool blankets, plus warm base layers, hats, and socks staged in each room. In a prolonged winter outage the goal isn’t to heat the whole house — it’s to keep each person’s core warm, and to concentrate everyone in one room at night to pool heat.
The Living Room: The Family Hub
Designate the living room as the gathering point, because concentrating people in one space conserves warmth and keeps everyone coordinated and calm. Stock it with LED lanterns for shared, hands-free light, and — this matters more than preppers admit — a few low-tech distractions: a deck of cards, books, and board games, especially if there are kids riding out the dark. Morale is part of preparedness; a household that’s occupied is a household that isn’t panicking.
Tape a printed copy of your family emergency plan somewhere visible here: who does what, where you meet if you’re separated (Ready.gov), and an out-of-area contact everyone can text. Written plans survive the moment the person who built the kit is the one who’s away when the power drops.
The Garage: Power, Fuel, and Tools
The heavy gear belongs in the garage or a utility area. If you have a battery power station and solar panel, this is where they live and charge — ready to keep a fridge cycling, run a CPAP, or recharge phones through a long outage. Store any generator fuel safely and outdoors-rated, keep work gloves and basic tools handy, and — the step everyone skips — learn where your main water and gas shutoffs are now, while the lights are on. Finding them by flashlight mid-outage is how small problems become expensive ones.
A battery power station is the upgrade that turns a survivable outage into a comfortable one, but it’s a layer on top of the no-power foundation, not a replacement for it. If you’re ready to size one, our portable power for summer blackout setups guide runs the math against real appliances, and the Bluetti AC180 vs EcoFlow head-to-head settles the choice between the two most popular units. If you’re tempted to add wind to the recharging mix, read our reality check on backyard wind turbines in winter first — small wind rarely earns its cost.
Put It Together Before You Need It
The whole method comes down to one shift: stop thinking of a blackout kit as a box and start thinking of it as a layout. Walk your house room by room this weekend — command shelf, kitchen, bathroom, bedrooms, living room, garage — and stage what each room needs to do its job in the dark. Most of it you already own; the work is distributing it and filling the gaps.
Do that once, check it twice a year when the clocks change, and the next outage becomes something your household simply executes. For the wider storm-season picture — the overlap of heat, cold, and outage — our summer blackout prep checklist pairs naturally with this room-by-room build, and if you’re in hurricane country, the hurricane-season blackout kit adds the storm-specific power and water layer.
Frequently Asked Questions
- What should be in a basic blackout kit?
- At minimum: light for every person (a headlamp or lantern), a hand-crank or battery weather radio for information when the network drops, a stocked first-aid kit, several days of drinking water and no-cook food, and a way to stay warm. Round it out with spare batteries, a manual can opener, and any daily medications. The trick is not just owning these things but staging them where you'll actually reach for them in the dark — which is why building the kit room by room beats piling it all in one bin.
- How long should a home blackout kit last you?
- The Red Cross recommends a two-week supply of water and food at home (three days for an evacuation kit), so build toward that for the water and food layers if you have the space — winter storms and grid failures can run far longer than a summer flicker. The good news is that most of the kit (radio, lights, first-aid, blankets) is a one-time setup that serves any length of outage; only the consumables — water, food, batteries, medication — need to scale with the number of days you're planning for.
- Where should you keep a weather radio in the house?
- Keep it where you pass every day and can grab it in the dark without hunting — a shelf by the main door or in the living room works best. A hand-crank weather radio is the one device that still delivers information when the cell network and internet are down, so it belongs somewhere central and obvious, not buried in a closet bin. Many households keep it on the same shelf as the flashlights and spare batteries so the whole information-and-light layer lives in one reliable spot.
- Do I need a generator for a blackout kit?
- No — a generator or battery power station is a valuable upgrade, but it's not the foundation. You can ride out most outages safely with light, water, no-cook food, warmth, first-aid, and a radio, none of which need power to work. Add a battery power station when you want to keep a fridge cycling, run a CPAP, or recharge devices through a long outage; until then, a well-stocked no-power kit already covers the essentials that keep a household safe and functioning in the dark.
- How do you keep a blackout kit from being raided for everyday use?
- Dedicate the supplies and store them slightly out of the everyday flow — a labeled bin on a closet shelf rather than the kitchen junk drawer — so the flashlight is actually there when the power drops. The one exception is consumables you rotate: date your water and food, use and replace them on a schedule, and keep batteries fresh. Check the kit twice a year (the daylight-saving clock changes are an easy reminder) to swap dead batteries and expired medication.
Sources & references
Before you go
The Renter's Homestead Pack
Self-reliance projects for the yard you don't own — container yields, a raised bed built to move with you, balcony preservation basics, and the landlord questions to ask first.
Free guide
The Renter's Homestead Pack
Self-reliance projects for the yard you don't own — container yields, a raised bed built to move with you, balcony preservation basics, and the landlord questions to ask first.