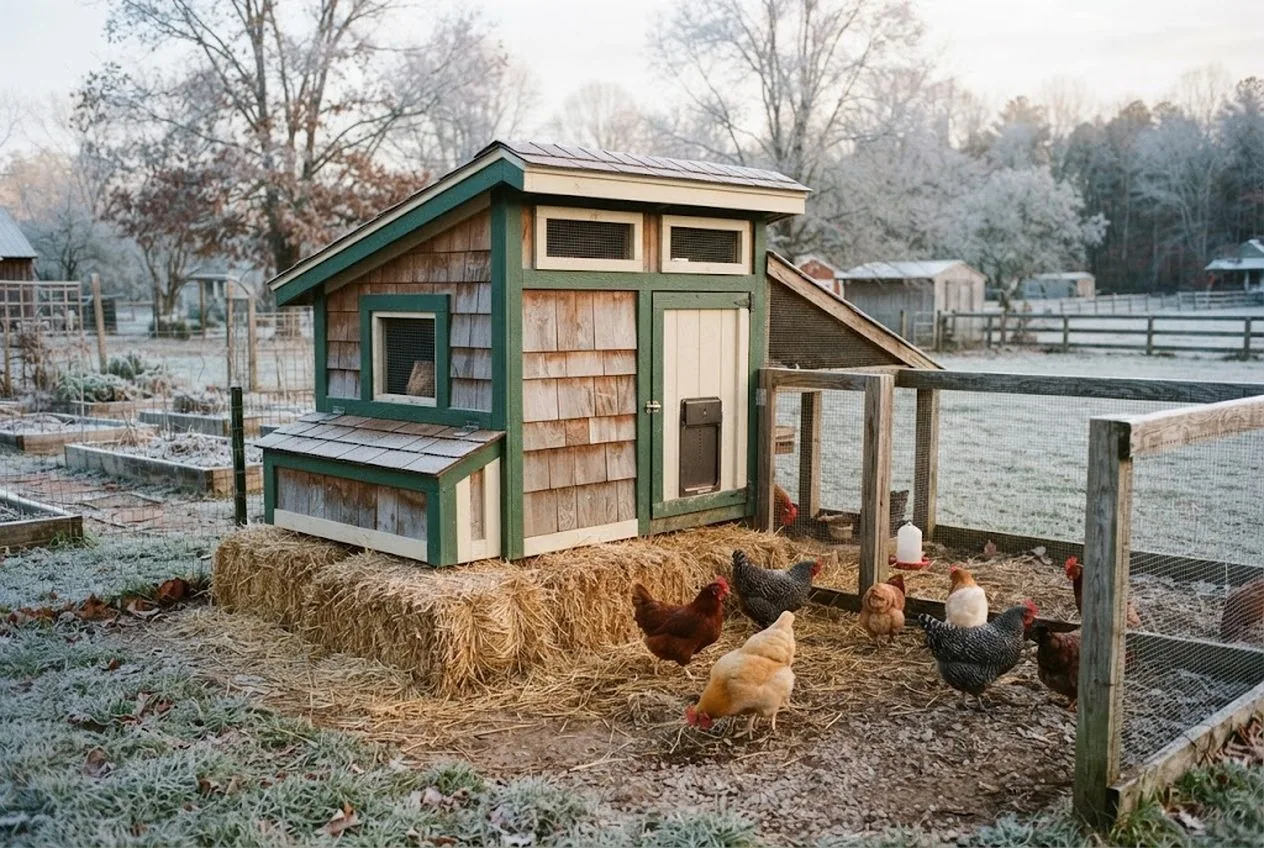
The first hard frost has a way of arriving on a night you meant to get to the coop but didn’t. One morning the waterer is a solid block of ice, there’s frost on the inside of the roof, and a bird is standing on one foot with a blackened comb tip. None of it is bad luck — it’s a coop that was still set up for summer when winter showed up. Winterizing is the couple of hours of work in early fall that heads all of it off.
Short answer: a chicken coop is winterized when it has ventilation without drafts, dry insulating bedding, water that won’t freeze, and a predator-proof lock-up. Chickens handle cold far better than most keepers fear — what actually hurts them is damp air and frozen water. Get those two right and the rest is detail. This guide walks the whole job, step by step, so it’s done before the frost, not after.
Disclosure: the product links here are affiliate links, so we may earn a commission if you buy through them at no extra cost to you. The guidance reflects standard cold-climate poultry practice rather than one brand’s catalog.
First, Understand What You’re Protecting Against
The instinct is to make the coop warmer, and that instinct causes most winter chicken problems. A healthy chicken wears a down coat it grows itself; a flock huddled on a roost stays remarkably warm down to well below freezing. Cold, on its own, is rarely the killer: as long as adult birds are protected from wind and wet weather, they should not need added heat even in the coldest part of the year (University of Maryland Extension).
The two real enemies are moisture and predators. A dozen birds breathing and pooping in a sealed box all night dump an astonishing amount of water vapor into the air. When that moist air can’t escape, it condenses on combs, wattles, and toes — and wet cold is what causes frostbite, not dry cold. Moisture also drives up ammonia levels and makes it harder for birds to stay warm, since damp air feels much colder than dry air (University of Maryland Extension). Meanwhile, a lean fall pushes foxes, raccoons, and weasels to test the coop harder than they did all summer. So winterizing is really two jobs: get moisture out while keeping drafts off, and seal the coop against anything that wants in.
Step 1: Ventilate High and Keep Drafts Off the Roost
This is the counterintuitive step that everything else rests on. You need the coop well-ventilated and draft-free at the same time, and the way you square that circle is height.
Add vents up near the roofline — above the level where the birds roost. Warm, moist air rises, so high vents let it carry the humidity and ammonia out of the coop before it can condense on the flock; extension guidance is for adequate air exchange without creating drafts (Oregon State University Extension). Meanwhile, you close off the low gaps at roost level, the ones that would send a cold breeze across sleeping birds. The rule of thumb: air should move above the chickens, never across them.
What you must not do is seal the coop airtight in a well-meaning attempt to trap heat. That’s the single most common winterizing mistake, and it’s the one that fogs the roof, soaks the combs, and produces the frostbite people blame on the cold. A slightly breezy, bone-dry coop beats a snug, humid one every time.
Step 2: Build Up a Deep-Litter Floor
Your bedding does double duty in winter as insulation and a slow heat source, if you run it as deep litter. Instead of stripping the floor clean each week, you lay down a thick bed — 4 to 8 inches of pine shavings or chopped straw, the range Arkansas extension specialists suggest for insulation (University of Arkansas Division of Agriculture) — and simply add fresh material on top as it soils, turning it occasionally.
The lower layers begin to compost in place, and that microbial activity throws off a gentle, steady warmth (University of Maryland Extension) while drying the floor from underneath. The birds get insulation between their feet and the cold ground, you get dramatically less winter mucking, and the whole bed becomes a wheelbarrow of finished compost for the spring garden. Start building the depth now, in early fall, so the system is established and working before the hard cold.
The one caveat is that deep litter only works if it stays dry — which loops straight back to Step 1. Good high ventilation and a leak-free roof are what keep the litter composting instead of turning into a sodden, ammonia-reeking mat.
Step 3: Keep Drinking Water From Freezing
If you fix only one thing this fall, fix the water. Hens are more sensitive to a lack of water than a lack of feed, and even several hours without it will probably cut egg production (UF/IFAS Extension). Birds also can’t break through ice to reach water that has frozen over (University of Maryland Extension), and in a hard freeze an open waterer can ice over within hours of you filling it, which means without intervention someone is hauling out warm water two or three times a day all winter.
A heated poultry waterer — or a heated base under a metal fount — solves it in one move, keeping water liquid through the coldest nights so the flock always has access.
Set it up before the first freeze so you can confirm it holds temperature on a cold night while the stakes are still low. Our heated chicken waterer review breaks down the power draw and what to check before you buy. If your coop sits at the far end of the yard with no mains power, our solar coop automation guide shows how to run the water and door off a small panel.
Step 4: Predator-Proof Gaps and Secure the Door
Winter is hungry season, and a fox or raccoon that ignored your coop all summer will work much harder at it in December. Walk the whole structure and run with a critical eye, and cover any gap a weasel could slip through with hardware cloth — not chicken wire. Least weasels can squeeze through holes as small as a quarter inch, which typically gets them through chicken wire, and raccoons will pull a bird’s head through the wires of an enclosure (eXtension). Pay special attention to vents, the joins around doors, and anywhere the ground has settled to leave a gap a weasel could slip under.
Then deal with the pop-door. It has to be shut and latched every night after the flock roosts, because a coop left open at dusk is an open invitation; extension guidance is simply to make sure predators cannot access the coop and to close birds in securely at night (Penn State Extension). On the dark, miserable evenings when you least want to trek out there, an automatic door earns its keep by locking up on its own.
Whether an automatic door is worth the money over a reliable manual latch comes down to your routine and your predator pressure — we weigh both sides in automatic coop door vs manual for winter.
Step 5: Do a Final Weatherproofing and Light Check
With the big four handled, close out the smaller jobs that make the coop comfortable and productive through the season:
- Stop leaks and block the wind. Patch any roof leak — a drip ruins deep litter and drives up humidity — and bank the north or windward wall with straw bales, stacked leaves, or a sheet of plywood to break the prevailing wind without sealing off airflow.
- Check the roosts. Birds keep their feet warmest when they can squat down and cover their toes with their feathers, so a wide, flat wooden roost (a 2×4 laid flat side up) beats a narrow round bar or a metal or plastic pipe that conducts cold (University of Maryland Extension). Make sure every bird has room to get up off the cold floor.
- Decide on light. Laying naturally drops as days shorten. If you want eggs through winter, a timer adding morning light to reach 14 to 16 hours a day can keep hens producing (Penn State Extension) — or you can let them rest and lay naturally with the returning sun. Either is a valid choice; just make it deliberately.
Then do the real test: check the whole setup holds up through the first genuinely cold, wet night. A coop that stays dry and calm through that is a coop that’s ready.
The Takeaway
Winterizing a coop isn’t about warmth — it’s about keeping the air dry, the water liquid, and the predators out. Ventilate high so moisture escapes without drafting the roost, build a deep-litter floor for insulation, install a heated waterer before the first freeze, and seal every gap while making sure the door latches every night. Do that couple of hours of work now and your flock walks into winter healthy, hydrated, and safe — and you skip the frostbitten combs and pre-dawn water hauls that catch out the keepers who waited.
For the full seasonal picture, our 7 fall chores to get chickens and bees ready for winter folds the coop into the wider list of jobs to finish before the ground freezes.
Sources & references
- University of Maryland Extension, Winter weather and small flocks (FS-1133) (opens in new tab)
- University of Arkansas Division of Agriculture, Backyard poultry coops prepped for cold still require good ventilation (opens in new tab)
- Oregon State University Extension, Backyard chicken coop design (opens in new tab)
- UF/IFAS Extension, Factors affecting egg production in backyard chicken flocks (opens in new tab)
- eXtension, Predator management for small and backyard poultry flocks (opens in new tab)
- Penn State Extension, Successfully raising a small flock of laying chickens (opens in new tab)
Before you go
The Renter's Homestead Pack
Self-reliance projects for the yard you don't own — container yields, a raised bed built to move with you, balcony preservation basics, and the landlord questions to ask first.
Free guide
The Renter's Homestead Pack
Self-reliance projects for the yard you don't own — container yields, a raised bed built to move with you, balcony preservation basics, and the landlord questions to ask first.