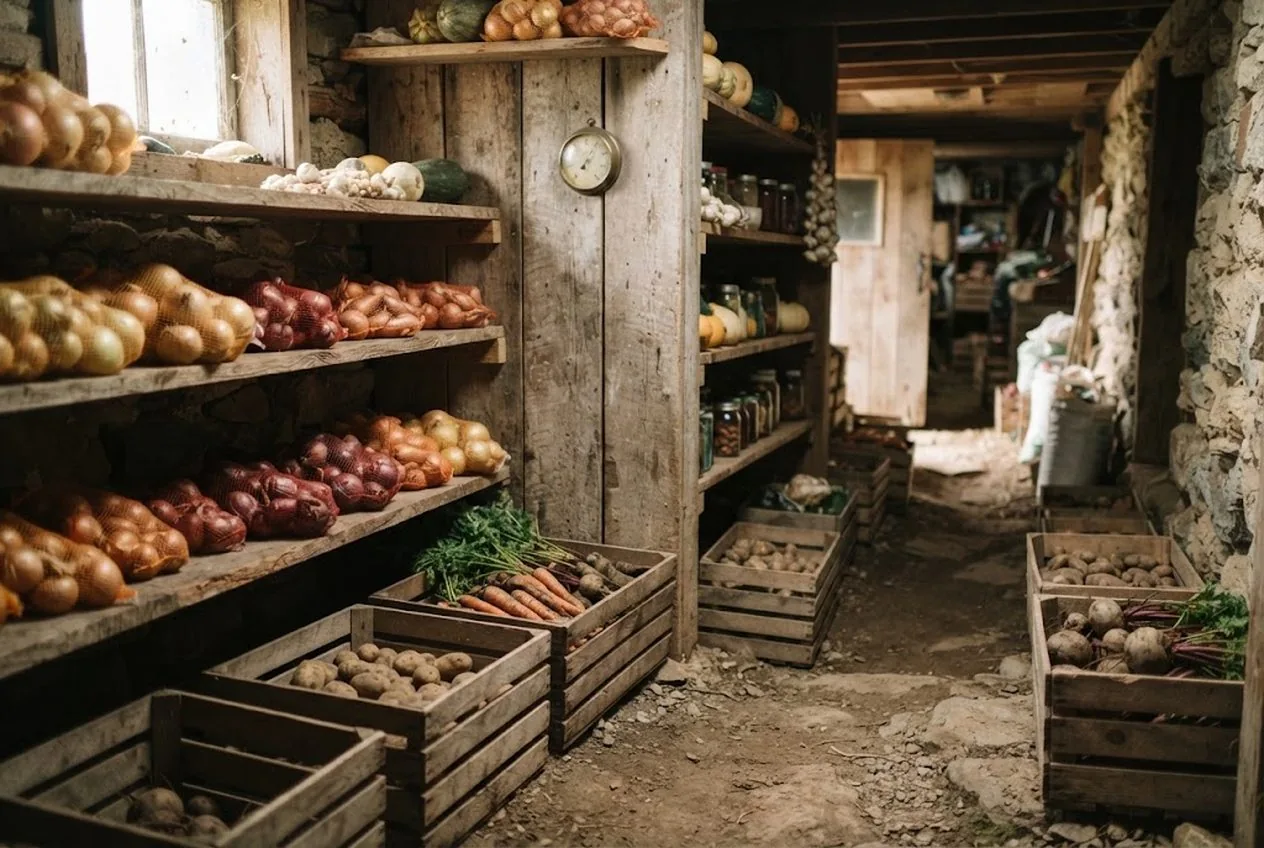
You can grow a flawless harvest and cure every crop perfectly, and still lose half of it by February — not because the food was bad, but because the room was disorganized. A root cellar isn’t a closet you cram full; it’s a climate you arrange. Get the layout and airflow right and the same potatoes, carrots, and onions that would slump into a soft, sprouting mess in a jumbled pile will instead sit dormant and firm clear through winter, no power required.
This is the season-wrap job — one of the classic fall homestead projects to finish before the ground freezes: the harvest is in, the crops are cured, and now you set the room up to carry them. Done well, it takes an afternoon and pays you back with fresh food off the shelf in January. This guide walks the whole thing — the two zones, where each crop lives, how to move the air, and how to keep watch through the cold months. (Root cellaring is a heritage skill, too; both books in our Storey’s Country Skills vs The Backyard Homestead comparison cover preserving the harvest if you want the deeper reference.)
Short answer: split the cellar into a cold, moist floor zone for roots and cabbage and a cool, dry upper zone for onions, garlic, and squash; store apples apart so their ethylene doesn’t spread; build low-intake, high-exhaust airflow with gaps between crates; and hang a min/max thermometer so you catch a freeze or a warm spell before it costs you a harvest.
Start With the Two Zones
Almost every storage crop wants one of two climates, and the whole layout follows from that split. If you’ve read our fall vegetables for root cellar storage list, this will be familiar — organizing the room is just putting that list into physical order.
- Cold and moist (32–40°F, 85–95% humidity): most root vegetables and the cabbage family (University of Alaska Fairbanks Extension). They shrivel in dry air, so they want it damp and cold.
- Cold-to-cool and dry (about 32°F at 55–75% humidity for onions, garlic, and shallots; around 50–60°F for winter squash): damp air rots them; they want it dry (UGA Extension).
Here’s the useful part: those two zones already exist in your cellar, stacked on top of each other. Cold air sinks and humidity pools low, so the floor is naturally your cold-moist zone. Warmer, drier air rises, so the upper shelves are your cool-dry zone (University of Alaska Fairbanks Extension). You don’t have to build two rooms — you just have to put each crop at the right height.
Step 1: Map Your Two Climate Zones
Before you move a single crate, stand in the cellar and read it. The coldest, dampest spot is on or near the floor, usually along an outer wall or nearest the cold-air intake. The warmest, driest spot is up high, near the ceiling and away from the intake draft. That vertical gradient is your filing system: low for roots and cabbage, high for alliums and squash.
If you’re not sure where the lines fall, this is exactly what the thermometer is for — but even a rough read of “cold and damp down low, drier up top” is enough to start placing crops correctly.
Step 2: Set Roots and Cabbage in the Cold, Moist Floor Zone
The floor and lowest shelves get your densest, most cold-loving keepers:
- Carrots and beets packed in damp sand or sawdust inside slatted crates. The packing medium holds humidity right against the roots so they stay crisp instead of rubbery.
- Potatoes stored cold (38–40°F), dark, and humid; above 40°F they begin to sprout (University of Alaska Fairbanks Extension) — light turns them green and bitter, so keep them covered or in a solid-sided bin down low.
- Turnips, rutabagas, and parsnips treated like carrots: cold, damp, and packed.
- Cabbage, cold and moist but wrapped or set slightly apart, because its smell travels.
The crate is the backbone of this zone. A sturdy, slatted, stackable crate lets you layer roots in damp sand, stack vertically to save floor space, and inspect the contents through the slats without unpacking everything.
Disclosure: the product links here are affiliate links, so we may earn a commission if you buy through them at no extra cost to you. The temperature, humidity, and storage figures here reflect long-standing university-extension and traditional root-cellaring guidance, not brand marketing.
Stack crates with a finger’s gap between them and a couple of inches off the floor — on a pallet, a low rack, or furring strips. Roots sitting in a puddle or pressed against a cold concrete wall are the first to rot, and lifting them a few inches is the cheapest insurance in the cellar.
Step 3: Shelve Onions, Garlic, and Squash in the Cool, Dry Zone
Now go up. The upper shelves run a touch warmer and are far easier to keep dry, which is exactly what the alliums and squash want.
- Onions, garlic, and shallots — cured until papery, then stored where air moves freely so they never sweat.
- Winter squash and pumpkins — set in a single layer, not touching, somewhere cool and dry (around 50–55°F is ideal; below ~50°F they suffer).
Alliums live or die on airflow. Cured onions, garlic, and shallots keep for months in breathable mesh produce bags that let air pass on every side (University of Alaska Fairbanks Extension), and rot faster when piled in a solid box.
Hanging the bags rather than shelving them is even better where you have the headroom — a hung bag gets airflow from every direction and takes up no shelf at all.
Step 4: Store Apples and Ethylene Producers Apart
This is the rule that ruins the most harvests when it’s ignored. Apples and pears give off ethylene gas as they ripen, and ethylene can cause bitterness, softening, and discoloration in other stored crops (UGA Extension). Onions can also give apples and potatoes off-flavors when they share space.
So give fruit its own isolated crate on a separate shelf, ideally near the exhaust vent so any ethylene it sheds gets carried out of the room rather than pooling around your vegetables. Check the fruit crate often and pull any apple that softens — this is the shelf where “one bad apple spoils the barrel” is literally true (UW Extension).
Step 5: Engineer the Airflow
Everything above depends on moving air. Ventilation is how a cellar controls temperature and humidity and exhausts the excess moisture that encourages mold (University of Alaska Fairbanks Extension). A sealed, still cellar traps humidity, lets ethylene and rot-gases build up, and holds warm pockets that shorten storage life. The fix is a simple convection loop:
- A low intake — a vent, pipe, or gapped window near the floor — lets cold, fresh outside air sink in.
- A high exhaust at the opposite corner lets warm, stale, humid air rise and escape.
Cold air in low, warm air out high, at opposite ends of the room: that pulls a slow, steady current through the whole space with no fan and no power. In deep winter you may need to partly close the intake to keep the room from freezing — which is precisely what the thermometer tells you.
Inside the room, keep the current flowing around every crop:
- Off the floor and off the walls — a few inches of gap everywhere so cold surfaces don’t sweat onto produce.
- Gaps between crates, never a solid wall of boxes.
- Slatted shelves and crates rather than solid ones, so air moves through, not just past.
Step 6: Hang a Min/Max Thermometer and Check Weekly
You can’t manage a climate you can’t see. A min/max thermometer records the highest and lowest temperature since you last reset it, so a single glance tells you whether the cellar dipped toward a killing freeze overnight or crept too warm during a mild spell — the two failures that quietly wreck a harvest between visits.
Mount it at produce height, not up near the ceiling where it’s warmest, so it reads the air your crops actually sit in. Then build a weekly habit: read the min and max, reset it, and walk the shelves pulling anything soft, sprouting, or molding before it takes its neighbors with it. Five minutes a week is the difference between a cellar that feeds you to spring and one you empty into the compost in January.
If a cold snap pushes the low toward 32°F, close the intake down and add insulation over the most freeze-sensitive crops; if the max is climbing, open the vents wider or wait for a cold night to flush the room.
Putting It All Together
Organizing the cellar is really six moves: read the two zones, load roots and cabbage low, shelve alliums and squash high, isolate the fruit, move the air, and watch the thermometer. Do them in that order and the room does the rest all winter.
The cellar is also only the fresh half of a winter larder. For the shelf-stable other half, start with the foods to stockpile for a one-year pantry — and if some of those staples live in buckets down in the cellar, our Gamma seal vs standard bucket lids comparison keeps the dry-goods side sealed and easy to reach.
If your cellar itself still needs work — better sealing, insulation, or those intake and exhaust vents — our how to build a root cellar guide covers the structure that makes this layout possible in a basement corner or a buried container. Build the room, arrange it the way this guide lays out, and a fall harvest turns into a winter larder that runs on nothing but cold air and a little attention.
Frequently Asked Questions
- How do you set up airflow in a root cellar?
- Aim for a low intake and a high exhaust so cold, fresh air enters near the floor and stale, warmer, more humid air leaves near the ceiling. Two vents or pipes at opposite corners create a gentle convection loop that carries away ethylene, excess moisture, and the odd whiff of a rotting vegetable before it spreads. Inside the room, keep produce off the floor and off the walls, leave gaps between crates, and never pack shelves solid — air has to move around each crop, not just past the door. Stagnant air is what turns one soft potato into a shelf of them.
- How should you arrange shelves in a root cellar?
- Organize vertically by climate. The floor and lowest shelves are the coldest and most humid, so that's where roots and cabbage belong; the upper shelves are slightly warmer and easier to keep dry, which suits onions, garlic, and winter squash. Run shelving down the cold outer walls, leave a small gap behind it for air to circulate, and reserve one isolated shelf or crate for apples so their ethylene stays away from everything else. Deep enough for a crate, spaced for airflow, and slatted rather than solid is the ideal.
- What temperature and humidity should a winter root cellar hold?
- Most root crops and cabbage want cold and damp — roughly 32–40°F at 85–95% humidity — while onions and garlic want cold but drier air, around 55–75% humidity, and winter squash wants it dry and warmer, around 50–60°F. A good cellar holds both zones at once: a cold, moist floor and a cooler, drier shelf. Hold the temperature just above freezing without dipping below 32°F, because a hard freeze ruins most stored produce as surely as heat does.
- Why keep apples away from potatoes and other vegetables?
- Apples release ethylene gas as they ripen, and ethylene can cause bitterness, softening, and discoloration in other stored crops. Onions can also give apples and potatoes off-flavors when they're stored together. Give them their own crate on a separate shelf with good airflow, and the ethylene disperses instead of pooling around your winter roots.
- How often should you check a root cellar in winter?
- Walk it about once a week. Glance at the min/max thermometer to catch any overnight freeze or warm spell, and do a quick sort — pull anything soft, sprouting, or molding before it spreads to its neighbors. The old rule holds: one bad apple really does spoil the barrel, and a five-minute weekly check is what keeps a small problem from becoming a lost harvest.
Sources & references
Before you go
The Renter's Homestead Pack
Self-reliance projects for the yard you don't own — container yields, a raised bed built to move with you, balcony preservation basics, and the landlord questions to ask first.
Free guide
The Renter's Homestead Pack
Self-reliance projects for the yard you don't own — container yields, a raised bed built to move with you, balcony preservation basics, and the landlord questions to ask first.