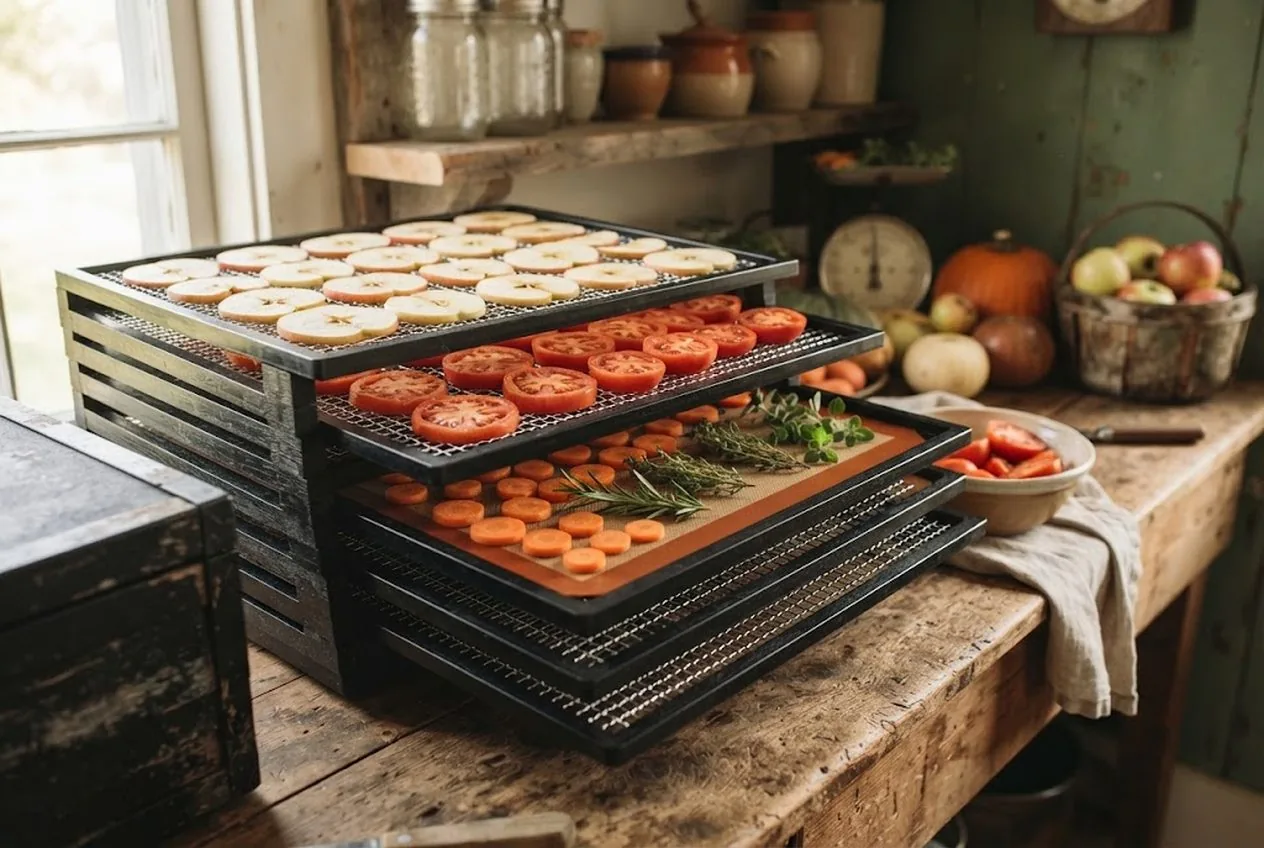
Dehydrating is the gentlest way to put up a harvest. There’s no pressure gauge to watch, no acid math to get right, no botulism to fear — just low heat and moving air, slowly pulling the water out of food until spoilage organisms have nothing to live on. A fall garden’s worth of tomatoes, apples, carrots, and herbs shrinks down to a few jars of concentrated, shelf-stable food that weighs almost nothing and lasts for months.
But “gentle” doesn’t mean “careless.” The difference between dried food that keeps all winter and a jar that molds by Thanksgiving comes down to a handful of details: even slicing, the right temperature, drying fully, and one easy step — conditioning — that most beginners skip. This is the whole process, start to finish, for turning a fall harvest into a stocked pantry shelf.
Short answer: slice food evenly, blanch the vegetables that need it, dry each food at its own temperature (herbs low, jerky high) until it’s brittle or leathery with no moisture, then condition the fruit and store everything airtight in a cool, dark place.
Why Dehydrating Earns a Place in the Pantry
Every preservation method trades on removing what spoilage needs — and dehydrating simply removes the water. Bacteria, mold, and yeast can’t grow without moisture, so food dried to roughly 10% moisture (vegetables) or 20% (fruit) becomes shelf-stable without a fridge, a freezer, or a can seal (National Center for Home Food Preservation).
What makes it so appealing for a fall harvest is its range and forgiveness. One machine handles herbs, fruit, vegetables, fruit leather, and jerky. The results store compactly, rehydrate into soups and stews all winter, and — unlike canning — a single mistake ruins one tray, not a batch of sealed jars that could hurt someone. If you’ve got more produce than you can eat and no interest in acid tables, this is where to start. When you’re ready to add the other fall methods, our Presto pressure canner review covers the canning workhorse, and the fermentation crock vs mason jar comparison covers the live-culture route — three methods that together handle nearly any harvest.
What You’ll Need
- A food dehydrator with an adjustable thermostat spanning roughly 95–165°F
- Non-stick silicone sheets for fruit leather, small herbs, and sticky or small-cut foods
- A sharp knife or a mandoline for even slicing
- A pot for blanching and a bowl of ice water
- Airtight jars or bags for storage, and a marker for labeling
The one tool that decides your results is the dehydrator itself — specifically its temperature control and airflow. If you’re shopping for one, our best food dehydrator for preserving your garden review breaks down what actually matters and names the picks; this guide is about the technique that works in any decent unit.
Disclosure: the product links here are affiliate links, so we may earn a commission if you buy through them at no extra cost to you. The temperatures and methods here follow long-standing USDA and university-extension food-drying guidance, not brand marketing.
Step-by-Step: Drying the Fall Harvest
Step 1: Prep and Slice Evenly
Wash everything, then cut it to a uniform thickness — about 1/4 inch is a reliable default. Even pieces are the whole game: mismatched slices leave you with some pieces brittle while others are still damp, and one damp piece can spoil a jar. Peel or core where it makes sense (apples, winter squash), and break herbs down to sprigs or individual leaves.
Step 2: Blanch the Vegetables That Need It
Many vegetables dry better with a quick blanch first — a couple of minutes in boiling water or steam, then a plunge into ice water and a pat dry. Blanching halts the enzymes that dull color and flavor in storage and shortens drying time (Montana State University Extension). It’s worth doing for green beans, carrots, corn, peas, and broccoli. Skip it for fruit, herbs, onions, garlic, and peppers, which dry fine raw.
Step 3: Arrange on Trays — and Reach for Silicone
Lay pieces in a single layer with a little space around each so air can move; don’t let them touch or overlap. For anything sticky, small, or pourable — fruit leather, chopped herbs, small-diced vegetables — use a non-stick silicone sheet so it doesn’t drip through the mesh or cement itself to the trays.
Step 4: Set the Right Temperature
Match the thermostat to the food — this is where cheap fixed-temperature units fail:
| Food | Temperature |
|---|---|
| Herbs | 95–115°F |
| Vegetables | ~140°F |
| Fruit & fruit leather | ~140°F |
| Jerky (meat) | ~140°F, with the meat heated to 160°F internal |
Sources: herbs (NCHFP), fruits and vegetables (Colorado State University Extension; Montana State University Extension), jerky (NCHFP).
Lower and slower beats hot and fast. Cranking the heat causes case hardening — the surface seals while the inside stays wet — which traps moisture and invites spoilage. Patience at the right temperature is what gives you evenly dried, storable food.
Step 5: Dry Until Done, and Test After Cooling
Drying times run from a couple of hours for herbs to many hours for wet fruit and vegetables; if your unit has vertical airflow, rotate the trays partway through. The crucial trick is to test a piece only after it cools — warm food always feels softer and more pliable than it truly is (Colorado State University Extension). Check for:
- Vegetables: hard and brittle — they snap, not bend
- Fruit: leathery and pliable, no beads of moisture when squeezed and torn
- Jerky: bends and cracks but doesn’t break clean in two
When in doubt, dry longer. Under-dried food can spoil in storage.
Step 6: Condition the Fruit
This is the step that separates jars that keep from jars that mold, and almost no first-timer does it. Pack cooled, dried fruit loosely in a jar, seal it, and shake it daily for about a week. If any condensation appears on the glass, the fruit still holds hidden moisture — return it to the dehydrator (National Center for Home Food Preservation). Conditioning evens out the moisture between pieces and catches dampness before it ruins a whole batch in storage.
Step 7: Store Airtight, Cool, and Dark
Pack finished food into airtight jars or bags, and store them cool, dark, and dry — heat, light, air, and moisture are the four enemies of dried food. Label everything with the contents and date. Stored this way, vegetables keep 6–12 months (about a year at 60°F, six months at 80°F) and fruit about a year (Montana State University Extension).
Pushing Shelf Life From Months to Years
Ordinary airtight storage gets you through the winter. To hold dried food longer, remove the oxygen: seal it in jars or Mylar with an oxygen absorber, and the same brittle carrots and apple slices go from a one-season stash to a longer-term reserve. That deep-storage step is exactly what our long-term food storage with Mylar bags and oxygen absorbers guide covers — dehydrating and Mylar are natural partners, one making the food storable and the other making it last.
And if you’d rather dry off the grid entirely, our DIY solar food dehydrator build does this same job on sunshine alone — the technique in this guide transfers straight across.
Dehydrating is one of the most flexible skills a self-reliant kitchen can own. Slice evenly, dry at the right temperature until it’s truly done, condition the fruit, and store it airtight — do those four things and a chaotic fall harvest becomes a shelf of concentrated food that carries you clear through to spring.
Frequently Asked Questions
- What temperature should you dehydrate fall vegetables and fruit at?
- Match the temperature to the food. As a general guide: herbs dry around 95–115°F, and fruits and vegetables around 140°F. For jerky, the meat must also reach an internal 160°F, by heating it before or after drying, to reduce the risk of foodborne illness. Drying too hot 'case hardens' food — the outside seals while the inside stays moist — so lower and slower beats hot and fast. An adjustable thermostat across roughly 95–165°F covers everything a fall garden produces.
- Do you have to blanch vegetables before dehydrating them?
- Most vegetables dehydrate better if you blanch them first. A quick dip in boiling water or a steam blanch stops the enzymes that cause off-flavors and color loss in storage, and it speeds drying by softening the tissue. Vegetables like green beans, carrots, corn, peas, and broccoli especially benefit. Onions, garlic, peppers, herbs, and most fruit don't need blanching — so it's a step you apply selectively, not to everything.
- How do you know when dehydrated food is done?
- Test it by feel after it cools, since warm food seems softer and more pliable than it really is. Vegetables should be hard or brittle — they snap rather than bend. Fruit should be leathery and pliable with no beads of moisture when you squeeze and tear a piece. Jerky should bend and crack but not break in two. When in doubt, dry longer: under-dried food can spoil in storage.
- How long does dehydrated food last?
- Dried thoroughly and stored airtight in a cool, dark place, most dehydrated vegetables keep 6–12 months and fruit around a year. Sealing it with the oxygen removed — in jars or Mylar with an absorber — can push shelf life further. The keys are drying completely, conditioning fruit before storage, and keeping finished food away from heat, light, air, and moisture.
- Do you need silicone sheets or trays for a dehydrator?
- For small or sticky foods, yes — they make a real difference. Non-stick silicone sheets keep fruit leather, small herbs, chopped items, and anything gooey from dripping through the mesh trays or welding themselves to them, and they clean up far more easily. For larger sliced produce that sits flat on the tray, the standard trays are fine. Most people end up using a sheet or two for the messy jobs and bare trays for everything else.
Sources & references
- National Center for Home Food Preservation, Packaging and Storing Dried Foods (opens in new tab)
- National Center for Home Food Preservation, Drying Herbs (opens in new tab)
- National Center for Home Food Preservation, Jerky (opens in new tab)
- Colorado State University Extension, Drying Fruits (opens in new tab)
- Montana State University Extension, Drying Vegetables (opens in new tab)
Before you go
The Renter's Homestead Pack
Self-reliance projects for the yard you don't own — container yields, a raised bed built to move with you, balcony preservation basics, and the landlord questions to ask first.
Free guide
The Renter's Homestead Pack
Self-reliance projects for the yard you don't own — container yields, a raised bed built to move with you, balcony preservation basics, and the landlord questions to ask first.