| Spec | Standard |
|---|---|
| Mylar bags | Heat-sealed, then stored inside a rodent-proof bucket |
| Oxygen absorbers | 50cc per quart, 300cc per gallon |
| Oxygen absorbers | 1,500cc (three 500cc packets) per 5-gallon container |
| Moisture content | About 10% or less, and low in oil, before any 25–30 year storage claim |
That’s the spec chart long-term storage runs on, drawn from Utah State University Extension guidance (Ohio State University Extension): heat-sealed Mylar, absorbers sized to the container, and a ceiling on moisture and oil before a 25–30 year claim is even on the table. Move off any one of those numbers — a weak seal, an undersized absorber, a food wetter or oilier than the cutoff — and the multi-decade figure no longer applies to what’s in your bucket.
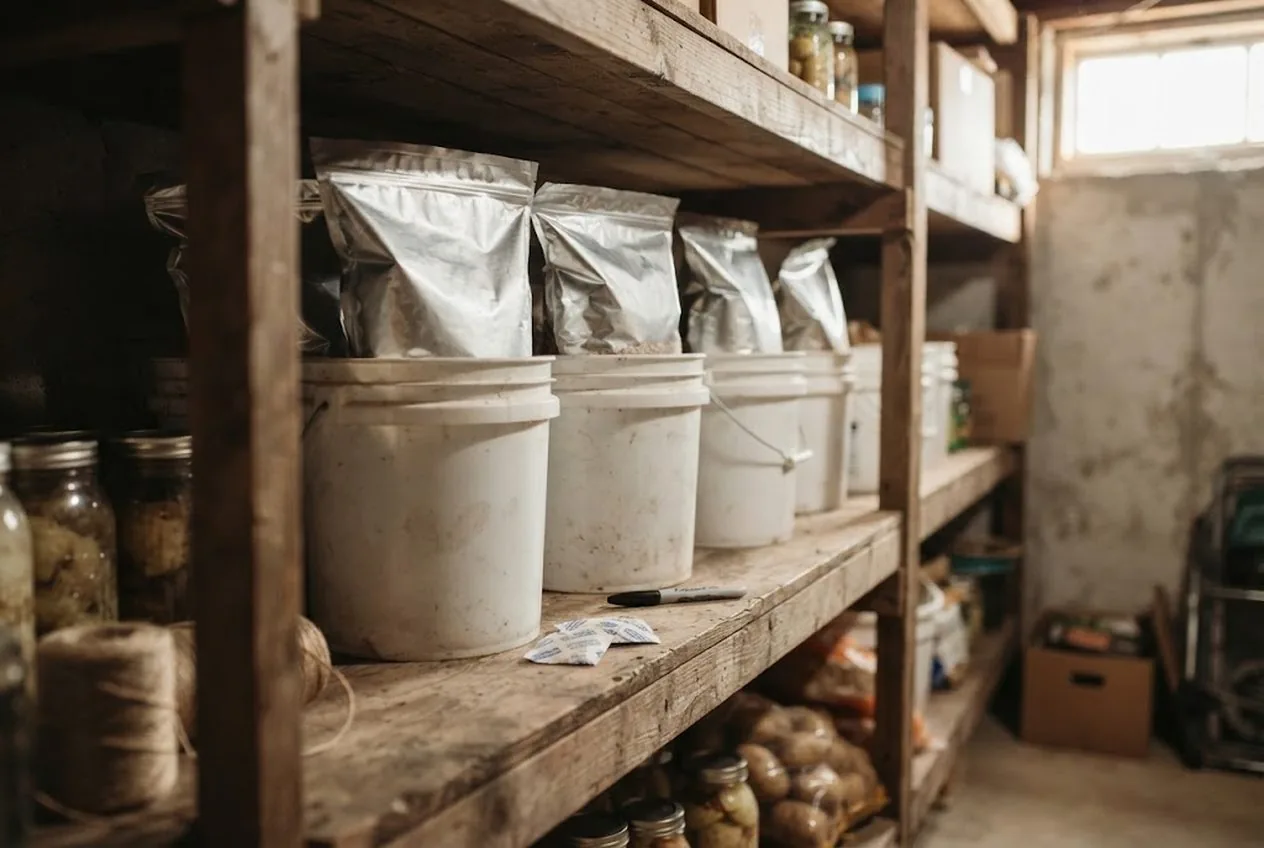
There’s a reason the same image shows up in every serious pantry: shining silver bags of rice and beans standing in stacks of white buckets. Mylar bags and oxygen absorbers are how you take an ordinary bag of dry staples and push its shelf life from a couple of years toward the 25–30 year range above — the deep-storage layer that sits behind your everyday pantry and waits, quietly, for a year you hope never comes.
The method is genuinely simple, but the chart above is non-negotiable: get the seal, the absorber sizing, and the moisture cutoff right, and this is one of the highest-return afternoons you’ll ever spend on your pantry. Miss any of those specs and you’re looking at months or a few years, not decades.
Short answer: seal low-moisture, low-fat dry staples (white rice, wheat, beans, oats, pasta — about 10% moisture or less and low in oil) in heat-sealed Mylar with oxygen absorbers sized to the container — about 300cc per gallon, 1,500cc per 5-gallon container — then protect the bags in food-grade buckets and store them cool and dark. Meet every one of those specs and staples can last 25–30 years.
Why Mylar and Oxygen Absorbers Work Together
The two do different jobs, and you need both.
Mylar is a metallized film that blocks the three things that destroy stored food over time: light, moisture, and oxygen. Unlike a plastic bag, a proper Mylar bag is a true barrier — air doesn’t seep through it. But sealing a bag full of ordinary air still traps air that is about 21% oxygen (Utah State University Extension), and that oxygen is enough to fuel rancidity, feed any insect eggs that came home in the package, and slowly degrade the food.
That’s the oxygen absorber’s job. Each little sachet contains iron (with salt) that oxidizes and locks the oxygen away (Be Ready Utah), pulling the inside of the sealed bag down to nearly oxygen-free. Insects can’t survive it, oils oxidize far more slowly, and the food essentially goes dormant. Mylar keeps the outside out; the absorber removes what’s already inside. Together they create the low-oxygen, dark, dry environment that gives staples their decades-long shelf life.
Which Foods Qualify — and Which Don’t
This is the step people get wrong, so be strict about it. The method works for low-moisture, low-oil dry staples, and only those.
Great for long-term Mylar storage:
- White rice, wheat berries, and other whole grains
- Rolled oats
- Dried beans, lentils, and legumes
- Pasta
- Dehydrated (not freeze-dried-in-oil) vegetables — home-dried batches qualify too, and our best food dehydrator for preserving a garden review covers the machine that makes them
Do not store this way:
- Oily foods — brown rice, nuts, seeds, whole-grain flours high in oil. Their oils are prone to rapid rancidity, so they are poor candidates for decades-long storage (Utah State University Extension). Store these in the freezer and rotate them.
- Sugar and salt — these store beautifully in Mylar, but skip the oxygen absorber. Sugar does not oxidize, so it does not need one, and absorbers in granulated sugar are reported to promote hardening (Utah State University Extension). Seal them in Mylar without an absorber.
- Anything with moisture — moist food stored in oxygen-reducing packaging can cause botulism poisoning, so foods should be about 10% moisture or less (Utah State University Extension). Dry-only, always.
That last point is a safety rule, not a quality one: a low-oxygen environment is exactly what dangerous bacteria like. Keep it to genuinely dry goods.
What You’ll Need
- Mylar bags with oxygen absorbers (Amazon) — buy bags with absorbers included and sized for your bag volume
- Food-grade buckets with gasket lids (Amazon) — for physical protection, pest defense, and clean stacking
- A heat sealer: an impulse sealer is the reliable choice, since Utah State University Extension does not recommend sealing with an iron (Utah State University Extension)
- A board or the bucket rim to press the seal against, plus a marker for labeling
- An airtight jar to store any leftover oxygen absorbers between batches
Disclosure: the product links here are affiliate links, so we may earn a commission if you buy through them at no extra cost to you. The shelf-life figures below reflect long-standing university-extension and long-term-storage research for properly sealed, cool-stored staples.
Step-by-Step: Sealing Food for the Long Haul
Step 1: Size Your Oxygen Absorbers
Absorbers are rated in cc (cubic centimeters of oxygen they can absorb), and you size them to the container. The extension rule of thumb (Ohio State University Extension):
- One-gallon bag: ~300 cc
- Five-gallon bag or bucket: ~1,500 cc (e.g., three 500 cc absorbers)
When in doubt, use more. Over-absorbing does no harm; under-absorbing leaves oxygen behind that quietly shortens shelf life. Work promptly once the absorber package is open — the sachets start reacting with room air immediately — and reseal any you don’t use in an airtight glass jar so they stay active (Ohio State University Extension).
Step 2: Fill the Bag Inside the Bucket
Set the Mylar bag inside a food-grade bucket first, then pour in your dry staple. The bucket supports the bag upright, keeps it from tipping, and means your finished package is ready to stack. Leave a few inches of empty bag at the top so you have clean material to seal.
Step 3: Add the Absorbers and Press Out the Air
Drop the correctly sized absorbers on top of the food. Then gather the top of the bag and press out as much air as you can — the absorbers will handle the rest, but starting with less air means a tighter, faster result.
Step 4: Heat-Seal the Top
Use a heat sealer to fuse the Mylar into a smooth, continuous seal; Utah State University Extension does not recommend an iron, which tends to leave a poor seal (Utah State University Extension). Leave a small gap at one end, squeeze out the last of the air, then close that gap. Tug gently on the finished seal — it should hold without separating. An impulse sealer makes this faster and more uniform if you’re sealing many bags.
Step 5: Protect It in a Food-Grade Bucket
The seal is done, but a bare Mylar bag is vulnerable — easily punctured, and rodents will chew straight through it to the grain inside (Utah State University Extension). Snap the bag’s bucket into a gasket lid and the bag is protected from punctures, pests, and light, and stacks cleanly. This is why the classic pantry image is bags in buckets, not bags alone.
Step 6: Label, Store Cool, and Verify
Write the contents and the date on every bag and bucket — future you will not remember. Store everything in a cool, dark, dry place; heat is the enemy that no seal can beat, and USDA guidance cited by Utah State University Extension says shelf life drops by half for every 10.8 degrees of temperature rise (Utah State University Extension). Check a bag after a day: as the absorbers pull the oxygen out, the Mylar should draw tight and firm around the food. That vacuum-like snugness is your confirmation the seal held and the absorbers are working.
What This Buys You: Real Shelf Life
Done correctly and stored cool, this is what the effort returns:
| Food | Shelf life in Mylar + O2 absorbers |
|---|---|
| White rice | Up to 30 years stored cool; about 10 years at a constant 70°F |
| Wheat berries | About 25 years stored cool |
| Dried beans | Up to 30 years |
| Rolled oats | Up to 30 years |
| Sugar/salt (Mylar, no absorber) | Indefinite if kept dry |
| Brown rice, nuts (oily) | Short — freezer and rotate instead |
Those aren’t marketing numbers; they come from Brigham Young University storage studies summarized by Utah State University Extension (Utah State University Extension) (Utah State University Extension). The variables that shrink them are always the same three — heat, oxygen, and moisture — which is exactly what this method controls.
Where the Deep-Storage Layer Fits
Mylar-and-bucket staples are the foundation of a pantry, not the whole building. They’re calorie insurance — rice, beans, and wheat that will still be food in decades — but they need rounding out with the variety and rotation of the food you actually eat week to week. Avoiding the errors in our 8 long-term food storage mistakes guide keeps this layer intact, and our off-grid food storage without a fridge or generator guide shows how canning and dehydrating fill in around it.
For a ready-made system of calorie-dense, long-shelf-life recipes designed to store for years without refrigeration, our Lost SuperFoods review breaks down one popular approach — a useful complement to the bulk staples you seal yourself.
An afternoon of sealing buys you decades of security. Start with a few buckets of white rice and dried beans — the cheapest, longest-lasting staples there are — and build the layer out one batch at a time.
Frequently Asked Questions
- How many oxygen absorbers do I need per Mylar bag?
- Size absorbers to the container. Utah State University Extension guidance is about 50 cc for a quart container, 300 cc for a one-gallon container, and three 500 cc packets (1,500 cc) for a five-gallon container. When in doubt, use more rather than less — over-absorbing does no harm, while too little leaves oxygen behind that shortens shelf life and invites spoilage.
- What foods can you store in Mylar with oxygen absorbers?
- Low-moisture, low-oil dry staples: white rice, wheat and other whole grains, rolled oats, dried beans and legumes, pasta, and dehydrated vegetables. Avoid oily foods like brown rice, nuts, and seeds, which are prone to rapid rancidity, and skip oxygen absorbers for sugar and salt: sugar does not oxidize and does not need them, and absorbers in granulated sugar are reported to promote hardening. Store sugar and salt sealed in Mylar without absorbers instead.
- How long does food last in Mylar bags with oxygen absorbers?
- Stored cool, dry, and dark, properly sealed low-moisture staples like white rice, wheat, dried beans, and rolled oats can last roughly 25–30 years, according to Brigham Young University storage research summarized by Utah State University Extension. At a constant 70°F, USU puts white rice with oxygen absorbers closer to 10 years. The variables that shorten that are heat, residual oxygen, and moisture — which is why cool storage and correctly sized absorbers matter so much. Oily foods are the exception and store for a far shorter time, no matter how well you seal them.
- Do I need buckets if I already use Mylar bags?
- The bucket isn't for the seal — the Mylar and oxygen absorbers do that — it's for physical protection. A sealed Mylar bag is airtight but easily punctured, and rodents can chew straight through it. A food-grade bucket with a gasket lid protects the bag from punctures, pests, and light, and makes stacking practical. For a few bags in a cool, sealed tote, buckets are optional; for serious quantity on the floor, they're worth it.
- How do you seal a Mylar bag at home?
- Fill the bag, drop in the oxygen absorbers, then press the air out and seal the top with a heat sealer, leaving a small gap to squeeze out remaining air before you close it fully. Utah State University Extension does not recommend sealing with a household iron because it tends to leave a poor seal; an impulse sealer is faster and more consistent. A good seal is smooth, continuous, and passes the tug test without separating.
Sources & references
Before you go
The Renter's Homestead Pack
Self-reliance projects for the yard you don't own — container yields, a raised bed built to move with you, balcony preservation basics, and the landlord questions to ask first.
Free guide
The Renter's Homestead Pack
Self-reliance projects for the yard you don't own — container yields, a raised bed built to move with you, balcony preservation basics, and the landlord questions to ask first.