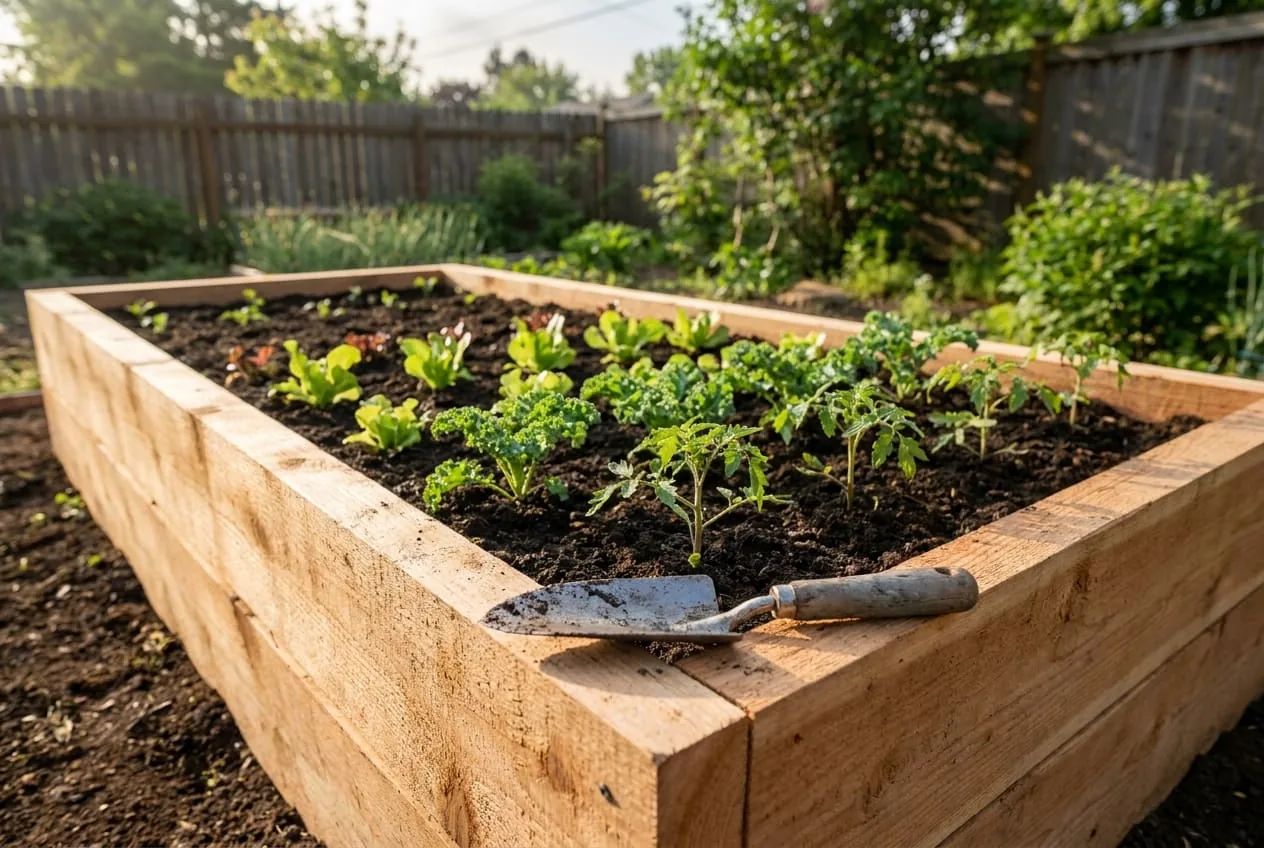
Raised bed gardens solve the most common problem home gardeners face. The root cause is soil control: you choose exactly what goes in the bed, which means you’re not fighting clay, hardpan, compaction, or contaminated soil. That advantage matters most in the first few years, before native soil has been substantially improved.
The tradeoff is upfront cost and effort. A well-built raised bed with proper soil mix is not the cheapest way to start a garden. But it is one of the most reliable ways to get a productive garden going quickly, particularly on problem soil, in limited space, or when you want to extend the growing season at both ends.
This guide covers dimensions that actually work, wood choices, the classic Mel’s Mix soil recipe, and what to plant first.
Short answer: Build a raised bed no wider than 3 to 4 feet and about 12 inches deep, framed in rot-resistant cedar or cheaper fir. Fill it with Mel’s Mix — equal parts compost, peat moss or coco coir, and coarse vermiculite — and the faster-warming, better-drained soil lets you plant earlier in spring.
Why Raised Beds Work
Before building, it’s worth understanding the mechanism — because that understanding shapes every decision that follows.
Drainage and aeration. Raised beds drain faster than in-ground soil, which matters most in heavy clay regions where poor drainage kills roots. The improved drainage also means soil warms faster in spring, letting you plant earlier (Oregon State University Extension).
Soil quality control. You fill the bed with whatever mix you choose. This bypasses the years it takes to build native soil through amendment. A well-structured fill mix provides root-accessible nutrients and the air-water balance that root systems need from day one.
No compaction. Garden beds fail partly because people walk on the soil, compressing the structure that roots need. In a properly sized raised bed (more on this below), you never need to step in — you can reach every point from the edges. After a few seasons, the soil structure that was intentionally built in remains intact.
Pest and weed management. Raised beds with a hardware cloth bottom exclude ground-level pests (voles, gophers). Fresh imported growing medium starts with a dramatically lower weed seed load than native soil. This advantage diminishes over time as wind-blown seeds arrive, but the first few seasons are noticeably cleaner.
Season extension. Soil in a raised bed warms faster in spring than surrounding ground soil, allowing earlier planting (Utah State University Extension). The same soil mass cools faster in fall. Adding a cold frame or low tunnel over a raised bed compounds this advantage substantially.
What Dimensions Should a Raised Bed Be?
Width: 3 to 4 feet maximum. This is the non-negotiable constraint. You need to reach every part of the bed without stepping in it, and beds 3 to 4 feet wide allow easy access from both sides (Utah State University Extension). If the bed is accessible from only one side, limit width to 2 feet.
Length: flexible, but plan for multiples of 4. Standard plant spacing works most easily in 4-foot increments. Longer beds are fine; a popular size is 4 feet wide by 8 feet long by one foot deep (Penn State Extension).
Depth: This is where most first-time builders go too shallow.
| Crop Type | Suggested Depth |
|---|---|
| Lettuce, herbs, shallow-rooted greens | 6 inches |
| Most vegetables (tomatoes, beans, peppers) | 12 inches |
| Root vegetables and deep-rooted crops (carrots, parsnips, squash, potatoes) | 18–24 inches |
Utah State University Extension recommends a bed at least 6 to 12 inches high to accommodate the rooting depth of most vegetables, and says beds shallower than 12 inches should have no bottom so roots can reach the soil below (Utah State University Extension). Some sources recommend 18 to 24 inches, which needs less watering and gives roots more room (Penn State Extension). For a general-purpose bed that handles most vegetables, 12 inches is a practical depth.
What Wood Should You Use (and What to Avoid)?
Wood selection matters primarily for durability and food safety. The relevant considerations:
Cedar and redwood are the traditional choices for untreated outdoor wood — both are naturally rot-resistant, long-lasting, and more expensive (Oregon State University Extension).
Douglas fir and pine are significantly cheaper and work fine, but untreated fir rots and breaks down within a few years (Utah State University Extension). Many builders treat them with a diluted linseed oil (Amazon) application to extend life. Don’t use interior-grade lumber; it fails quickly outdoors.
Pressure-treated lumber is the contentious option. Modern pressure-treated lumber in the US uses copper-based preservatives such as alkaline copper quaternary (ACQ) rather than the older chromated copper arsenate (CCA), which manufacturers stopped producing for homeowner uses in December 2003 (EPA). Utah State University Extension says pressure-treated lumber may be used for raised beds, but a plastic barrier should be placed between the lumber and the soil mix to prevent contaminants leaching into the garden soil (Utah State University Extension). The choice depends on your risk tolerance. Many experienced vegetable growers use it; many certified organic operations do not.
Avoid: any reclaimed lumber whose history is unknown and railroad ties (treated with creosote) (Oregon State University Extension).
Hardware cloth bottom: If rodent pressure is significant — gophers or voles are common in raised beds — line the bottom of the frame with 1/4-inch hardware cloth (Amazon) before filling. Staple it to the frame sides. This adds cost but prevents the most frustrating outcome of raised bed gardening: losing an entire root crop to underground pests you never see.
Building the Frame
A standard 4×8 foot raised bed requires:
- Two 8-foot boards for the long sides
- Two 4-foot boards for the end sides (cut from an 8-foot board, leaving a 4-foot piece)
- Four corner posts (optional but recommended for deeper beds — use 2×2 or 4×4 post cut to bed height + 1 foot for ground anchoring)
Assembly with posts: Cut four corner posts to your bed height plus 12 inches. Drive them 12 inches into the ground at your planned bed corners. Fasten side boards to the inside of the corner posts with 3-inch exterior screws (Amazon) (not nails — nails work loose over years of wet-dry cycling).
Assembly without posts (shallower beds): For a 6-inch bed, corner brackets work fine. Use heavy L-brackets rated for outdoor use or the raised bed corner kits (Amazon) that several garden suppliers sell.
Fasteners: Use exterior-grade screws (galvanized or stainless), not regular drywall screws. The wet soil environment causes standard screws to rust and fail within a few years.
Leveling matters more than most people expect. A bed that slopes significantly will dry unevenly — the high end dries out while the low end stays wet. Take an extra few minutes with a level before driving corner posts.
The Soil Mix That Works
This is where most raised bed guides give poor advice. Filling a raised bed with bagged “raised bed soil” or topsoil from a local supplier is expensive and often produces disappointing results. Bagged topsoil quality varies widely, and the economics don’t scale — filling a single 4×8×12-inch bed requires about 32 cubic feet of soil.
The Mel’s Mix baseline: Equal parts compost, peat moss (or coco coir), and coarse vermiculite (Square Foot Gardening Foundation). This is the mix popularized by Mel Bartholomew’s Square Foot Gardening method. It drains well, holds moisture, provides good structure, and starts with reasonable nutrient content from the compost.
Adapting based on what’s available:
- Replace peat moss with coco coir (Amazon) — the Square Foot Gardening Foundation lists it as an alternative to peat moss
- Use the highest-quality compost you can source locally — this is the most impactful variable
- Vermiculite is the most expensive component; coarse perlite (Amazon) is cheaper and performs similarly for drainage, though it doesn’t retain moisture as well
Bulk delivery vs. bags: If you’re filling more than two or three beds, order compost and topsoil in bulk from a local landscape supplier, which is usually cheaper per cubic foot than the equivalent volume in bags.
Initial fill for a 4×8×12-inch bed (32 cubic feet):
- Compost (~11 cu ft), cheapest bought in bulk
- Coco coir (~11 cu ft); compressed bricks expand significantly
- Vermiculite (Amazon) (~10 cu ft)
Prices vary widely by region. After year one, you only need to top up with 1 to 2 inches of compost each season.
What to Plant First
For a first raised bed, prioritize crops that visibly reward the investment:
Best performers for beginners:
- Salad greens (lettuce, spinach, arugula): leaf lettuce can be picked any time after leaves form (Utah State University Extension), and you can continue harvesting for weeks
- Radishes: generally mature 25 to 45 days from seeding, depending on variety (Utah State University Extension), reliably successful, good soil-level indicator
- Herbs (basil, parsley, cilantro): high value per square foot, continuous harvest
- Green beans: prolific producers, disease-resistant, easy to manage
Crops that underperform in a single small bed:
- Corn — needs a large block for pollination
- Pumpkins and winter squash — sprawling vines need too much space
- Watermelon — same issue; the yield-to-space ratio is poor for a first bed
Square foot planting: Instead of rows, plant on a grid, with larger plants getting a full square foot and small crops like radishes and carrots planted many to a square. This maximizes yield from limited bed space and simplifies succession planting.
Extending the Season
A raised bed combined with season extension infrastructure can dramatically increase the productive window.
Low tunnels: PVC hoops stuck into the soil on each side of the bed, covered with floating row cover (Amazon), add growing time at the beginning and end of the season for little cost. This is one of the most cost-effective season extension options available.
Cold frames: A hinged or removable lid made of glazed polycarbonate or old windows over the raised bed creates a mini-greenhouse that protects cool-season crops from frost.
We covered cold frame construction in detail in the DIY cold frame guide — the raised bed provides the ideal structure to attach a cold frame lid directly to.
Watering a Raised Bed
Raised beds dry out faster than in-ground beds — this is by design — but it means consistent watering is more critical.
Hand watering works fine for one or two beds with daily attention. Frequency depends on climate, season, and what’s planted. In summer heat, a fully planted bed may need watering daily or every other day.
Drip irrigation is worth considering at two beds or more. Utah State University Extension calls drip irrigation a simple and efficient method perfectly suited to raised beds (Utah State University Extension). Drip kits (Amazon) sized for raised beds can be connected to a timer (Amazon) for fully automated watering. The labor payoff is significant; in hot weather, hand-watering two or three beds daily becomes a substantial time commitment.
Soaker hoses (Amazon) are the middle option — cheaper and simpler to install than drip systems, not quite as targeted. They work well in beds with dense planting.
Water from a rain barrel system can supplement municipal water supply for raised beds — particularly useful in areas with summer water restrictions, where having a stored reserve lets you keep watering even when neighbors can’t.
Connecting Raised Beds to the Rest of the System
The raised bed earns its place as the production center of a backyard food system, but it works best in combination with:
Compost production: A backyard compost system converts the garden’s own waste into the annual amendment the bed needs. After year one, you can maintain soil quality primarily from your own composting output rather than purchased inputs.
Vermicomposting: A worm bin produces small amounts of high-quality castings that are particularly effective for seed starting and transplants — the seedlings that go into your raised bed.
Food preservation: What the raised bed produces in surplus needs to go somewhere. The solar food dehydrator handles herbs and many vegetables; canning, fermentation, and a root cellar handle the rest.
The raised bed is the part of this system most people build first, and for good reason — it’s the most direct connection between effort invested and food produced. For the full sequence of turning one bed into a working homestead, our self-sufficient backyard beginner’s guide maps out what to build after it.
Maintenance Season by Season
Spring: Add 1 to 2 inches of compost and turn it lightly into the top 4 to 6 inches. Test and adjust pH if you’re growing brassicas or blueberries (most vegetables prefer slightly acidic to neutral soil). Plant cool-season crops as soon as soil can be worked.
Summer: Consistent watering, succession planting of fast crops as spaces open up, mulching with straw or wood chips to retain moisture.
Fall: After frost, clean out spent annuals. Plant a cover crop of winter rye or clover if you won’t be using the bed, or plant garlic for harvest next summer.
Winter: No maintenance required in most climates. The soil structure remains intact. Some gardeners add a layer of leaves or straw as a mulch to insulate.
A raised bed built properly with good soil fills in faster than most new gardeners expect. By the second season, what seemed like a lot of money and effort for a box full of dirt pays off in practical ways: weeding that takes minutes from the sides of the bed, harvests that start earlier, and soil that remains workable rather than becoming concrete in summer heat.
Frequently Asked Questions
- How deep should a raised bed garden be?
- Utah State University Extension recommends a bed at least 6 to 12 inches high to accommodate the rooting depth of most vegetables, and says beds shallower than 12 inches should be built with no bottom so roots can reach the soil below. A 12-inch bed is a practical general-purpose depth; some gardeners go to 18 to 24 inches for deep-rooted crops, which gives roots more room and needs less watering.
- What is the best soil mix for a raised bed?
- A popular baseline is Mel's Mix — equal parts compost, peat moss (or coco coir), and coarse vermiculite. Popularized by Mel Bartholomew's Square Foot Gardening method, it drains well, holds moisture, and starts with reasonable nutrient content from the compost. A 4×8-foot bed filled 12 inches deep takes about 32 cubic feet of mix, so buying compost in bulk from a local supplier usually keeps costs down.
- What wood is safe to use for a raised bed?
- Cedar and redwood are the traditional untreated choices: naturally rot-resistant, more expensive, and long-lasting. Untreated fir and pine are much cheaper but break down within a few years. Modern pressure-treated lumber uses copper-based preservatives rather than the old arsenic-based CCA, which was discontinued for homeowner uses at the end of 2003; Utah State University Extension says it may be used if a plastic barrier separates the wood from the soil. Avoid unknown reclaimed lumber and creosote railroad ties.
- How wide should a raised bed be?
- Three to four feet maximum, so you can reach every part of the bed without stepping in it and compacting the soil. Four feet allows reaching from both sides; if the bed is accessible from only one side, limit it to 2 feet. Length is flexible, but planning in multiples of 4 feet makes standard plant spacing easiest.
Sources & references
- Utah State University Extension, Raised Bed Gardening (opens in new tab)
- Oregon State University Extension, Raised bed gardening (FS 270) (opens in new tab)
- Penn State Extension, Raised Bed Gardening (opens in new tab)
- EPA, Chromated Arsenicals (CCA) (opens in new tab)
- Square Foot Gardening Foundation, Mel's Mix Resources (opens in new tab)
- Utah State University Extension, Radishes in the Garden (opens in new tab)
- Utah State University Extension, Lettuce in the Garden (opens in new tab)
Before you go
The Renter's Homestead Pack
Self-reliance projects for the yard you don't own — container yields, a raised bed built to move with you, balcony preservation basics, and the landlord questions to ask first.
Free guide
The Renter's Homestead Pack
Self-reliance projects for the yard you don't own — container yields, a raised bed built to move with you, balcony preservation basics, and the landlord questions to ask first.