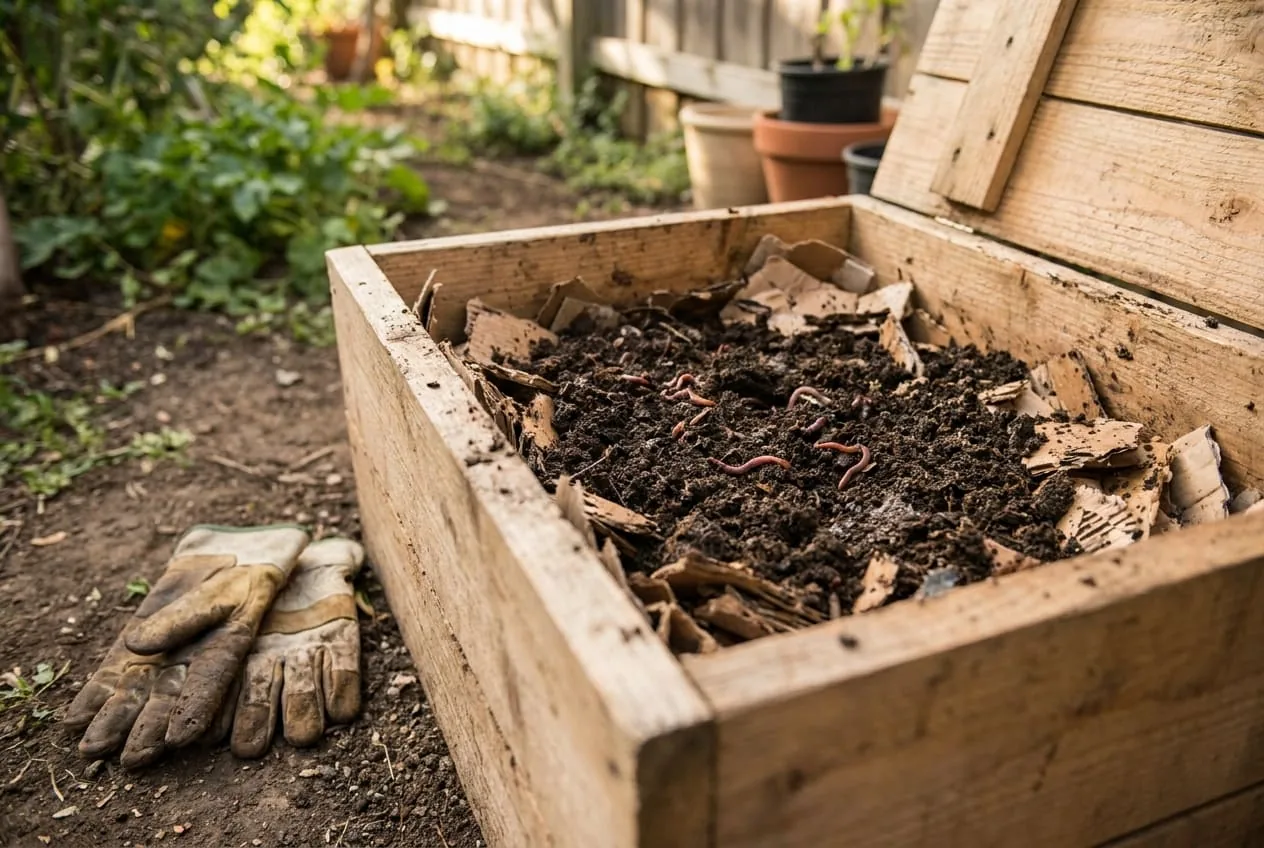
Red wiggler worms can eat more than half their body weight in a day (Illinois Extension), and a beginner-sized bin turns kitchen scraps into dense, dark, nutrient-rich castings. Penn State Extension notes castings may contain more nitrogen than traditional compost, may increase crop yields, and may decrease plant diseases and pest attacks (Penn State Extension).
The upfront cost is under $30. The ongoing inputs are kitchen scraps you were going to throw away. The output is a soil amendment you produce for free in a plastic tub under your kitchen sink.
This guide covers everything: two container setups (a $5 single-bin and a $25 stacked-tray system), what to feed your worms and what to avoid, how to harvest finished castings without sorting worms by hand, and the few things that cause worm bin problems and how to fix them.
Short answer: A worm bin is a ventilated plastic tote stocked with 1–2 pounds of red wiggler worms that eat your kitchen scraps and turn them into nutrient-dense castings in about 3–4 months. The whole setup costs under $30, has no odor when maintained correctly, and produces an amendment that improves soil porosity and water-holding capacity (Penn State Extension).
Why Worm Castings Are Different From Regular Compost
Before getting into the build, it’s worth understanding what makes vermicompost worth the effort beyond “it’s free fertilizer.”
Regular compost is decomposed organic matter — a mix of nutrients and organic structure that improves soil over time. Good compost is genuinely useful. But worm castings are substantially different in three ways:
Nutrient availability. Worm castings may contain more nitrogen than traditional compost, which can increase crop yields (Penn State Extension).
Microbial life. The worm’s digestive system doesn’t just break down organic matter — the finished vermicompost is full of tiny organisms (University of Maryland Extension) that continue activity in your soil.
Soil structure and plant health. Worm castings enhance soil by reducing erosion and increasing porosity and water-holding capacity, and they may decrease plant diseases and pest attacks (Penn State Extension).
None of this requires believing in magic soil amendments. The mechanism is understood — it’s what happens when organic matter passes through a worm’s gut rather than just sitting in a pile.
What You Need to Get Started
The basic setup is a single plastic storage bin with holes drilled for ventilation. This is the cheapest and fastest way to start.
The single-bin setup (under $10 if you have a drill):
- One 18–20 gallon opaque plastic storage tote with a lid — standard storage totes (Amazon) work well. Avoid clear bins — worms are photophobic and need darkness
- A drill with a 1/4-inch bit for ventilation and drainage holes
- Shredded newspaper or cardboard for bedding
- Coco coir (optional but excellent) — holds moisture better than newspaper alone
- About 1 pound of red wiggler worms (Eisenia fetida) to start
Drilling the holes: University of Maryland Extension recommends drilling a series of 1/4- to 1/2-inch holes in the bottom and lid of the container for good air circulation, then setting the bin on bricks or scrap wood so air can enter underneath (University of Maryland Extension). Put a tray under the bin to catch any liquid leachate so it doesn’t end up on whatever surface the bin sits on.
Total setup cost: A drill bit is $3, a tote is $5–$10, bedding materials are free (shredded junk mail, cardboard egg cartons, torn newspaper). Your main expense is the worms.
Where Do You Get Red Wigglers?
Red wigglers (Eisenia fetida) are not ordinary garden earthworms. Garden-variety earthworms burrow deep and don’t do well in a contained bin environment. Red wigglers are surface dwellers that live on forest floors eating organic material (Illinois Extension) — exactly the conditions your bin creates.
You need 1 to 2 pounds to start a bin for a household of 2–4 people; one pound is about 1,000 worms, and a pound of red wigglers in an established bin consumes about a half-pound to one pound of scraps each week (Penn State Extension). Size your worm population to the scraps your household actually produces.
Sources:
- Local gardening clubs, community gardens, or homesteader groups sometimes give away starter populations
- Uncle Jim’s Worm Farm (Amazon) ships live worms on Amazon with good survivability ratings
- Some bait shops carry red wigglers — confirm the species, as nightcrawlers and Canadian crawlers aren’t the right worm for this application
Worms are the main setup expense. Red wigglers reproduce quickly (University of Maryland Extension), so the upfront cost is a one-time investment.
Setting Up the Bin
Step 1: Prepare the bedding. Fill the bottom quarter of the bin with shredded newspaper, torn cardboard, or a mix of both. Shred it into 1–2 inch strips — not too fine. If you have coco coir (Amazon), expanding one brick and mixing it with the paper makes significantly better bedding — it holds moisture more consistently and worms produce more actively in it.
Step 2: Moisten the bedding. The bedding should be about as damp as a wrung-out sponge. Squeeze a handful — if water drips freely, it’s too wet. If it falls apart and doesn’t hold shape when squeezed, it’s too dry. Too wet is the more common mistake; it creates anaerobic conditions that smell and stress the worms. Add more dry material if you’ve overdone the moisture.
Step 3: Add a thin layer of soil. A cup of garden soil (or finished compost if you have it) introduces the grit worms need to process food — they don’t have teeth and eat sand and small particles to help mash their food (Illinois Extension). This step is small but matters for early bin productivity.
Step 4: Add the worms. Open the worm package and place the worms on top of the bedding in a pile. Leave the bin open and under a light for 15–20 minutes. Worms will immediately burrow away from the light and into the bedding. This tells you the bin conditions are acceptable and they’re not going to try to escape en masse.
Step 5: Add your first feeding — lightly. New worms need to acclimate before you load the bin with food. Start with a small amount — half a cup of food scraps — buried under the bedding. Don’t add more until you see the previous feeding is being processed (3–5 days). Overfeeding a new bin is the most common beginner mistake.
What to Feed Your Worms (and What to Avoid)
Worms process most kitchen organic matter, but not everything. The distinction matters because the wrong inputs cause either bad conditions in the bin or attract pests you don’t want.
Feed freely:
- Fruit scraps and peels (banana, apple, citrus in moderation)
- Vegetable scraps and peels
- Coffee grounds and paper filters — in moderation; coffee is acidic, and too much can make a worm bin uninhabitable (Illinois Extension)
- Tea bags (remove staples if any)
- Eggshells (crushed) — adds grit
- Stale bread and grains in small amounts
- Shredded paper and cardboard (these are both food and bedding)
Feed sparingly:
- Citrus peels — acidic and can stress worms if added in large quantities; small amounts are fine
- Onion and garlic scraps — worms avoid strongly pungent materials; they’ll eventually process it, but they won’t seek it out
- Spicy peppers — same issue as onion
Never add:
- Meat, fish, or dairy — these rot anaerobically, create strong odors, and attract flies, mice, and raccoons
- Oils and fatty foods in quantity
- Pet waste — parasites
- Diseased plant material — pathogens can survive vermicomposting in a cool bin environment
- Treated or glossy paper — ink and chemical coatings
The rule of thumb: if it came from a plant and isn’t heavily processed, your worms can handle it. When in doubt, leave it out and stick to produce scraps.
The Stacked Tray Upgrade (Under $25)
The single-bin design has one limitation: harvesting finished castings requires digging through the bin and sorting worms from finished material by hand, which is tedious. The stacked tray design eliminates this.
The concept: use two or three stacking bins nested inside each other, each with holes in the bottom. Worms live and process material in the top tray. When the top tray is full, you add a new tray on top with fresh bedding. Worms migrate up toward the new food source, leaving finished castings behind in the lower tray. You remove the bottom tray, harvest finished castings, and put that empty tray on top as the new feeding zone.
Building it:
Buy two or three identical bins (18–20 gallon, same model). On one bin, drill 1/4-inch holes every 2 inches across the entire bottom — this allows worms to migrate between trays and leachate to drain into the collector tray below. This becomes your “working tray.”
Keep one undrilled bin as the collector (bottom tray) to catch any leachate. The working tray sits inside the collector, held off the bottom by the lip of the collector or small wood spacers if needed.
The lid goes on top of the working tray. As the working tray fills, add a second drilled tray on top with fresh bedding. Worms will migrate up when they run out of food below.
Commercial alternatives: If building feels fiddly, commercial worm composting systems like the Worm Factory 360 (Amazon) use exactly this design in a pre-engineered form. The DIY version works just as well; the commercial unit just has better tray-to-tray fit and a built-in leachate spigot.
Moisture, Temperature, and Location
Moisture is the variable that causes most bin problems. The bin should feel consistently like damp but not wet bedding. Check it weekly by squeezing a handful. If it’s wet, add dry shredded paper. If it’s dry, mist lightly with water. Most people add too much wet kitchen scraps without compensating with dry bedding — this is the root of most odor problems.
Temperature: Keep the bin where it stays between 55°F and 80°F and out of direct sunlight; red wigglers will not survive cold winters outdoors (Illinois Extension). Penn State notes they enjoy the same indoor temperatures we do, 60°F to 75°F (Penn State Extension). This means:
- Don’t leave the bin outside in winter or summer in most US climates
- A garage in winter may be too cold
- A shaded outdoor spot works well in spring and fall
- Under a kitchen sink or in a basement is often ideal year-round
Location: Despite what people expect, a properly maintained worm bin has no odor. The bin should smell like soil. If it smells like rotting food, the issue is overfeeding, too much moisture, or meat/dairy scraps that shouldn’t be in there. Fix the underlying cause rather than moving the bin outside to avoid the smell — that’s treating the symptom.
How Do You Harvest Finished Castings?
Finished castings look like very dark, crumbly soil. They have no visible food scraps or bedding material left — everything has been processed. Worms produce a noticeable amount of vermicompost in about 6–8 weeks, and a typical harvest comes every 3–4 months (University of Maryland Extension).
The migration method (easiest): Stop feeding for a few weeks, then move the bedding and finished compost to one side of the bin. Fill the empty side with fresh bedding and add food only on the fresh side. Worms will migrate toward the food, which can take up to a few months (University of Maryland Extension). After that time, the old side contains finished castings with few worms. Scoop out the finished side, refill with fresh bedding, and continue.
The light method: Dump the bin contents onto a tarp in bright light. Worms will burrow away from the light into the center of each pile. Scrape the outer layer of castings off, wait a few minutes, repeat until you have a small ball of worms that you return to the bin with fresh bedding.
The tray method (with stacked design): As described above — simply wait for worms to migrate up to the new tray and remove the bottom tray of finished material.
As a healthy population multiplies, production increases accordingly.
Using Castings in Your Garden
The value of worm castings comes from using them correctly — more isn’t always better, and the right application depends on what you’re growing.
Seed starting: Mix a small proportion of castings into seed-starting mix rather than using them at full strength.
Transplanting: Add a handful of castings to the bottom of each transplant hole.
Top dressing: Apply a thin layer around the base of established plants and water in. Repeat during the growing season. This is the easiest high-value application for a continuous supply of castings.
Worm tea (liquid leachate): If your stacked bin design collects leachate in the bottom tray, dilute it well with water and apply to the soil around plant roots. Note that this is different from “aerated worm tea” (a separate technique involving bubbling castings in water) — leachate is the naturally collected liquid from the bin.
| Application | Castings to Use | Frequency |
|---|---|---|
| Seed starting mix | A small share of total volume | Once per batch |
| Transplant hole amendment | 1 handful per plant | At transplanting |
| Established bed top dressing | Thin layer | During growing season |
| Container plants | A small share of potting mix | Refresh seasonally |
Troubleshooting Common Problems
The bin smells bad (like rotting food): Too much food, too much moisture, or prohibited materials (meat/dairy). Remove recent food scraps, add several sheets of dry shredded newspaper, and don’t feed for a week. The bin should return to a neutral soil smell within a few days.
Worms are trying to escape: Usually happens in the first 48 hours as worms acclimate to new conditions, or when bin conditions are wrong. Check moisture first — if the bin is too wet, worms will try to leave. A single night with a light on near the bin discourages escape attempts. If exodus continues after the first few days, check the bedding conditions closely.
Fruit flies: Common when sweet fruit scraps are left exposed on the surface. Always bury food under a layer of bedding. A thin layer of coco coir on top helps create a barrier. Yellow sticky traps (Amazon) near the bin catch adults if you have an existing population.
Worms aren’t processing food: Usually temperature (too cold) or bin too acidic. If you’ve added a lot of citrus, the pH may have dropped. Add crushed eggshells or a pinch of agricultural lime to neutralize. If temperature is the issue, move the bin somewhere warmer.
White mites visible on bin walls: Usually not harmful — they’re potworms or mites that live alongside red wigglers. If they’re visibly overwhelming the bin, reduce moisture and food quantity to shift conditions back toward worm dominance.
Connecting Vermicomposting to a Broader Garden System
Worm castings fit best into a garden system when paired with other soil improvement techniques. Castings excel at targeted amendment — transplant holes, seed starting, container plants — rather than large-scale broadcast application (for that, finished hot compost or cover crops are more economical).
The cold frame we covered in the cold frame guide and the seed-starting angle of vermicompost are natural complements: start seedlings in a castings-amended mix, transplant into a cold frame in early spring, and extend your season at both ends. The worms in your basement or kitchen produce the amendment for your spring seedlings.
For food preservation on the other end of the growing season — what you do with what the garden produces — the solar food dehydrator and root cellar guides cover the most accessible options. None of these systems requires significant investment. Together they form the infrastructure of a garden that produces meaningful quantities of food and preserves it through winter.
The worm bin is the starting point for most people, because the cost is low and the feedback loop is fast — within a few weeks you’re producing something valuable from waste you were discarding. That’s as good an introduction to a self-sufficient food system as exists.
Frequently Asked Questions
- What worms are best for a compost bin?
- Red wigglers (Eisenia fetida), not common garden earthworms. Red wigglers are surface dwellers that live on forest floors eating organic material, while garden earthworms burrow deep and do poorly in a contained bin. Start with about 1 pound (roughly 1,000 worms) per half-pound to pound of weekly scraps; a household of 2–4 people may need 1–2 pounds.
- What should you not put in a worm bin?
- Never add meat, bones, fat, or dairy, which rot and attract pests; grease and oils; pet waste or litter; diseased plant material; or treated and glossy paper. Citrus, onion, garlic, and spicy peppers should be fed only sparingly, and coffee grounds in moderation because they are acidic. Stick to fruit and vegetable scraps, tea bags, crushed eggshells, and shredded paper or cardboard.
- Does a worm bin smell bad?
- No — a properly maintained worm bin smells like soil, not garbage. If it smells like rotting food, the cause is overfeeding, too much moisture, or prohibited scraps like meat or dairy. Fix the underlying cause by removing recent food, adding dry shredded newspaper, and pausing feeding for a week.
- How long does it take to get worm castings?
- Worms take about 6–8 weeks to produce a noticeable amount of vermicompost, and a typical harvest schedule is every 3–4 months, once the bedding has been transformed into dark, crumbly material with no visible food scraps. Production increases as the population grows.
Sources & references
Before you go
The Renter's Homestead Pack
Self-reliance projects for the yard you don't own — container yields, a raised bed built to move with you, balcony preservation basics, and the landlord questions to ask first.
Free guide
The Renter's Homestead Pack
Self-reliance projects for the yard you don't own — container yields, a raised bed built to move with you, balcony preservation basics, and the landlord questions to ask first.