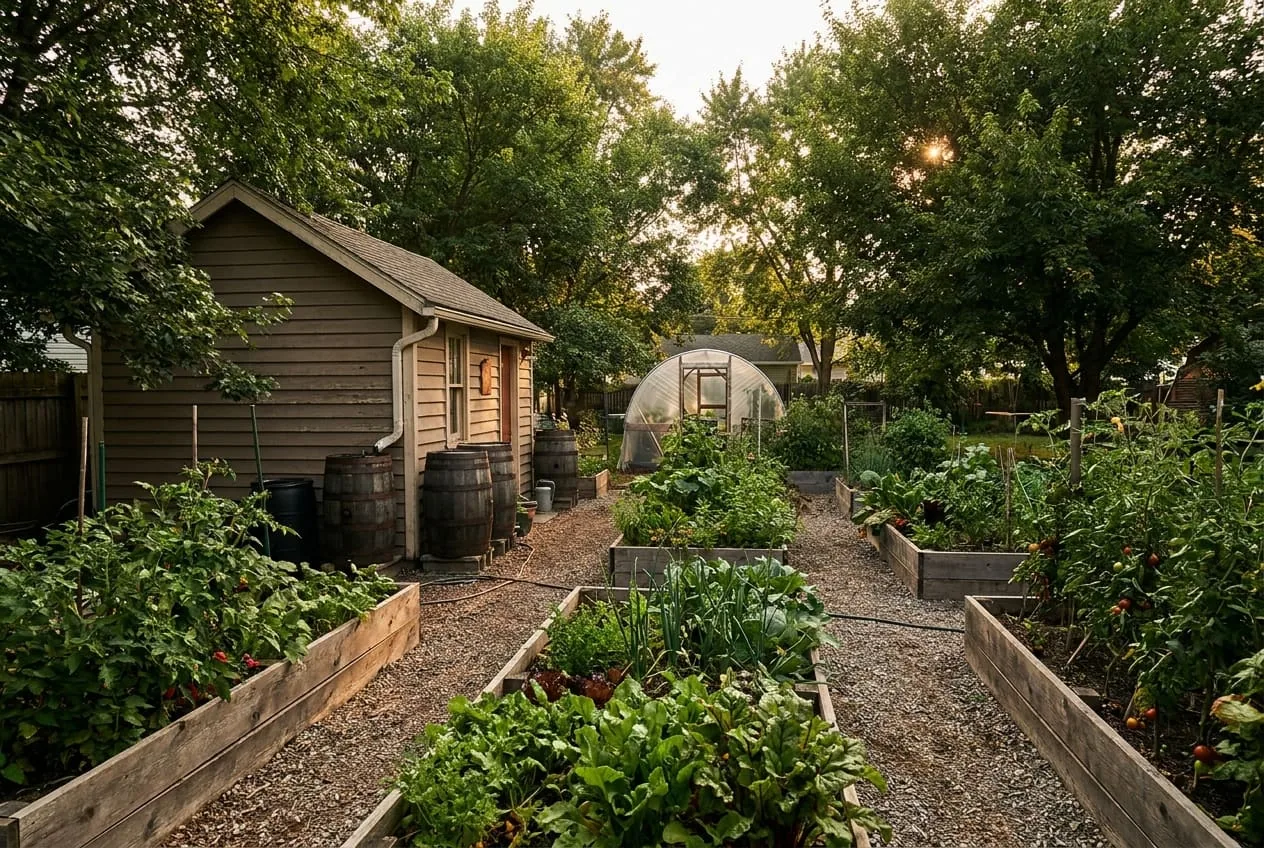
Self-sufficiency doesn’t require 40 acres and a tractor. Most of the infrastructure that matters — a productive vegetable garden, a root cellar for storage, a handful of chickens for eggs, a worm bin for soil amendment — fits in a typical suburban backyard and can be built gradually across a few seasons.
What it requires is building in the right order. Most people who start with homesteading goals get stuck because they try to do everything at once, or start with the projects that look satisfying on social media rather than the ones that produce the most food per hour of work invested. This guide maps the path from a conventional lawn to a genuinely productive food system — what to do first, why, and roughly what it costs.
Short answer: A productive backyard food system fits on a quarter-acre lot and can be built over 2–3 years — but only if you build it in the right order. Start with soil (test, compost, worm bin) and one raised bed, add season extension and storage, and introduce a small flock of 4–6 chickens last; done well, it can noticeably reduce your grocery bill.
What “Self-Sufficient” Actually Means
True self-sufficiency — producing 100% of your own food on your property — is a full-time job for an experienced family on substantial land. That’s not the realistic goal for most people, and it doesn’t need to be.
A more useful goal is food resilience: reducing your dependence on grocery store supply chains for a meaningful portion of what you eat. This is achievable on a quarter-acre suburban lot. The specific targets that are realistic for most backyards:
- Year-round salad greens and herbs (cold frames, succession planting)
- Seasonal vegetables in meaningful quantity (tomatoes, beans, squash, roots)
- Eggs from a small flock (4–6 hens cover most household egg needs)
- Preserved and stored food covering gaps in fresh production (root cellar, dehydrated, fermented)
- Soil fertility maintained without external inputs (compost, worm castings, cover crops)
None of these requires more than a few hundred square feet per category. A 20×30-foot backyard garden with cold frame extension, a small chicken coop, and a root cellar in the basement gets you most of the way there.
What Order Should You Build Things In?
The most common mistake is starting with the projects that photograph well and ignoring the infrastructure that actually makes the system work. Here’s the sequence that builds toward real food production rather than just looking like a homestead.
Year 1: Soil and Growing
Everything else depends on productive soil. Start here.
Soil assessment: Before planting anything, test your soil (most cooperative extension offices offer low-cost soil tests). You need to know your pH and nutrient baseline. Most suburban soils are compacted, low in organic matter, and either too acidic or too alkaline for vegetable production. The test tells you what to fix.
Compost: Start composting kitchen scraps and yard waste immediately. A well-maintained pile is finished in about three to five months, while an untended pile may take a year (EPA), so starting it in your first weeks means usable compost by mid-season. Even a simple three-bin system from pallets costs nothing and handles a large volume.
Worm bin: A vermicomposting setup produces castings you can harvest after three to six months (EPA) and runs continuously on kitchen scraps. Worm castings make a useful amendment for seedling transplant holes. Build one early.
Start small: A 4×8 raised bed for your first season is better than a 20×30-foot in-ground garden. Raised beds allow you to control soil quality completely, reduce weed pressure, and learn what works in your climate before investing in a large footprint. One raised bed, managed well, teaches you more than four beds planted and neglected.
Key crops for beginners: Zucchini, beans, tomatoes, and leafy greens produce reliably with minimal experience. Start with varieties suited to your USDA zone — your county cooperative extension office publishes a list of recommended varieties for your specific climate. Ignore heirloom varieties for your first year; they require more skill to produce well.
Year 1–2: Soil Biology and Fertility
The goal in years one and two isn’t maximum production — it’s building the soil ecosystem that makes maximum production sustainable.
Deep litter composting: After your first growing season, add 4–6 inches of shredded leaves, wood chips, or straw to your garden beds and let them break down over winter. This adds organic matter, feeds soil microbes, and suppresses weeds the following spring.
Cover crops: Plant a fast-growing cover crop (winter rye, crimson clover, annual buckwheat) in any bed that finishes producing before fall. Cover crops help prevent erosion and add organic matter when turned under in spring, and legumes such as crimson clover also fix nitrogen for the next crop, while winter cover crops like rye scavenge leftover nitrogen (SARE). Seed is inexpensive for a backyard bed.
Mulching: Bare soil loses moisture rapidly and degrades structurally. Keep all beds mulched with 2–3 inches of organic material — straw, shredded leaves, wood chips. This alone reduces how often you need to water and cuts the time spent weeding in an established mulched bed.
Year 2: Season Extension
A growing season that ends when frost hits leaves you relying on the grocery store for much of the year. Season extension widens the productive window.
Cold frames: A cold frame built from a salvaged storm window and a 2×12 lumber frame costs little and extends your growing season on each end. Cold-hardy crops like spinach, arugula, kale, and carrots can keep producing through frost in a well-managed cold frame.
Succession planting: The most productive vegetable gardens don’t grow one crop and then stop — they plant a new crop every 2–3 weeks so that when one bed finishes, the next is ready. Succession planting keeps beds productive from early spring through late fall and requires no additional infrastructure.
Crop timing calendar: Once you’ve been through one full season, you have the data to build a planting calendar specific to your microclimate. The university extension version is a good starting point; refine it based on your actual first/last frost dates and how your specific site behaves (south-facing slopes, proximity to buildings, etc.).
Year 2–3: Storage and Preservation
Growing food is only half the equation. The homestead that can’t preserve and store what it produces is still dependent on the grocery store for much of the year.
Root cellar: The simplest storage is a root cellar design that uses the earth’s natural temperature. Even the cheapest option — a buried barrel or trash can — can hold root vegetables through part of the winter. A basement corner conversion adds more storage space with minimal investment. Start with whatever your property allows.
Dehydration: A solar food dehydrator converts the summer harvest surplus into shelf-stable food with no ongoing energy cost. Dried tomatoes, peppers, herbs, and fruit pack high caloric and nutritional density into small storage volume. Combined with root cellar storage, a well-stocked pantry covers most seasonal gaps.
Fermentation: Lacto-fermentation is a preservation method that requires no heat and little equipment. Sauerkraut, kimchi, lacto-fermented pickles, and fermented hot sauce are all simple enough for a first-year homesteader. A mason jar wide-mouth set (Amazon) and some fermentation weights (Amazon) are all you need to start.
Year 2–3: Chickens
A small flock of 4–6 hens is the protein production component that most backyard food systems are missing. Common laying breeds produce roughly 200 to 280 eggs per year each (UNH Extension), so a small flock provides roughly 15 to 30 eggs per week in peak lay.
Building a predator-proof chicken coop is a manageable weekend project. More importantly, chickens create the closed loop that makes a backyard food system sustainable: kitchen scraps and garden waste feed the chickens, chicken manure feeds the compost pile, compost feeds the garden.
Introduce chickens after your garden is established, not simultaneously. Learning to manage a vegetable garden and a chicken flock at the same time doubles the learning curve. Get one system running well before adding another.
Year 3+: Expanding and Deepening
By year three, a well-run backyard food system produces meaningfully. The focus shifts from building to deepening: saving seeds from your best-performing plants, breeding pest-resistant strains suited to your specific soil, and replacing annual vegetable production with more perennial crops that produce for decades.
Perennial crops: Asparagus, rhubarb, established berry bushes, and fruit trees take several years to produce substantially but then provide many years of yield with minimal annual work. Plant them early even if you won’t see results for years — the best time to plant a fruit tree was five years ago, and the second best time is now.
Seed saving: Saving seed from your best plants is free, produces seed adapted to your specific microclimate, and over years develops genuinely superior performers. Start with easy self-pollinated crops — tomatoes, beans, peas, lettuce — before moving to insect-pollinated crops like squash and peppers, which can cross, and biennials like brassicas and root vegetables (Colorado State University Extension).
The Resources That Actually Help
The internet produces an enormous volume of homesteading content, most of it recycled, oversimplified, or written by people who haven’t done the things they’re describing. The few resources that consistently provide accurate, actionable guidance:
University cooperative extension publications are the most reliable source of location-specific growing information in the US. These are published by land-grant universities, written by researchers who’ve actually grown these crops in your region, and almost always free. Find your state’s extension service online and bookmark their vegetable gardening and food preservation publications.
The Self-Sufficient Backyard by Ron and Johanna Melchiore is the most comprehensive single-volume guide to building the kind of system this article describes. The publisher says they have lived off-grid for the past 40 years and refined their projects over decades (The Self-Sufficient Backyard). Their book covers everything from root cellars and food preservation to chicken husbandry and soil building — in the kind of specific, practical detail that most homesteading guides skip. Read our full review → For how it stacks up against the other heavily marketed backyard system, see our Self-Sufficient Backyard vs. Backyard Liberty comparison — and the backstory of the couple who spent 40 years off-grid explains why the book reads like field notes rather than theory.
The Lost SuperFoods is more narrowly focused on food preservation methods developed before refrigeration — the vendor describes over 126 forgotten survival foods and storage hacks (The Lost SuperFoods). It’s a useful complement to a root cellar and dehydration setup. Read our full review →
Which Tools Are Worth Owning from Year One?
These are the tools that get used constantly and where quality matters enough to not buy the cheapest option available:
| Tool | Why It Matters |
|---|---|
| Soil knife (hori hori) (Amazon) | Transplanting, weeding, soil sampling — replaces three separate tools |
| Broadfork (Amazon) | Aerates soil deeply without inverting layers or destroying soil structure |
| Soil thermometer (Amazon) | Tells you when soil is warm enough for each crop — eliminates guessing |
| Digital scale (Amazon) | Required for accurate fermentation salt ratios; also useful for harvest tracking |
| Min-max thermometer (Amazon) | Cold frame, root cellar, and chicken coop all require knowing overnight lows |
The tools most people buy first — rototillers, elaborate raised bed kits, fancy seed-starting systems — are largely optional. The tools above are the ones that get used every session from the first week of growing onward.
What a Self-Sufficient Backyard Actually Looks Like After Three Years
What a well-managed quarter-acre backyard food system typically includes:
- Garden: 400–600 square feet of intensive raised bed production
- Chickens: 4–6 hens, with laying breeds producing roughly 200–280 eggs per year each (UNH Extension)
- Root cellar: stored vegetables covering part of the winter
- Preserved food: canned, fermented, and dried goods
- Soil amendment: Worm bin + compost covering the garden beds
The grocery spending this system displaces depends heavily on your diet, climate, and skill.
The investment to reach this point is spread across 2–3 years, plus the time to learn what works in your specific microclimate. The infrastructure lasts decades. The compounding effect — better soil each year, better-adapted seed, a flock that reproduces, preserved food that carries you through gaps — builds value that accelerates over time rather than depreciating.
Start with the soil. Build the storage early. Let the system grow.
Frequently Asked Questions
- How much land do you need to be self-sufficient?
- You do not need 40 acres. Meaningful food resilience — reducing your dependence on grocery supply chains for a real portion of what you eat — is achievable on a quarter-acre suburban lot. A 20×30-foot garden with cold frame extension, a small chicken coop, and a root cellar in the basement gets most households most of the way there.
- What should you do first when starting a backyard homestead?
- Start with the soil, not the chickens. Test your soil (most cooperative extension offices offer low-cost tests), begin composting kitchen scraps immediately, and set up a worm bin for castings. Everything else depends on productive soil, and the projects that photograph well are usually the wrong place to begin.
- How many chickens do you need for a family?
- A small flock of 4–6 hens covers most household egg needs. Common laying breeds produce roughly 200 to 280 eggs per year each, according to UNH Extension, so 4–6 hens give roughly 15 to 30 eggs per week in peak lay, with production dropping during the fall molt and short winter days. A predator-proof coop is a manageable weekend build. Add chickens only after your garden is established.
- How much money can a self-sufficient backyard save?
- Savings depend heavily on your diet, climate, and how much of the harvest you store and preserve. The savings come from intensive raised-bed production, a small flock of hens, and root-cellared and preserved produce that covers seasonal gaps, with setup costs spread across 2–3 years so the system is built gradually.
Sources & references
- EPA, Composting At Home (opens in new tab)
- SARE, Cover Crops for Sustainable Crop Rotations (opens in new tab)
- UNH Extension, Producing Your Own Eggs (opens in new tab)
- Colorado State University Extension, Saving Seed (opens in new tab)
- The Self-Sufficient Backyard, official site (opens in new tab)
- The Lost SuperFoods, official product page (opens in new tab)
Before you go
The Renter's Homestead Pack
Self-reliance projects for the yard you don't own — container yields, a raised bed built to move with you, balcony preservation basics, and the landlord questions to ask first.
Free guide
The Renter's Homestead Pack
Self-reliance projects for the yard you don't own — container yields, a raised bed built to move with you, balcony preservation basics, and the landlord questions to ask first.