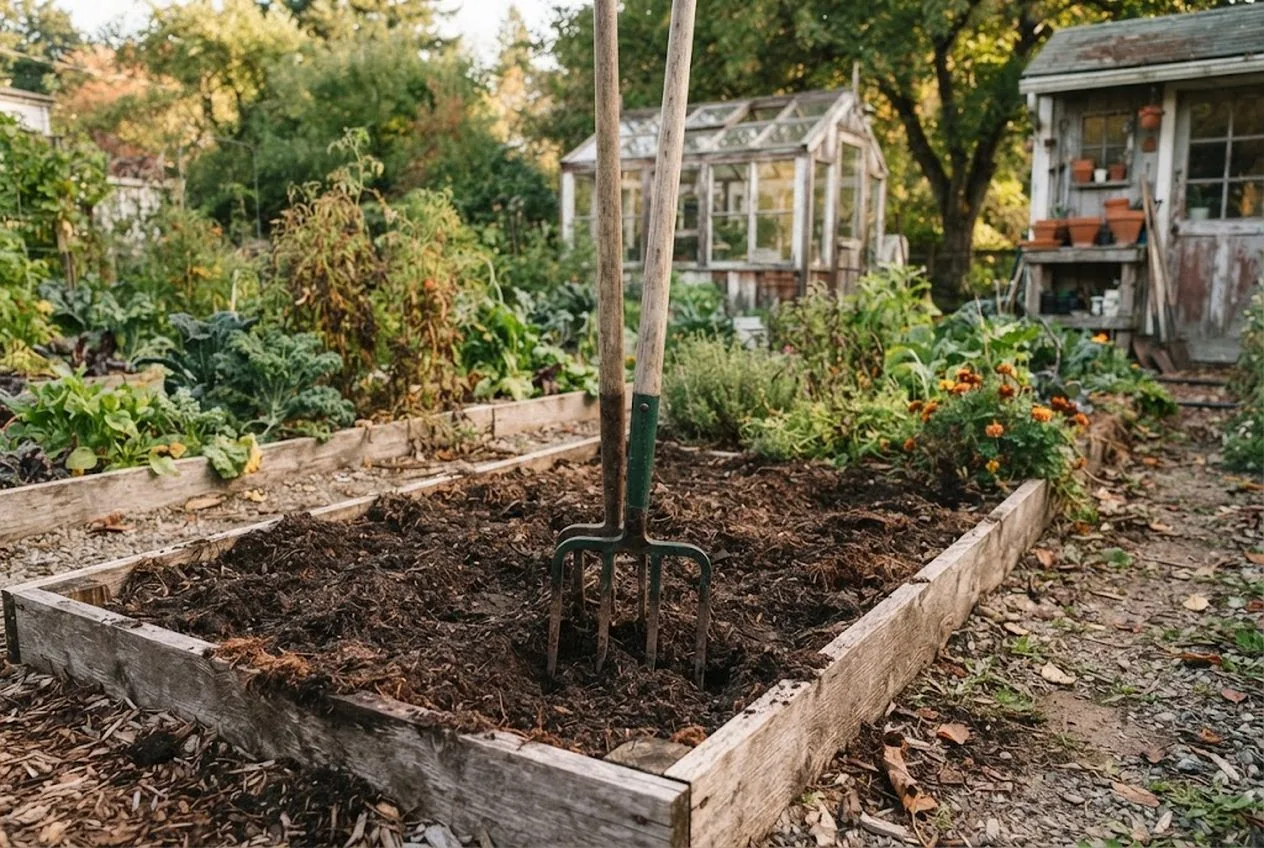
The soil your fall crops go into has just come off a hard summer. Months of watering, foot traffic, and heavy feeding have left it compacted, tired, and prone to drying out — exactly the conditions that make a late-summer sowing fail. The good news is that rebuilding it takes about two hours and no machinery, and the method leaves your soil in better shape than tilling ever could.
The short version: loosen the bed deep with a broadfork instead of a tiller, amend it with compost for fertility and coco coir for moisture and structure, then start your transplants in soil blocks. It’s a no-till approach that relieves compaction, holds water through the warm fall seed-bed stage, and preserves the soil life that actually feeds your plants. Here’s how to do it, step by step.
Why No-Till Wins for a Fall Bed
It’s tempting to fire up a tiller to “freshen” a bed, but tilling does real damage — especially before a fall planting. A tiller pulverizes soil structure, disrupts the fungal community and worm channels that move water and nutrients, and drags buried weed seeds up to the surface where they’ll happily sprout alongside your fall crop. Tilled soil is also more prone to surface crusting (UNH Extension).
A broadfork does the one useful thing tilling does — relieving deep compaction — without inverting the soil (UNH Extension). You get the drainage and root room your fall crops need while keeping the living soil intact. And because you’re not inverting the soil, you’re not planting a fresh flush of weeds right when you want a clean seed bed.
Step 1: Clear Out the Spent Summer Crops
Start by pulling or cutting down the finished summer plants. Compost anything healthy and remove anything diseased so you don’t carry problems into fall. Where practical, cut spent plants at the soil line and leave the roots in place to decompose (UNH Extension) — those decaying roots feed soil life and leave channels behind, and pulling them out only disturbs the structure you’re trying to protect.
Clear off large debris, but don’t obsess over a spotless surface. A little fine organic matter on top is fine and will work in during the next steps.
Step 2: Aerate Deep with a Broadfork
This is the heart of the method. A broadfork is a wide, U-shaped tool with long tines and two tall handles; you drive it into the soil with your foot and rock it back to lift and crack the ground without turning it over.
Work down the bed in rows: sink the tines to full depth, rock the handles back to fracture the soil, then step back a short distance and repeat. You’ll feel the compaction give way as deep channels open for roots, water, and air. On a standard raised bed the whole thing takes ten or fifteen minutes, and unlike a tiller it’s quiet, fuel-free, and leaves the soil layers where they belong.
Disclosure: the product links here are affiliate links, so we may earn a commission if you buy through them at no extra cost to you. The methods here follow long-standing no-till and soil-health guidance from university-extension and market-garden sources, not brand marketing.
Step 3: Amend with Compost and Coco Coir
With the bed loosened, spread your two amendments over the top:
- Compost — for fertility. A layer of finished compost adds the nutrients and biology your fall crops need. If you make your own, our backyard compost system guide covers building a steady supply — and the free DIY compost bin build gets that supply started at zero cost.
- Coco coir — for moisture and structure. A layer of hydrated coir dramatically improves the bed’s water-holding while keeping it airy and free-draining. This is the amendment that solves the single biggest fall-sowing problem: a warm seed bed that dries out and crusts before seeds can germinate.
Coir is milled coconut fiber sold as compressed bricks that expand considerably when soaked. It’s near-neutral to slightly acidic (pH 5.5–6.8) and lasts longer than peat moss, so it works as a stable structural amendment rather than a quick-fade one — and bricks hold 5–7 times their weight in water once rehydrated (UC ANR).
Remember that compost and coir do different jobs: compost feeds the soil, coir conditions it. Use both — coir alone will hold water beautifully but won’t feed your crops.
Step 4: Rake, Level, and Moisten the Bed
Lightly rake the compost and coir into the top 2–3 inches of soil — you’re integrating them into the surface, not digging them deep. Break up any clods and level the bed so water won’t pool or run off.
Then water thoroughly until the bed is evenly moist to depth. This step is non-negotiable for a late-summer sowing: seeds dropped into dry, warm soil simply won’t germinate, and a bed watered well before planting gives them the consistent moisture they need to get up. The coir you just added is what keeps that moisture in place between waterings.
Step 5: Start Fall Transplants in Soil Blocks
Some fall crops go in as direct-sown seed, but the longer-season ones — brassicas like broccoli, cabbage, and kale — do best set out as transplants. The best way to raise them is in soil blocks: free-standing cubes of moist soil pressed from a blocking mix, with no plastic pots at all.
Soil blocks give you stocky, healthy seedlings that establish fast, because roots reach the block’s edge and air-prune instead of circling the way they do in a pot (Iowa State University Extension). When you set the block into your prepared bed there’s no root disturbance and minimal transplant shock — a real edge in fall, when every day before frost counts. A coir-based blocking mix holds the blocks together and keeps them moist during warm late-summer starting.
Press the blocks, sow one or two seeds each, and keep them moist and shaded until they’re up. In a few weeks you’ll have transplants ready to drop into the bed you just built.
Put It All Together
Two hours of no-till prep — clear, broadfork, amend with compost and coir, level and moisten, then block up your transplants — gives your fall crops the deep, moisture-holding, living soil they need to race the frost. It’s less work than tilling, better for the soil, and it directly fixes the warm-and-drying seed bed that sinks most late-season sowings.
With the bed ready, plant it for the season: the cold-hardy crops you sow in late summer are exactly what this soil is built for, and if you’re working ahead of the calendar, what to plant in July for a fall harvest covers the earlier sowing window. And if you’re setting up new beds rather than refreshing old ones, our review of the best raised garden bed for fall planting covers the containers that make all of this easier to manage and cover against frost.
Frequently Asked Questions
- Why use a broadfork instead of a tiller for fall beds?
- A broadfork loosens and aerates deep soil without inverting it, so it relieves the compaction left by a summer of watering and harvest while preserving the soil structure, fungal networks, and worm channels that a tiller shreds. It also brings no buried weed seeds to the surface to sprout in your fall crop. For an established bed, a broadfork gives you the drainage and root room of tilling with none of the long-term damage — and it's quiet, fuel-free work.
- What does coco coir do for garden soil?
- Coco coir is milled coconut fiber that holds five to seven times its weight in water while still draining freely, so worked into a bed it improves both moisture retention and aeration at once. That's especially useful for a fall sowing, where a warm, drying seed bed is the main obstacle to germination — coir keeps the surface damp between waterings. It's near-neutral to slightly acidic and slow to break down, making it a stable structural amendment rather than a quick-fade one.
- Is coco coir a substitute for compost?
- No — they do different jobs and work best together. Compost feeds the soil, adding nutrients and biology; coco coir conditions it, improving water-holding and structure but adding little in the way of nutrients. Build a fall bed with both: compost for fertility, coir for moisture and tilth. Coir on its own will hold water beautifully but won't feed your crops.
- Why start fall transplants in soil blocks?
- Soil blocks let you raise stocky, healthy transplants with no plastic pots and minimal transplant shock. Because each block is free-standing soil, roots 'air-prune' at the edges instead of circling, so the seedling establishes fast when you set it out — a real advantage in fall when every day before frost counts. A coir-based blocking mix holds together well and keeps the blocks moist during warm late-summer starting.
- How soon before planting should I prep the bed?
- You can broadfork, amend, and plant a fall bed the same day — unlike heavy tilling, no-till prep doesn't need a settling period. If you have the time, watering the amended bed and letting it rest a few days lets the compost and coir integrate and the soil life respond, but it isn't required. For fall sowings racing the frost, same-day prep and planting is completely fine.
Sources & references
Before you go
The Renter's Homestead Pack
Self-reliance projects for the yard you don't own — container yields, a raised bed built to move with you, balcony preservation basics, and the landlord questions to ask first.
Free guide
The Renter's Homestead Pack
Self-reliance projects for the yard you don't own — container yields, a raised bed built to move with you, balcony preservation basics, and the landlord questions to ask first.