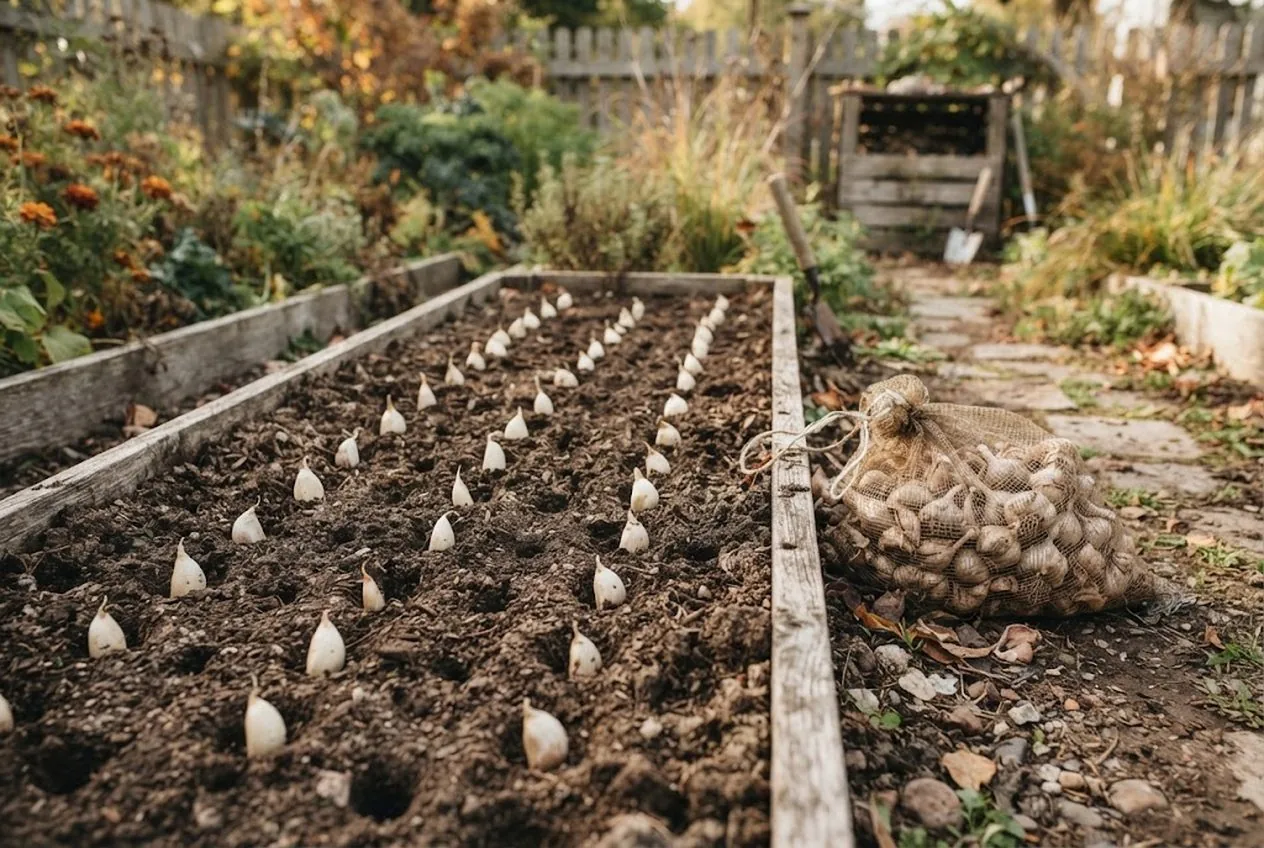
Almost every vegetable in the garden goes in once the frost danger has passed. Garlic does the opposite. You plant it in fall, cover it with mulch, and mostly forget about it through a winter where it looks — and for a while, is — completely dormant. Then it wakes up in spring and spends the whole next growing season turning that one clove into a full bulb.
That backward timing is exactly why so many first-time growers get garlic wrong. Not the growing part — garlic is genuinely low-maintenance once it’s in the ground — but the calendar. Plant on the wrong week and you either waste the plant’s energy on top growth that winter kills, or you shortchange the root system it needs before the ground locks up.
Short answer: garlic goes into the ground in fall, roughly 4 to 6 weeks before your area’s ground typically freezes hard, which lands anywhere from early September in the coldest zones to late fall or early winter in the mildest ones. Your USDA hardiness zone is a rough starting point for that window; your local first fall frost date is the number that actually decides the day. Get the depth and spacing right and the crop mostly takes care of itself from there.
Timing is the one decision that matters more than any other — get the window right and the growing itself is close to foolproof.
Why Garlic Needs a Cold Fall Planting
A garlic clove isn’t a seed — it’s a piece of the parent plant, and it needs a specific trigger to turn into a full bulb of cloves instead of a single round, undivided one. That trigger is a sustained period of cold, a process called vernalization (Illinois Extension). Planted in fall, the clove has time to grow a set of roots into the still-warm soil before winter, then sits dormant through the cold months while that chilling requirement gets met. Come spring, the plant uses the head start on root growth to push up leaves fast and start bulking up the bulb long before summer heat sets in.
Skip that fall cold period — by planting too late, or trying to force a spring planting in most zones — and the plant either doesn’t divide into cloves properly or simply runs out of season before the bulb reaches full size. The timing isn’t a tradition; it’s the mechanism the whole crop runs on.
What You’ll Need
- Seed garlic (not grocery-store garlic, which is often a mild-climate variety that may not adapt well to cold winters (Wisconsin Horticulture Extension)) — order from a farm or garden supplier suited to your climate, ideally early, since Illinois Extension suggests ordering in June before suppliers run low (Illinois Extension)
- A loosening tool for the bed — a garden fork or a broadfork for an established raised bed (Amazon)
- Finished compost, an inch or two to work into the top of the bed
- Mulch — straw, shredded leaves, or another loose organic material, enough for a 3-to-4-inch layer over the whole bed
- A trowel or hori-hori knife for setting cloves at consistent depth and spacing
Step 1: Find Your USDA Hardiness Zone and Local Frost Date
Start with your USDA hardiness zone, which is based on the average annual extreme minimum winter temperature (USDA Plant Hardiness Zone Map) and is a fine first filter for which garlic types and general timing apply to you. But treat it as a shorthand, not a schedule — two towns in the same zone number can have first-frost dates weeks apart depending on elevation, coastal exposure, and local terrain.
The number that actually runs your calendar is your average first fall frost date, published by your county or state extension office (a quick search for “[your county] extension first frost date” usually turns it up directly). That single date is your local anchor: Wisconsin Extension, for example, times garlic planting within a week or two after the first killing frost (Wisconsin Horticulture Extension).
Step 2: Count Back 4 to 6 Weeks From the Hard Ground Freeze
Garlic’s planting window is 4 to 6 weeks before the ground typically freezes hard (Illinois Extension) — not the first light frost, but the point where the soil itself locks up for the season. That window gives cloves enough time to establish roots without pushing much visible green growth, which is the balance you’re after: enough root development to survive winter, not so much top growth that a hard freeze kills it back and wastes the clove’s stored energy.
Here’s roughly how that window lines up by zone. These are broad, typical ranges — always check your own extension office’s frost date rather than treating a zone number as exact:
| USDA Zone | Typical Ground-Freeze Timing | Rough Garlic Planting Window | Example Areas |
|---|---|---|---|
| 3-4 | Early-to-mid fall | Early September to early October | Northern Plains, interior Alaska, high-elevation Rockies |
| 5-6 | Mid-to-late fall | Late September to late October | Upper Midwest, New England, Mid-Atlantic uplands |
| 7-8 | Late fall to early winter | Mid-October to early December | Mid-Atlantic coast, Pacific Northwest, parts of the Southern Plains |
| 9-10 | Rare or no hard freeze | Late October through December | Gulf Coast, coastal California, peninsular Florida |
In the two warmest zones, “planting window” is less about outrunning a freeze and more about giving the clove enough of a cool stretch to trigger cloving before the ground warms back up in spring — the trade-off there is more about variety choice (below) than exact date.
Step 3: Choose Hardneck or Softneck for Your Climate
Garlic splits into two broad types, and your zone should influence which one you plant:
- Hardneck garlic produces a stiff central stalk (a scape, which is itself edible), typically fewer but larger cloves, and often more complex flavor. It needs a genuine sustained cold period to vernalize properly and generally handles hard winters better. It’s the stronger choice in zones 3 through 6.
- Softneck garlic — the type most commonly sold in grocery stores — has no stiff stalk, produces more, smaller cloves, and stores considerably longer in the pantry, often 6 to 9 months (Wisconsin Horticulture Extension). It tolerates milder winters better and is the more reliable performer in zones 7 through 10, where a hardneck variety may not get the cold hours it wants.
Gardeners in the overlap zones (roughly 6 and 7) can often grow either type successfully; it comes down to whether you value flavor and easy peeling (hardneck) or long storage life (softneck) more.
Step 4: Prep a Loose, Well-Drained Bed
Garlic is unforgiving about one thing above all else: wet, compacted soil. Sitting cloves in dense or waterlogged ground through a long winter is the fastest way to lose a chunk of the planting to rot before it ever sprouts. Loosen the bed a full 8 to 10 inches deep — a garden fork works, and a broadfork makes quick, deep work of an established raised bed without inverting the soil layers or the biology living in them — then work in an inch or two of finished compost for fertility.
Disclosure: the product links here are affiliate links, so we may earn a commission if you buy through them at no extra cost to you. The vernalization mechanics and zone-based timing above follow long-standing land-grant university extension guidance for allium crops, not brand marketing.
If drainage is a known problem in your yard, a raised bed solves it more permanently than any amount of amending; our guide to choosing a raised garden bed for fall planting covers the sizing and material trade-offs.
Step 5: Break Apart the Bulb and Plant Each Clove
Just before planting — not weeks ahead — break the bulb apart into individual cloves, leaving the papery skin on each one intact. Set aside any clove that’s soft, discolored, or damaged; only firm, healthy cloves go in the ground.
Plant each clove root-down, pointed end up, about 2 inches deep, spaced 4 to 6 inches apart within a row, with rows roughly 12 inches apart (Penn State Extension). Planting upside down doesn’t kill the clove, but it forces the shoot to curl around and find its way up, which costs the plant energy and time it doesn’t need to spend.
Step 6: Mulch Heavily and Walk Away
Once the cloves are in, cover the bed with 3 to 4 inches of loose mulch — straw and shredded leaves are the standard choices (Wisconsin Horticulture Extension). That thick layer insulates the soil against sharp temperature swings, moderates the freeze-thaw cycles that can heave a shallow-planted clove partway out of the ground, and holds moisture through what’s often a dry stretch of fall. In the coldest zones, it substitutes for the insulating snow cover that isn’t guaranteed every winter.
After mulching, the bed genuinely needs nothing else until spring. Resist the urge to check on it; garlic’s whole strategy is to do its early growing quietly, underground, while you’re occupied with the rest of the fall garden.
Troubleshooting Common Garlic Planting Problems
Shoots came up in fall, not spring. This usually means planting happened too early relative to your frost date, or an unusually warm fall triggered early growth. The top growth will likely get knocked back by a hard freeze, but the clove itself typically survives underground and resumes growth in spring — expect a somewhat smaller bulb, not a lost crop.
Cloves are visible on the soil surface in late winter. Classic frost heave, caused by repeated freeze-thaw cycles working shallow-planted cloves upward. A thicker mulch layer is the fix going forward; for a bed already affected, gently press exposed cloves back down and add more mulch on top.
Cloves rotted instead of sprouting. Almost always a drainage problem — either the bed sat too wet over winter or the cloves were planted in compacted soil that didn’t let excess water move through. Loosening the bed deeply and improving drainage before the next planting, or switching to a raised bed, addresses this directly.
Bulbs came out small at harvest. Small bulbs usually trace back to one of three timing issues: planting too late for adequate fall root establishment, choosing a variety poorly matched to the zone (a hardneck struggling through a mild winter’s insufficient chill, for instance), or crowding cloves closer than the recommended spacing.
The Takeaway
Garlic rewards patience more than skill. Get your USDA zone’s rough window, confirm it against your own first-frost date, plant 4 to 6 weeks ahead of that freeze, choose hardneck or softneck to match your winters, and mulch heavily — then let the crop spend the winter doing the one thing it’s built to do without any help from you.
Garlic is one piece of a fall garden, not the whole plan. If you’re building or amending the bed it’s going into, our guide to prepping fall garden soil with a broadfork and compost covers the same loosening step in more depth, and the cold-hardy crops worth sowing alongside it can fill the rest of the bed while the garlic works underground. For the wider seasonal rhythm this fits into, our review of The Self-Sufficient Backyard walks through the kind of year-round planning that makes a single fall planting day like this one pay off for months.
Frequently Asked Questions
- What USDA zone should I use to time garlic planting?
- Your zone is a useful starting point, but it's a shorthand for climate, not a planting date. The number that actually decides the day is your local average first fall frost date, published by your county extension office. Two spots in the same zone can have frost dates weeks apart depending on elevation, coastal proximity, and local terrain, so treat the zone table as a rough calendar and your extension office's frost date as the tiebreaker.
- Can you plant garlic too early or too late?
- Yes, both mistakes are common. Planted too early, cloves sprout tall green shoots before winter, and that top growth gets killed back by hard freezes, wasting energy the plant needed for root and bulb development. Planted too late, the clove doesn't have time to grow roots before the ground freezes solid, and a garlic plant that overwinters without an established root system typically produces a smaller bulb the following summer.
- Should I plant hardneck or softneck garlic in a cold zone?
- Hardneck varieties are generally the better fit for zones 3 through 6. They tolerate hard cold well and need a genuine winter chill to divide into cloves properly, a process called vernalization. Softneck varieties are more common in milder zones 7 through 10, where winters may not deliver enough sustained cold for hardneck types to perform at their best, and softneck's better long-term storage life is a bonus in any zone.
- Do I need to mulch garlic after planting?
- In most zones, yes. A thick mulch layer — straw is the standard choice — insulates the soil, moderates the freeze-thaw cycles that can heave newly planted cloves up out of the ground, and holds moisture through a dry fall. In the coldest zones it also protects against a winter with little insulating snow cover. Pull the mulch back partway in spring once the ground is reliably thawed so shoots aren't smothered.
- What if I miss my zone's fall planting window?
- You have two honest options. Some gardeners plant late into workable soil and accept a smaller bulb the next summer rather than skip a year, since garlic is forgiving even under imperfect timing. The other option is spring planting, which is possible in most zones but reliably produces smaller bulbs than fall-planted garlic, because the plant misses the long cold vernalization period and has less time before summer heat ends bulb growth.
Sources & references
Before you go
The Renter's Homestead Pack
Self-reliance projects for the yard you don't own — container yields, a raised bed built to move with you, balcony preservation basics, and the landlord questions to ask first.
Free guide
The Renter's Homestead Pack
Self-reliance projects for the yard you don't own — container yields, a raised bed built to move with you, balcony preservation basics, and the landlord questions to ask first.