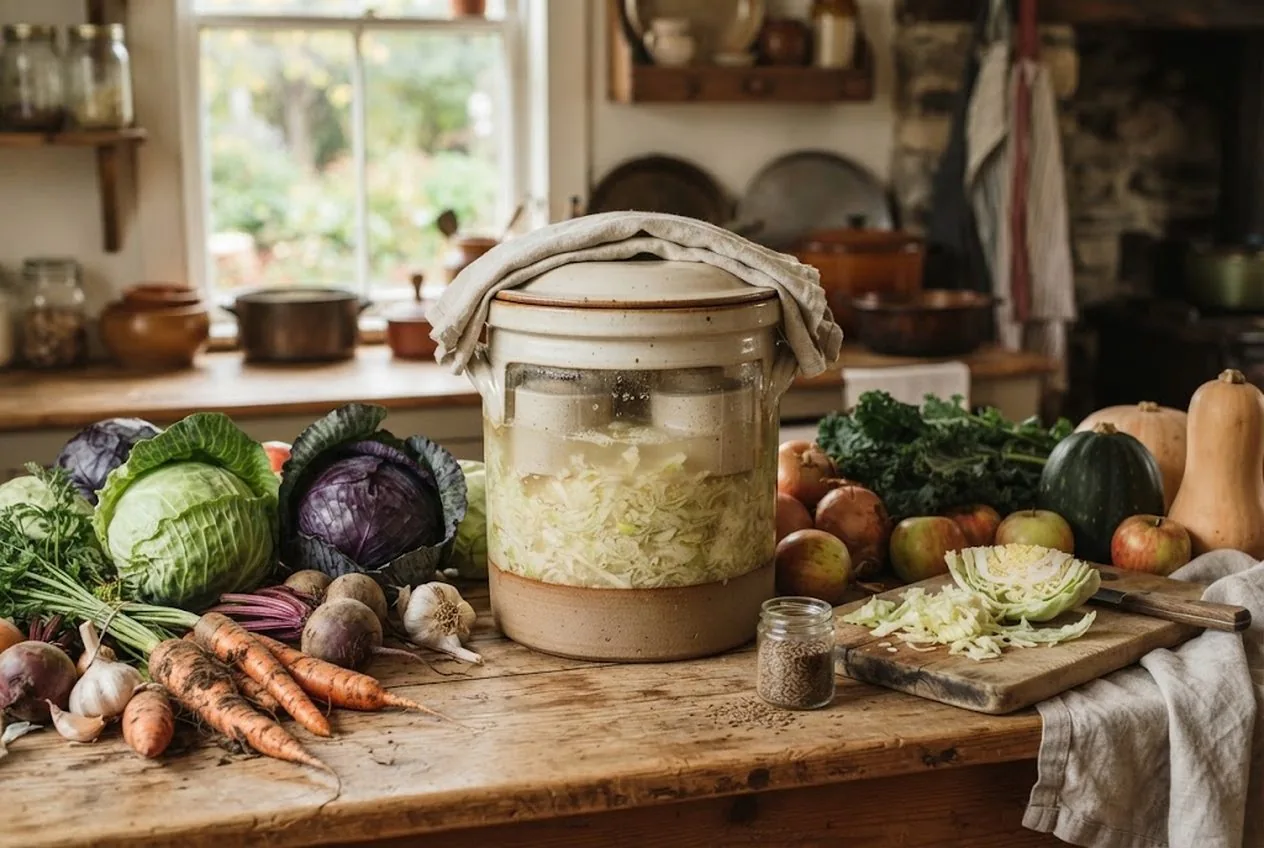
Fermenting is the oldest food-preservation trick there is, and still one of the most forgiving. No pressure gauge, no acid math, no electricity — just vegetables, salt, and time. A crock of sauerkraut bubbling quietly on the counter turns a glut of fall cabbage into a jar of tangy, probiotic-rich food that keeps for months, and it costs almost nothing to make.
The catch is that “almost nothing can go wrong” is not quite “nothing.” Get the salt, the submersion, and the temperature right and fermenting is genuinely foolproof. Get lazy about any of the three and you get mush, film, or the occasional batch you have to throw out. This guide walks the whole process in a crock, from a raw head of cabbage to a finished ferment ready for cold storage.
Short answer: salt your vegetables at about 2% by weight, pack them into a water-seal crock, weigh them down so everything stays submerged under the brine, and ferment at about 70–75°F for three to four weeks (longer if your room is cooler). Taste as you go, then move the finished ferment to cold storage.
Why a Crock Makes Fermenting Easy
You can ferment in a mason jar, a food-grade bucket, or a bowl with a plate on top. A purpose-built fermentation crock simply removes the two things beginners struggle with most.
The first is air. Lactic-acid bacteria — the good guys that sour and preserve your vegetables — work without oxygen, while the molds that spoil a batch need air to grow (UC Davis). A crock’s water-seal moat lets the carbon dioxide the ferment produces bubble out, while blocking outside air from getting in. That one feature does automatically what a jar-and-airlock setup only approximates.
The second is submersion. Anything floating above the brine is exposed to air and will grow film or mold. A crock ships with heavy stoneware weights that hold the vegetables down for the entire ferment, so you’re not fishing out floaters or pressing a bag of water on top every day. Between the moat and the weights, a crock turns fermenting into a set-it-and-check-it job rather than a daily chore.
What You’ll Need
- A fermentation crock with a water-seal moat and a lid
- Fermentation weights sized to your crock, to keep everything submerged
- Fresh, firm vegetables — cabbage, carrots, radishes, cucumbers, cauliflower, whatever the fall garden gives you
- Canning or pickling salt (anti-caking additives in other salts can cloud the brine (National Center for Home Food Preservation))
- A kitchen scale — the one tool that turns guesswork into a repeatable recipe
- A knife or mandoline, and a large bowl for salting and massaging
Disclosure: the product links here are affiliate links, so we may earn a commission if you buy through them at no extra cost to you. The guidance below follows long-standing fermentation and university-extension food-safety practice, not brand marketing.
The Salt Brine: Get This Right First
Salt is the one ingredient you cannot eyeball. It does three jobs at once: it draws water out of the vegetables to create the brine, it helps keep them firm (a brine that is too weak is a classic cause of soft pickles (National Center for Home Food Preservation)), and it holds spoilage bacteria at bay long enough for the acid-making bacteria to take over. Too little and the batch goes soft and risky; too much and fermentation stalls.
The reliable target is 2% salt by weight, and there are two ways to hit it depending on what you’re making:
- Dry-salting (sauerkraut, shredded vegetables): weigh the shredded vegetables and add 2% of that weight in salt; the tested USDA recipe works out to 3 tablespoons of canning or pickling salt per 5 pounds of cabbage (National Center for Home Food Preservation). Massage until the cabbage wilts and releases its own liquid; that liquid is your brine.
- Brining (whole or chunked vegetables, cucumbers, cauliflower): dissolve salt in water at the strength your tested recipe calls for and pour it over the packed vegetables until they’re covered. For topping up a kraut, NCHFP uses 1½ tablespoons of salt per quart of water; fermented cucumbers need a stronger brine.
Weigh, don’t guess. A scale is what makes your second batch as good as your first.
Step-by-Step: Fermenting in a Crock
Step 1: Prep and Salt
Wash and cut your vegetables to a uniform size — shredded for kraut, spears or coins for pickled vegetables. Weigh them, then either dry-salt and massage until they’re glistening with their own brine, or prepare a 2% brine to pour over them. If you’re adding aromatics — caraway, garlic, dill, ginger, chili — mix them in now.
Step 2: Pack the Crock Tight
Press the salted vegetables firmly into the clean crock, pushing out air pockets layer by layer. Packing tight keeps air out and helps the brine rise to the surface. Leave several inches of headspace at the top (NCHFP calls for the rim to sit at least 4 or 5 inches above the cabbage (National Center for Home Food Preservation)); a healthy ferment bubbles and rises, and you don’t want it climbing over the rim.
Step 3: Submerge Everything Under the Brine
Set the crock weights on top so every scrap of vegetable sits below the liquid. If a dry-salted batch hasn’t produced enough of its own brine to cover the vegetables after an hour or two, top it up with a little extra brine (1½ tablespoons of salt per quart of water). This is the single most important step — what’s under the brine ferments, what’s above it spoils.
Step 4: Seal and Ferment at the Right Temperature
Fill the crock’s moat with water and settle the lid so gas can escape but air can’t get in. Put the crock somewhere out of direct sun at 70–75°F, the USDA recommendation for sauerkraut. Above 75°F kraut may turn soft; at 60–65°F fermentation can take five to six weeks, and below 60°F it may not ferment at all (National Center for Home Food Preservation). Set the crock on a tray, because active ferments can bubble a little brine over the top.
Step 5: Taste, Then Move to Cold Storage
After about a week, lift the lid and taste. Fermentation is done when it hits the tang you want — about three to four weeks at 70–75°F. Skim off any thin white film if it appears (see below), and keep the vegetables submerged the whole time. When the flavor is right, spoon the ferment into jars for the refrigerator, or keep the sealed crock somewhere cold. Cold storage slows the process to a crawl, and fully fermented kraut keeps for several months in the refrigerator (National Center for Home Food Preservation).
Troubleshooting: Film, Smell, and Softness
A few things worry every first-timer, and almost all of them are normal.
| What you see | What it means | What to do |
|---|---|---|
| Vigorous bubbling, sour smell | Healthy fermentation | Nothing — it’s working |
| Thin, flat white film | Kahm yeast (harmless) (UC Davis) | Skim it off; keep vegetables submerged |
| Fuzzy green, blue, brown, or black growth | True mold (air exposure) | Discard the batch to be safe |
| Cloudy brine | Normal byproduct of fermentation | Nothing |
| Soft, mushy texture | Too little salt, too warm, or old produce | Fix next batch: weigh salt, ferment cooler |
The through-line is obvious once you see it: keep everything under the brine, keep it cool, and weigh your salt. Do those three and problems become rare.
Where Fermenting Fits in a Self-Reliant Kitchen
Fermenting is the no-power preservation method — it needs nothing but salt, a crock, and a cool corner, which is exactly why it anchors our guide to food preservation without electricity. It pairs naturally with the other fall-harvest skills: what you don’t ferment you can dry, can, or tuck into cold storage — our beginner’s guide to water-bath canning the summer harvest covers the canning side of that split.
If you’re still deciding what to ferment in, our fermentation crock vs. mason jar comparison lays out when the crock is worth it and when a jar is all you need. Either way, a single afternoon of shredding and salting turns a wheelbarrow of fall cabbage into months of living, probiotic food.
Start with a simple batch of sauerkraut — one head of cabbage, the right salt, and patience. Once you’ve watched a crock do its quiet work, you’ll be fermenting everything the garden throws at you.
Frequently Asked Questions
- How much salt do you use to ferment vegetables?
- Aim for roughly 2% salt by weight — the reliable sweet spot for lactic-acid fermentation. For a dry-salted ferment like sauerkraut, the tested USDA recipe uses 3 tablespoons of canning or pickling salt per 5 pounds of shredded cabbage. If you need brine to top up a kraut, that recipe uses 1½ tablespoons of salt per quart of water; fermented cucumbers call for a stronger brine, so follow a tested recipe for those. Use canning or pickling salt, since anti-caking additives in other salts can cloud the brine.
- How long does it take to ferment vegetables in a crock?
- Most vegetables take a few weeks, depending on temperature and how sour you like them. The USDA recommends 70–75°F for sauerkraut, where it is fully fermented in about three to four weeks; at 60–65°F it may take five to six weeks, below 60°F it may not ferment, and above 75°F it can turn soft. Start tasting after about a week — when it tastes pleasantly tangy and the bubbling has slowed, it's done. Then move it to cold storage, where it keeps developing flavor far more slowly.
- Is the white film on top of my ferment mold?
- Usually not. A thin, flat, white film is almost always kahm yeast — harmless, if unappetizing — and you simply skim it off. True mold is different: it's fuzzy and typically green, blue, brown, or black. Fuzzy, colored growth means the batch was exposed to air, and it's safest to discard it. A weight that keeps everything under the brine prevents both problems, because the bacteria you want thrive without oxygen while spoilage organisms need air.
- Do I need a fermentation crock, or will a mason jar work?
- A mason jar works fine for small, occasional batches, and it's the cheapest way to start. A water-seal crock earns its place when you ferment in volume: its moat lets carbon dioxide escape while blocking air, and its heavy weights keep vegetables submerged with no daily babysitting. We compare the two in detail in our fermentation crock vs. mason jar guide — if you're deciding what to buy, start there.
- Why did my fermented vegetables turn out soft or mushy?
- Softness usually comes down to three things: too little salt, too warm a fermentation, or vegetables that were past their prime. A brine that is too weak or a ferment kept too warm is a classic cause of soft pickles. Keep the temperature in the recommended range, weigh your salt rather than guessing, and use the freshest, firmest produce you can.
Sources & references
- National Center for Home Food Preservation, Sauerkraut (opens in new tab)
- National Center for Home Food Preservation, General Information on Fermenting (opens in new tab)
- National Center for Home Food Preservation, Problems with Fermented Pickles (opens in new tab)
- UC Davis, Common issues with fermented fruits and vegetables (opens in new tab)
Before you go
The Renter's Homestead Pack
Self-reliance projects for the yard you don't own — container yields, a raised bed built to move with you, balcony preservation basics, and the landlord questions to ask first.
Free guide
The Renter's Homestead Pack
Self-reliance projects for the yard you don't own — container yields, a raised bed built to move with you, balcony preservation basics, and the landlord questions to ask first.