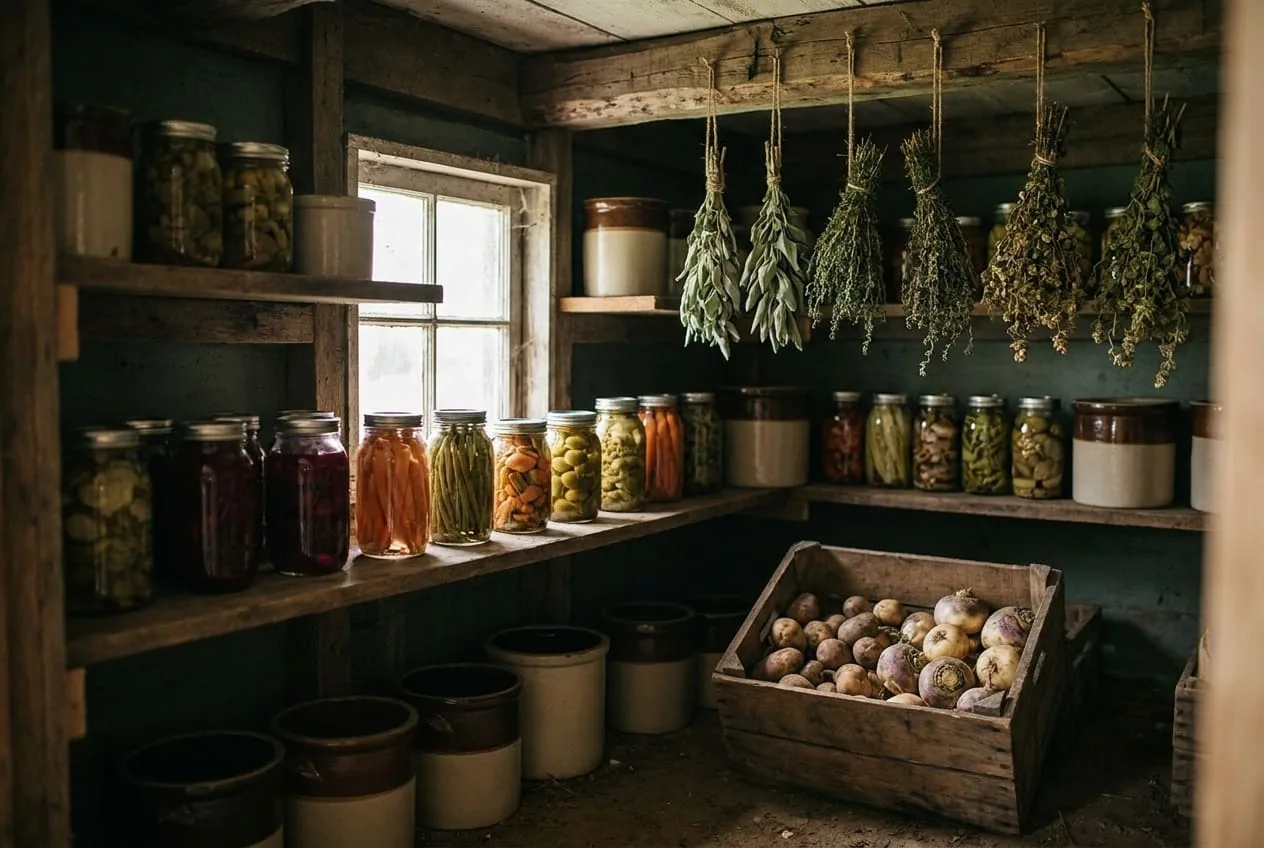
A chest freezer full of food is only an asset while the power stays on. A multi-day outage, an off-grid property, or simply the rising cost of running two freezers year-round all point to the same conclusion: it’s worth knowing how people kept food safe for the thousands of years before refrigeration existed.
The good news is that food preservation without electricity isn’t lost knowledge. Most methods below are documented by the USDA, the National Center for Home Food Preservation (NCHFP), or university extension services, and most of them cost almost nothing to start. Here are six that still earn their keep — with honest shelf-life numbers, not the fantasy figures you’ll find on survival-food sales pages.
1. Water-Bath Canning
Water-bath canning preserves high-acid foods — jams, jellies, pickles, fruit, and tomatoes with added acid — by submerging filled jars in boiling water. The heat destroys spoilage organisms and drives air out of the jar, and as it cools, the lid pulls down into a vacuum seal. No electricity is required for storage, and the processing itself works fine over a propane burner or wood stove.
The realistic shelf life, per NCHFP guidance: can no more food than you will use within a year for best quality, and store jars between 50 and 70°F (NCHFP). Color, texture, and nutrition decline over time — and safety always depends on correct processing times, tested recipes, and an intact seal.
The classic beginner mistake is using a water bath for low-acid foods like green beans, corn, or meat. Those require a pressure canner (Amazon); boiling water alone can’t reach the 240°F to 250°F that NCHFP says low-acid foods need (NCHFP). Stick to tested high-acid recipes and adjust processing times for your altitude.
A complete water-bath canning starter kit (Amazon) includes the rack, jar lifter, lid wand, and funnel you’ll burn through half a jar trying to improvise — worth having before your first batch, not after.
2. Fermentation
Fermentation is the cheapest gateway into preservation. Submerge shredded vegetables in a salt brine, keep air out, and naturally present lactic acid bacteria do the rest — converting sugars into acid that hostile microbes can’t tolerate. Sauerkraut and kimchi are the famous examples, but cucumbers, carrots, radishes, and hot peppers all ferment well.
The startup cost is a jar, salt, and a cabbage. Per NCHFP, fully fermented sauerkraut keeps for several months tightly covered in the refrigerator, or it can be canned (NCHFP), and unlike canning, the food stays raw and alive.
The common beginner mistake is letting vegetables float above the brine. Anything exposed to air molds. A purpose-built fermentation crock with weights (Amazon) keeps everything submerged automatically and seals with a water moat that lets CO₂ escape without letting air in — a meaningful upgrade over trying to improvise this with rubber bands and zip-lock bags.
3. Salt-Curing and Drying Meat
Long before refrigeration, meat was preserved by pulling the moisture out of it. Salt draws water from the tissue, and air-drying finishes the job — which is how you get biltong (a vinegar-and-salt cure, air-dried in thick strips) and jerky (thin slices dried with heat or airflow). Both are historical methods that work without any refrigeration at all.
Realistic expectations matter here. Extension guidance says homemade jerky is best used within one to two months, with refrigeration or freezing for longer storage, so this is a weeks-to-months method, not a years method. The USDA Meat and Poultry Hotline also recommends heating meat to 160°F (165°F for poultry) to destroy bacteria, since a dehydrator may not reach those temperatures (K-State Research and Extension).
The common beginner mistake is cutting too thick and under-salting, which leaves a moist core where bacteria thrive. Lean cuts, generous salt, good airflow, and low humidity are the non-negotiables.
4. Root Cellaring (Earth Refrigeration)
A few feet underground, the earth holds a remarkably stable temperature — cool in summer, above freezing in winter. Root cellaring uses that free, permanent “refrigeration” to store whole produce: potatoes, carrots, beets, cabbage, apples, and winter squash. You don’t need a stone cellar out of a storybook, either. A buried barrel, an insulated trench, or a cool corner of an unheated basement all work on the same principle.
Stored well, potatoes and root vegetables commonly last for months — enough to carry a fall harvest through winter. This method pairs naturally with growing your own food, and it’s one of the areas The Self-Sufficient Backyard book covers in real depth; our The Self-Sufficient Backyard review goes through its earth-refrigeration designs and whether they’re practical for a normal yard.
The common beginner mistake: storing apples next to potatoes. Apples release ethylene gas, which can make potatoes sprout. Separate them, keep humidity high for roots, and make sure air can circulate.
5. Dry Staples and Hardtack
The least glamorous method is the most reliable: keep food that’s already dry, dry. Grains, white rice, dried beans, salt, sugar, and honey have genuinely long shelf lives when protected from moisture, pests, light, and heat. Brigham Young University research found wheat and white rice still very acceptable after 30-plus years in sealed, low-oxygen cans, and beans up to 30 years (BYU Magazine), though old beans harden and take noticeably longer to cook (USU Extension).
Hardtack belongs in this family: a rock-hard biscuit of flour, water, and salt that fed sailors and soldiers for months or years at a time, precisely because there’s almost no moisture in it for anything to spoil.
The common beginner mistake is storing staples in their original paper or thin plastic bags in a humid garage. Moisture and pantry moths will find them. The standard approach is airtight containers — food-grade buckets (Amazon), Mylar bags (Amazon), or wide-mouth mason jars (Amazon) — kept somewhere cool and dark.
6. Sun and Air Drying
You don’t need an electric dehydrator to dry food. Herbs air-dry in bundles indoors. Fruit leather, sliced fruit, and vegetables can sun-dry outdoors when conditions cooperate — NCHFP guidance calls for a minimum of 85°F, humidity ideally below 60 percent, and good airflow, with food protected by screening and brought in at night. In humid climates, a simple solar dryer (a vented box that concentrates heat) does the same job.
Per NCHFP, most dried fruits keep about a year at 60°F and six months at 80°F — cooler is longer. Dried vegetables have about half the shelf life of fruits (NCHFP).
For consistent results year-round regardless of weather, a food dehydrator (Amazon) is the most versatile single preservation appliance you can own — it handles herbs, jerky, fruit leather, and vegetables at adjustable temperature with no guesswork on humidity or sun.
The common beginner mistake is under-drying and skipping the conditioning step. The standard practice is to pack cooled dried fruit loosely in a jar for 7 to 10 days, shaking daily; if condensation appears, it goes back for more drying. Skip that check and one moist piece can mold the whole jar.
What The Sales Pages Get Wrong
If you’ve spent any time researching this topic, you’ve seen the claims: eggs preserved for 10 years, canned food that stores for 20, recipes that “probably never spoil.” The Lost SuperFoods sales funnel is a well-known example of this style of marketing.
Here’s the correction, against USDA and NCHFP guidance:
- Home-canned food is best used within about a year, not twenty. Holding jars longer is a quality gamble — and never an excuse to skip proper processing.
- Water-glassed eggs do not last a decade, and Utah State University Extension says water glassing is not considered safe or recommended for long-term egg storage (USU Extension).
- Almost nothing “never spoils.” Salt, sugar, and honey come close. Nearly everything else has a real clock on it.
It’s also worth saying plainly: most of this knowledge is free. The NCHFP website, your county extension office, and old cookbooks cover these methods in detail at zero cost. What curated books sell is convenience — everything organized in one place — not secret knowledge. If you’re weighing whether that convenience is worth paying for, our The Lost SuperFoods review goes through which of its 126+ methods are actually useful and which are padding.
Start With One Jar
You don’t need to master all six methods before the next power outage. The practical path is to start with the cheapest one — a jar of sauerkraut this weekend — and layer on the others as your garden, budget, and storage space allow. Most methods here have centuries of use behind them and modern USDA- or extension-backed guidance to keep them safe. That combination beats any sales-page miracle.
If you want 126+ pre-electricity preservation methods collected in one place — including several not covered here — The Lost Superfoods collects them in a single volume.
Frequently Asked Questions
- How long does home-canned food really last?
- Per NCHFP guidance, can no more food than you will use within a year for best quality, and store jars between 50 and 70°F. Quality declines over time, faster in warm storage. Any jar that's bulging, leaking, spurting on opening, or off-smelling should be discarded without tasting.
- Can you preserve eggs without refrigeration?
- Not in a way food-safety experts endorse. Water glassing — submerging fresh, unwashed eggs in a pickling-lime solution — is a traditional method, but Utah State University Extension says it is not considered safe or recommended for long-term egg storage, partly because Salmonella can contaminate an egg before it is laid. It also requires unwashed eggs with the bloom intact, so it's a backyard-flock method, not a grocery-store one.
- What food lasts longest without electricity?
- Dry staples win by a wide margin. Salt, sugar, and honey keep more or less indefinitely. White rice, dried beans, and wheat stored in sealed, oxygen-free containers can last for decades according to Brigham Young University food-storage research. Everything else — canned, fermented, dried, or cured — is measured in months to a couple of years.
- Do I need special equipment to start?
- No. Fermentation needs a jar, salt, and a vegetable. Air-drying herbs needs string. Water-bath canning needs jars, lids, and any deep pot with a rack. The only real equipment threshold is pressure canning for low-acid foods, which requires a proper pressure canner — no substitutes.
- Is water-bath canning safe for meat and vegetables?
- No. Meat and low-acid vegetables like green beans and corn must be pressure canned. A boiling-water bath can't reach the temperatures needed to destroy botulism spores in low-acid foods. This is the single most important safety rule in home canning.
Sources & references
- NCHFP, Storing home canned foods (opens in new tab)
- NCHFP, Ensuring safe canned foods (opens in new tab)
- NCHFP, Sauerkraut (opens in new tab)
- K-State Research and Extension, Dry meat safely at home (MF3173) (opens in new tab)
- Utah State University Extension, Storing eggs safely (opens in new tab)
- BYU Magazine, Ask an expert: new tips for old food (opens in new tab)
- Utah State University Extension, Storing dry beans (opens in new tab)
- NCHFP, Packaging and storing dried foods (opens in new tab)
Before you go
The Renter's Homestead Pack
Self-reliance projects for the yard you don't own — container yields, a raised bed built to move with you, balcony preservation basics, and the landlord questions to ask first.
Free guide
The Renter's Homestead Pack
Self-reliance projects for the yard you don't own — container yields, a raised bed built to move with you, balcony preservation basics, and the landlord questions to ask first.