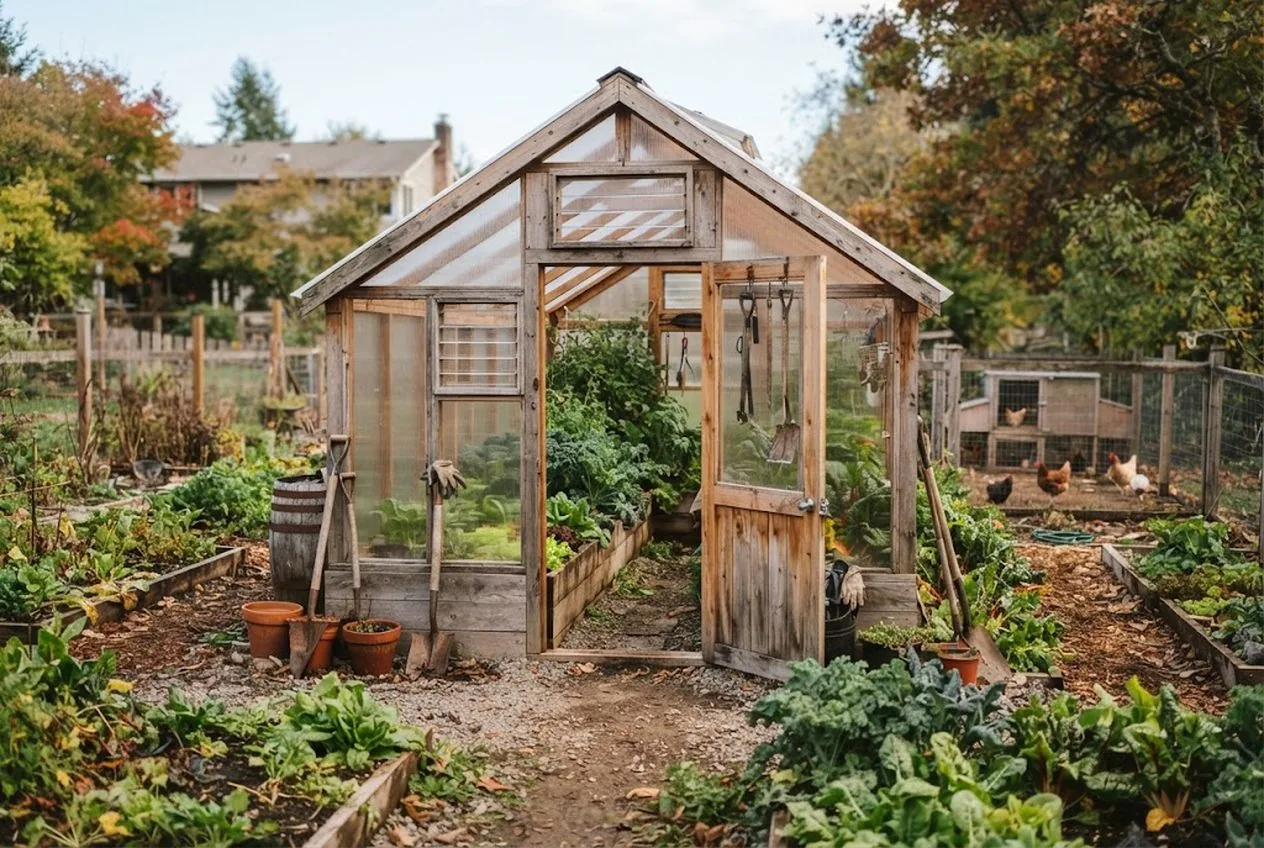
A greenhouse is the piece of infrastructure that turns a seasonal garden into a nearly year-round one. It’s where fall greens keep growing after the open beds have frozen, where next spring’s transplants get a head start, and where a bad-weather day still means fresh food. And despite the price of the pre-built glass units in the catalogs, a solid backyard greenhouse is a weekend build with ordinary tools.
The short version: frame a small structure — 8x10 to 10x10 feet is plenty — on a level, well-anchored base, glaze it with twin-wall polycarbonate for insulation that single-pane glass can’t match, and build in proper venting so it never overheats. Get those three things right and you’ve got a durable growing space that pays for itself in extended harvests season after season. Here’s how to do it, step by step.
The growing part is easy — the parts that make or break the build are a dead-level base, thorough anchoring, and enough ventilation. We’ll cover all three.
Why Twin-Wall Polycarbonate Is the Right Glazing
The glazing you choose decides how well the greenhouse actually works, and for a backyard build twin-wall polycarbonate beats the alternatives on nearly every count. Glass insulates poorly, shatters, and is heavy and awkward to work with. Plastic film is cheap but degrades in UV and tears in wind, so you’re re-covering every few years (University of Arkansas). Twin-wall polycarbonate splits the difference and then some.
The “twin wall” is the key: two clear sheets bonded together with hollow channels between them, and that trapped air layer is what gives the material its insulation. On a cold night your greenhouse holds warmth far better than it would behind single-pane glass, and on a sunny day the panels still transmit the light your crops need (UT Extension). It cuts to any size with a utility knife, won’t break if a branch drops on it, and lasts a decade or more outdoors (University of Arkansas).
Disclosure: the product links here are affiliate links, so we may earn a commission if you buy through them at no extra cost to you. The methods here follow long-standing greenhouse-building and extension-service guidance, not brand marketing.
Step 1: Choose a Site and Size the Greenhouse
Site the greenhouse where it gets the most sun and the most shelter. As the days shorten, low winter light is your limiting factor, so orient the long side to face south (WSU Extension) and keep it clear of buildings and evergreens that throw afternoon shade. A spot that’s also protected from the prevailing wind will hold heat better and take less of a beating in storms.
For size, 8x10 to 10x10 feet is the backyard sweet spot: big enough to walk into, start transplants, and overwinter a bed of greens, and close to the roughly 100 square feet extension specialists treat as the minimum for utility and cost efficiency (UT Extension). Build the ridge at least 7 feet high so you can stand comfortably and hot air has somewhere to rise. Mark the footprint with stakes and string, then measure the diagonals — equal diagonals mean the base is square, and a square base is what lets every panel and the door seal properly later.
Step 2: Build a Level, Anchored Base
Everything above depends on the base being dead level and firmly anchored. A perimeter of pressure-treated timber staked into the ground works well, as does a compacted gravel pad framed with timber — the gravel also drains meltwater away from your growing beds.
Level it carefully in every direction with a long spirit level, shimming or digging until it’s true, because polycarbonate panels and a hinged door only seal on a square, level frame. Then stake or screw the base into the ground at every corner and along each side. This is the step people skimp on and regret: a lightweight greenhouse is essentially a sail, and a fall or winter storm will find any weak anchor point. Over-build this part.
Step 3: Frame the Walls and Roof
With the base set, frame the structure from pressure-treated lumber or an aluminum greenhouse-kit frame. The one rule that governs the framing is to space the uprights to match your panel width, so every sheet of polycarbonate lands on a support along both edges. Add a ridge beam down the top and enough horizontal cross members that each panel has solid backing all the way around.
Brace the corners with temporary or permanent diagonals so the frame can’t rack out of square while you’re glazing it. Take a minute here to plan where your door and vents will go — it’s far easier to frame the openings now than to cut them in later.
Step 4: Glaze with Twin-Wall Polycarbonate
Cut the panels to size with a utility knife or a fine-tooth saw, and pay attention to orientation: run the internal channels vertically so any condensation that forms inside them drains down and out the bottom rather than pooling. Seal the top edge of each panel with solid aluminum tape and the bottom edge with vented tape — this keeps insects and dirt out of the channels while still letting moisture escape.
Fasten the panels to the frame with screws and rubber-gasketed washers, driven snug but not so tight that they crush the sheet. Polycarbonate expands and contracts with temperature (University of Arkansas), so leaving the fasteners slightly relaxed prevents stress cracks over the seasons. Work methodically around the structure until it’s fully enclosed.
Step 5: Add a Door and Proper Venting
Hang a framed, polycarbonate-glazed door on one gable end. Beyond access, the door doubles as a low-level air intake, which you’ll need for ventilation.
Venting is the step that separates a greenhouse that grows food from one that cooks it. Even in fall, a sealed greenhouse can climb past 90°F on a sunny afternoon and kill the very crops you built it for. Cut at least one roof or upper-wall vent and fit an automatic solar vent opener — a simple device with a wax-filled cylinder that expands as it warms and pushes the vent open with no electricity at all, then closes it as things cool. The open door low and the vent high create a cross-draft that continuously pulls hot air out the top. It’s the closest thing to a set-and-forget climate control a backyard greenhouse has.
Step 6: Monitor with a Min/Max Thermometer
You can’t manage what you can’t measure, and a greenhouse’s temperature swings are wider than they look. Hang a min/max thermometer at plant height, out of direct sun, so it records the true high and low the greenhouse hits each day.
Those two numbers tell you everything: whether your venting is keeping up on sunny days, and how cold it’s actually getting at night so you know when to add extra frost protection. Watch it for a few sunny-and-cold days and you’ll quickly learn your greenhouse’s personality.
Put It All Together
A backyard greenhouse comes down to three things done well: a level, anchored base, twin-wall polycarbonate glazing for real insulation, and venting that keeps it from overheating. Nail those and the rest is straightforward carpentry. Build it in fall and you can move cold-hardy greens inside before the first hard freeze, then start next spring’s transplants weeks early.
Fill it for the season with the cold-hardy crops you sow in late summer — spinach, kale, and lettuce all thrive under cover as the weather cools, and a sturdy container inside makes them easier to manage; our review of the best raised garden bed for fall planting covers the bed we’d put under this roof. And on the very coldest nights, stack a layer of protection inside the greenhouse the same way you would in the open garden; our guide to row covers vs. cold frames explains how the different season-extenders work together.
Frequently Asked Questions
- Why use twin-wall polycarbonate instead of glass or plastic film?
- Twin-wall polycarbonate is the best all-round glazing for a backyard greenhouse because it insulates far better than single-pane glass or plastic film, won't shatter, and cuts to any size with a utility knife. The two walls trap a layer of air between them, so the greenhouse holds overnight warmth better than glass while still transmitting the light your crops need. It's also light enough that one person can handle a full sheet, and it lasts a decade or more outdoors versus a few years for film. For a structure you want to grow in through fall and winter, the insulation alone justifies the choice.
- What size greenhouse should I build for a backyard?
- For most families an 8x10 to 10x10 foot footprint is the sweet spot — big enough to walk into, start transplants, and overwinter greens, but small enough to fit in a typical yard. Build the ridge at least 7 feet high so you can stand comfortably and get airflow above the plants. If you're unsure, err slightly larger: greenhouses fill up fast, and it's far easier to build one bay bigger now than to add on later.
- Does a backyard greenhouse need a foundation?
- It needs a level, anchored base, but not a poured concrete foundation for most builds. A frame of pressure-treated timber staked into the ground, or a bed of compacted gravel inside a timber perimeter, gives you a level surface and keeps the structure from shifting or lifting in wind. The critical points are that the base is dead level — polycarbonate panels and doors only seal properly on a square, level frame — and that the whole greenhouse is anchored against wind, which is the single biggest threat to a lightweight structure.
- How do I keep a polycarbonate greenhouse from overheating?
- Venting is non-negotiable. Even in fall a sealed greenhouse can climb past 90°F on a sunny afternoon and cook your crops, so build in at least a roof vent and a low intake vent or door to create a cross-draft that pulls hot air out the top. An automatic solar vent opener handles this without electricity by expanding a wax cylinder as it warms, opening the vent for you when you're not there. Pair it with a min/max thermometer so you can see exactly how hot and cold the greenhouse actually gets.
- Can I build a greenhouse in fall, or is it a spring project?
- Fall is one of the best times to build. You put the structure up while the weather is still workable, then move cold-hardy greens and transplants inside before the first hard frost, extending your harvest by weeks. Building in fall also means the greenhouse is ready to start seedlings the moment late winter arrives, giving you a jump on spring. The one caution is wind — anchor the base thoroughly, because fall and winter storms will test a new structure hardest.
Sources & references
Before you go
The Renter's Homestead Pack
Self-reliance projects for the yard you don't own — container yields, a raised bed built to move with you, balcony preservation basics, and the landlord questions to ask first.
Free guide
The Renter's Homestead Pack
Self-reliance projects for the yard you don't own — container yields, a raised bed built to move with you, balcony preservation basics, and the landlord questions to ask first.