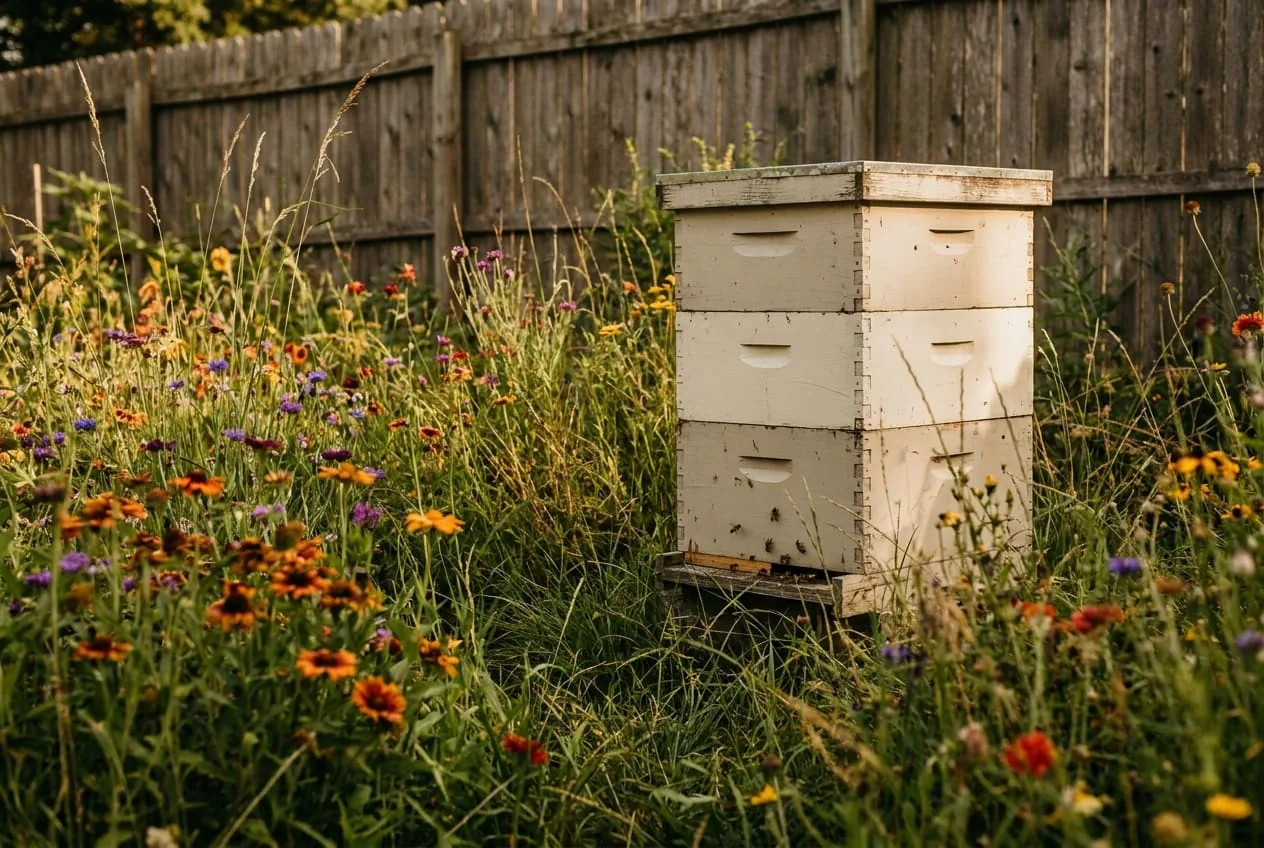
Many beginner beekeeping setups fail in the first year, and the failures are often traceable to the same handful of preventable mistakes: buying the wrong equipment, sourcing poor-quality bees, missing the signs of a struggling queen, or failing to prepare for winter. None of these are complicated to avoid with good information upfront.
This guide is written for someone who wants to start one or two hives in a backyard, produce honey, and build skills over time — not someone trying to run a commercial operation. The honest version of what to expect, what to budget, and where the real risks are.
Short answer: Start with a single Langstroth hive and a locally sourced nucleus colony, budget several hundred dollars for your first year, and expect to build skills rather than harvest honey in year one. Regular inspections and treating for Varroa mites before winter are what separate the hives that survive from the ones that fail.
Why Backyard Beekeeping Is Worth It
Beyond honey, a backyard hive pollinates your garden at a scale that nothing else achieves. A colony may have anywhere from 2,000 to 60,000 workers (UGA Extension), and foragers range well beyond your yard. Flowering plants in your yard — vegetables, fruit trees, berries — get more pollinator visits with a hive nearby.
A productive hive can produce surplus honey each year, with the amount depending on your local forage, climate, and how well you manage the colony.
The connection to a broader garden and food system is direct: bees produce honey and beeswax as immediate outputs, and they amplify the productivity of everything else you’re growing by acting as pollinators.
What Equipment Do You Actually Need?
Beekeeping equipment catalogs are full of gadgets. Most of them aren’t necessary for a beginner. Here’s what you actually need to start one hive, and what you can skip.
The Hive
The Langstroth hive is the right choice for almost every beginner in North America. It’s modular (you add boxes called “supers” as the colony grows), the parts are standardized (you can buy from dozens of suppliers), and the beekeeping community is built around it — advice, local clubs, and replacement parts are all easier to find than for alternative designs like Warré or top-bar hives.
A complete Langstroth hive for one colony requires:
- Bottom board — the floor; either solid or screened (screened is better for ventilation and Varroa mite monitoring)
- Two deep brood boxes — where the queen lives and lays eggs; this is the “permanent” part of the hive the bees overwinter in
- Frames with foundation — 10 frames per box; foundation gives bees a guide for drawing comb
- Queen excluder — a metal grid that lets worker bees through but blocks the queen; placed between brood boxes and honey supers so honey stays separate from brood
- Honey super(s) — shallower boxes added above the brood chamber for honey storage; you add these as the colony expands
- Inner cover and outer cover — the “ceiling” of the hive
A complete beginner Langstroth hive kit (Amazon) with all the above components assembled is the simplest start; NC State Extension puts starter kits that include a hive, smoker, hive tool, and veil at about $300 (NC State Extension). Unassembled kits are cheaper if you’re comfortable with basic woodworking. Painted or pre-finished hive bodies last longer — exterior latex paint protects wood in all weather conditions.
Skip for year one: Escape boards, pollen traps, specialized hive feeders beyond a basic entrance feeder. Learn the basics before adding accessories.
Protective Gear
Do not skip protective gear. Even experienced beekeepers get stung through gaps in ill-fitting equipment, and stings near the eyes or face require immediate attention. For a beginner, the psychological comfort of good protection also lets you work calmly — bees respond to panicked movements.
| Item | What to Look For | Cost |
|---|---|---|
| Full beekeeping suit (Amazon) | Attached veil, elastic wrists/ankles, light-colored fabric | Check current price |
| Beekeeping gloves (Amazon) | Goatskin leather; secure at the wrist | Check current price |
| Ventilated jacket (Amazon) | If you find full suits too hot in summer, a ventilated jacket with attached veil is the upgrade worth making | Check current price |
For most backyards and most inspection conditions, a standard full suit with goatskin gloves is adequate.
Tools
Three tools cover every inspection and harvest task for a beginner:
- Hive tool (Amazon) — a metal pry bar for separating frames and boxes stuck together with propolis (bee glue). Buy two. They get lost in tall grass constantly.
- Bee smoker (Amazon) — blowing cool smoke at the hive entrance and under the cover calms bees and reduces stinging during inspections. Pine straw, grass, and burlap make good fuel (UGA Extension).
- Frame grip (Amazon) — holds frames securely for inspection without crushing bees between your fingers.
Total equipment budget for one hive: a few hundred dollars, depending on whether you buy kits or individual components, new or used.
Where Do You Get Bees?
Equipment is the easy part. Getting bees is where more beginners stumble.
Package Bees
A “package” is typically 3 pounds of bees plus a mated queen in a separate cage, shipped through the mail in a screened wooden box, and costs about $100–$125 (NC State Extension). Packages are widely available and easy to find online. Order early for spring delivery — suppliers can sell out.
The limitation: A packaged queen is introduced to worker bees she’s never lived with. Acceptance rates are generally high, but there’s a failure window in the first weeks.
Nucleus Colonies (Nucs)
A nucleus colony — “nuc” — is a 5-frame mini-colony that usually holds about 10,000 adult bees, wax comb with honey and pollen, brood, and an egg-laying queen (NC State Extension). It’s a functional colony at a small scale. Nucs are available from local beekeeping associations and regional breeders, typically in spring.
Why nucs are better for beginners: The queen is already established and laying. Bees from a nuc start producing faster than a package because they don’t need to draw new comb from scratch — they already have brood frames. Acceptance issues are essentially eliminated.
The tradeoff: Nucs are harder to ship, so you generally need to source them locally. Your state’s beekeeping association usually maintains a list of nuc producers. NC State Extension puts a nuc at about $150–$200 (NC State Extension).
Local vs. Commercial
Locally raised bees adapted to your climate and local forage conditions overwinter better and perform more consistently than bees shipped from different climate regions. If you have access to local nucs or packages, prioritize them over commercial operations from distant states. Your local beekeeping association is the best resource for finding regional breeders.
Setting Up the Hive: Site, Orientation, and First Install
Location requirements:
- Sun: Morning sun is critical — it warms the hive and gets bees flying early in the day. Full morning sun with afternoon shade in hot climates is ideal.
- Wind protection: Cold winter winds accelerate moisture buildup inside the hive. A fence, hedge, or building wall on the north and west sides helps.
- Flight path clearance: Bees leaving the hive fly outward in a straight line from the entrance. Position the entrance toward a fence, hedge, or structure that forces bees to gain altitude before reaching head height — this eliminates most conflicts with neighbors, children, and pets.
- Water source: Bees need water year-round and will find it regardless of where you put it. If your nearest neighbor’s pool or pet dish is the only water within a few hundred feet, your bees will use it and create conflict. Establish a dedicated water source (a shallow dish with floating corks for bees to land on) close to the hive before installing bees.
Installing a package: On installation day, remove the queen cage from the package and set her aside. Pour the bees into the hive box, place the queen cage between two center frames with the candy plug exposed (bees eat through the candy to release her, giving them time to accept her), close the hive, and leave it undisturbed for several days. Return and check that the queen has been released; about a week after her release, eggs or young larvae in the cells confirm a laying queen, and no eggs means she may be dead and must be replaced (UGA Extension).
Installing a nuc: Transfer the 5 frames from the nuc box into the center of your hive box. Fill the empty frame spaces with new frames on each side. Queen is already established — no candy plug, no waiting period.
The First Year: What to Do Each Season
The single most important skill in beekeeping is consistent, purposeful hive inspection. Open the hive regularly during the active season (spring through fall), and you will catch most problems before they become fatal to the colony.
Spring (April–June)
The colony builds rapidly. Your primary job is managing space — bees that run out of room to expand will swarm (split off with the old queen to find a new home), which reduces your honey production and loses you a large share of your bees.
Add honey supers before the colony fills the brood boxes. When most frames in the top brood box are drawn and covered with bees, it’s time to add a super. Waiting until frames are full means you’ve already lost several weeks of honey production capacity.
Check for swarm cells. Queen cells built along the bottom edge of frames (“swarm cells”) signal that the colony is preparing to swarm. Catching this early gives you options: split the hive yourself (a “walkaway split” — see below), destroy the swarm cells and add space, or let the swarm happen and manage the resulting two colonies.
Summer (July–August)
Peak honey production. Continue monitoring space. Begin Varroa mite monitoring (see below — this is the single biggest threat to first-year colonies).
The nectar flow varies significantly by region — your local beekeeping association knows when the major nectar flows happen in your area. In most of the US, there’s a primary spring flow and a secondary fall flow, with a nectar dearth in midsummer. During dearths, colonies may become defensive and begin robbing each other — reduce hive entrances during known dearth periods.
Fall (September–October)
Pre-winter preparation. The colony contracts back to 2 brood boxes. Honey stores must be adequate — Illinois Extension recommends at least 90 pounds of honey for a hive to make it through a central Illinois winter, and needs vary by climate. If stores are low, supplement with 2:1 sugar syrup (2 parts sugar to 1 part water) fed in a hive-top feeder; bees can take syrup until temperatures fall below 50°F (Illinois Extension).
Treat for Varroa mites before winter — this is the most critical timing. Mites feed on the fat bodies bees rely on during long non-foraging periods such as winter, and they transmit lethal viruses (Penn State Extension). Winter losses from untreated Varroa are a major cause of first-year hive failures.
Winter (November–March)
Minimal intervention. The cluster of bees generates enough heat to survive, but opening the hive on cold days releases critical warmth. Check that the entrance isn’t blocked by dead bees or ice. Heft the hive from the back edge — if it feels light, the colony may be starving and needs emergency fondant or dry sugar above the frames.
Varroa Mites: The Most Important Thing to Understand
Varroa destructor is a major parasite of honeybee colonies. Without management, Varroa mites weaken bees and spread lethal viruses that can collapse colonies (Penn State Extension). This is a key reason “treatment-free” beekeeping fails many beginner keepers.
Monitor first. Varroa testing supplies (Amazon) — alcohol wash kits — measure mites per 100 bees. Test on a regular schedule, such as monthly, during the active season. Action thresholds vary, but they aim to keep mite levels at or below about 2 mites per 100 bees (Penn State Extension).
Treatment options:
- Oxalic acid (for example Api-Bioxal, applied as vapor or dribble) — EPA-registered in the US; it does not reach mites in capped brood, so it works best when little or no brood is present, and its label allows use with honey supers on the hive (US EPA)
- Formic acid (Mite Away Quick Strips) — penetrates brood cappings to kill reproducing mites; it can harm the colony above 85°F and loses efficacy below 50°F (Penn State Extension)
- Amitraz (Apivar strips) — effective but requires rotation to prevent resistance
Treatment protocols and timing vary by region — your state’s department of agriculture or local beekeeping association publishes region-specific guidance. Follow it.
Honey Harvest: When and How
Don’t harvest in year one unless your colony is exceptionally strong and has fully provisioned its brood boxes. A first-year colony’s priority is building population and storing winter provisions — the beekeeper’s priority should be building skills and ensuring colony survival, not honey.
In year two and beyond: harvest from fully capped frames in the honey supers. “Capped” means bees have sealed the cells with wax, a sign the honey has been dried down for storage. For reference, USDA grade standards require at least 81.4% soluble solids, or about 18.6% moisture or less, for Grade A and Grade B extracted honey (USDA AMS).
A basic extraction setup: an uncapping fork (Amazon) or electric uncapping knife, and a hand-crank extractor (Amazon) for spinning honey from uncapped frames. A small 2-frame hand-crank extractor handles small harvests from a few hives.
First-Year Budget Summary
| Category | Cost Range |
|---|---|
| Starter kit (hive, smoker, hive tool, veil) | About $300 (NC State Extension) |
| Package bees or nuc | $100–$125 package, $150–$200 nuc (NC State Extension) |
| Full suit + gloves | Varies by supplier |
| Frame grip and spare hive tool | Varies by supplier |
| Varroa monitoring and treatment supplies | Varies by product |
| Hive stand (optional but helpful) | Varies by supplier |
| Total first-year investment | Several hundred dollars or more |
Add a honey super and extraction setup in year two when you’re ready to harvest.
Connecting Bees to the Broader Garden System
A beehive integrates naturally into the kind of closed-loop food system that a productive backyard is working toward. The bees pollinate your cold frame crops, fruit trees, raised beds, and berry bushes. The wax cappings from honey harvest have dozens of uses (wood conditioning, lip balm, candles, waterproofing). The spent frames can go into the compost pile.
The most productive garden systems have a relationship between soil, plants, insects, and animals that amplifies each component. Worm castings from the vermicomposting bin feed the soil, the soil grows the plants, the plants feed the bees, the bees amplify the plants. The chickens eat the garden waste and produce eggs and manure. The root cellar stores the harvest.
None of these require each other — they can each be built independently and work well on their own. But together they add up to something qualitatively different: a backyard that produces food rather than one that just stores it.
Frequently Asked Questions
- How much does it cost to start backyard beekeeping?
- Budget several hundred dollars for your first year with one hive. NC State Extension puts starter kits (hive, smoker, hive tool, and veil) at about $300, a three-pound package of bees at $100–$125, and a nuc at $150–$200. Add a suit, gloves, and Varroa monitoring and treatment supplies. Buying unassembled kits or used gear brings the total down.
- How much honey does one backyard hive produce?
- Harvestable honey varies widely with local forage, climate, and how well the colony is managed. You generally should not harvest in year one, though, since a first-year colony needs its stores to survive winter.
- Are package bees or a nucleus colony better for beginners?
- A nucleus colony (nuc) is usually better for beginners because it is a functional 5-frame mini-colony with an established laying queen, brood, and workers. NC State Extension notes a nuc becomes a mature hive very rapidly and is less likely to fail, though it costs more ($150–$200 versus $100–$125 for a package). Nucs must usually be sourced locally. Packages are cheaper and easier to ship but carry a queen-acceptance failure window in the first weeks.
- Why do so many first-year beehives fail?
- Many beginner setups fail in the first year, often from a handful of preventable mistakes: wrong equipment, poor-quality bees, missing the signs of a struggling queen, or failing to prepare for winter. Untreated Varroa mites are a major killer, since they feed on bees and transmit lethal viruses. Regular inspections and monitoring-based Varroa treatment prevent many losses.
Sources & references
- NC State Extension, How to Become a Beekeeper in North Carolina (opens in new tab)
- UGA Extension, Honey Bees and Beekeeping (B1045) (opens in new tab)
- Penn State Extension, Methods to Control Varroa Mites (opens in new tab)
- US EPA, Api-Bioxal pesticide product label (2025) (opens in new tab)
- Illinois Extension, Prepare your bees for winter (opens in new tab)
- USDA AMS, United States Standards for Grades of Extracted Honey (opens in new tab)
Before you go
The Renter's Homestead Pack
Self-reliance projects for the yard you don't own — container yields, a raised bed built to move with you, balcony preservation basics, and the landlord questions to ask first.
Free guide
The Renter's Homestead Pack
Self-reliance projects for the yard you don't own — container yields, a raised bed built to move with you, balcony preservation basics, and the landlord questions to ask first.