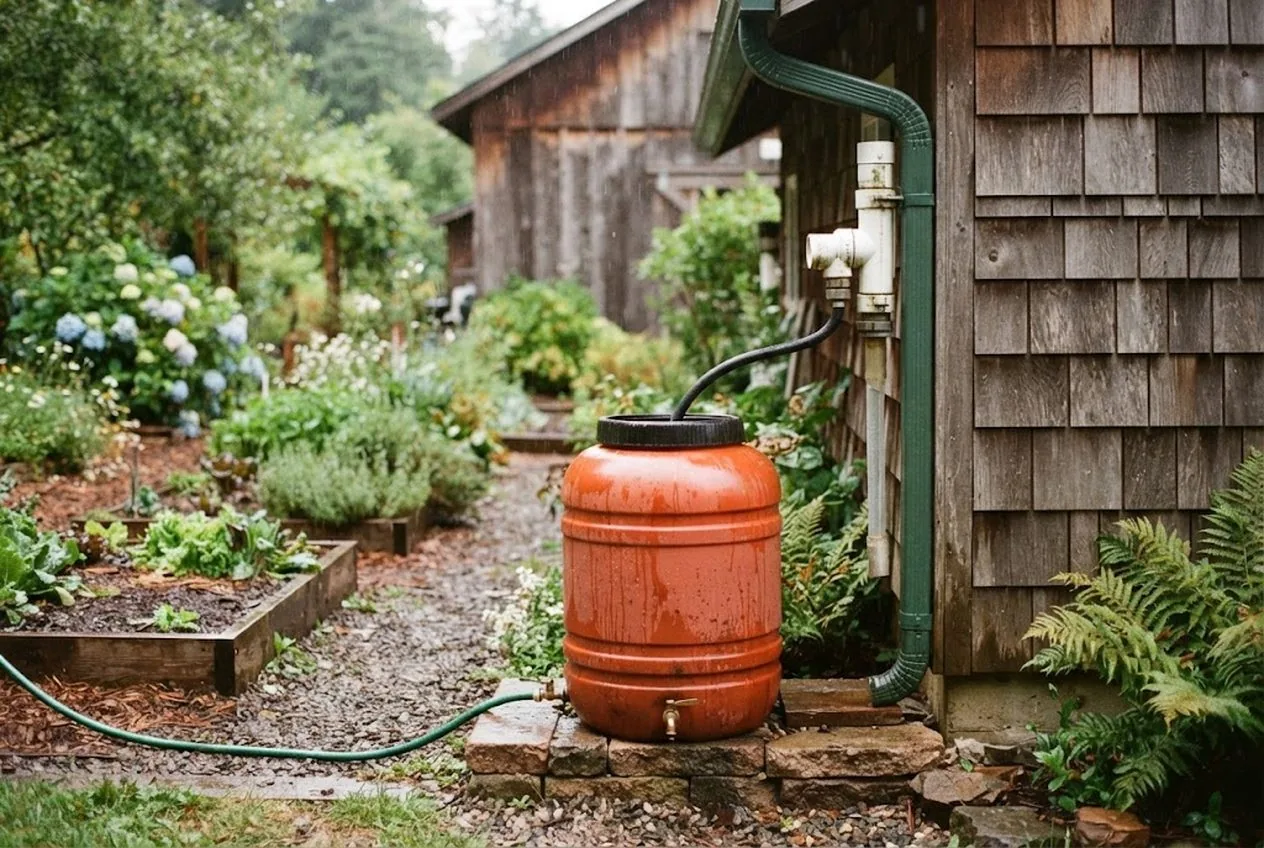
The first few minutes of a rainstorm carry the dirtiest water your roof will ever send you. As the rain starts, it sweeps a season’s worth of dust, pollen, bird droppings, grit, and rotting leaf bits off the shingles and straight down the downspout — and if your rain barrel has no defense, all of that lands in your storage. The fix is one of the cheapest, highest-return upgrades in backyard water collection: a first-flush diverter that catches and discards that opening surge so only cleaner water reaches the barrel.
The short version: a first-flush diverter is a holding chamber plumbed into your downspout that traps the first, dirtiest volume of a storm, lets it drain slowly away, and passes the cleaner water that follows into your barrel. Here’s exactly what it does, how to size it, and how to install one on an existing setup in an afternoon.
Why the First Flush Is Worth Throwing Away
Rainwater itself is clean; the problem is the roof it runs across. Between storms, your roof accumulates a surprising load of contaminants — airborne dust, tree litter, animal droppings, and the fine grit that shingles shed (EPA). When rain begins, the initial wash carries the highest concentration of all of it. Capture that first flush and send it away, and the water reaching your barrel is dramatically clearer.
The payoff is practical, not theoretical. A barrel fed the raw first flush builds a layer of sludge on the bottom, clogs its spigot and any drip lines downstream, and grows algae faster. Divert that flush and you get clearer water, far less sediment, fewer clogs, and a barrel that stays cleaner between the seasonal scrub-outs. It’s the difference between a barrel you fight and one that just works. (To be clear: roof-washed water is for irrigation and non-potable use — even diverted, it isn’t drinking water without proper treatment (Texas Water Development Board; CDC). If you ever plan to drink stored rainwater, a gravity system like the one in our Big Berkey countertop filter review is the kind of treatment stage that job requires.)
Step 1: Size the Diverter to Your Roof
How much water you should divert scales with how much roof you’re catching. A widely used starting point is about 10 gallons for every 1,000 square feet of roof area, and you’ll want to divert more if your roof is especially dirty or you’ve had a long dry spell that let debris pile up (Texas Water Development Board).
That target volume tells you how big the diverter’s holding chamber needs to be — usually a length of vertical pipe that fills with the first flush before clean water starts flowing past it to the barrel. Bigger roof, taller chamber. When you’re unsure, size up: the water you divert is precisely the water you least wanted in storage.
Step 2: Choose Your Diverter Style
There are two practical routes, and both use the same trap-the-first-flush principle:
- A self-contained diverter kit is the simplest retrofit. It’s a purpose-built body that installs directly into the downspout with a slow-release valve already fitted — ideal for a standard house downspout feeding one or two barrels.
- A chamber-style diverter built from a length of pipe and a fitting suits larger roofs that need to divert more water than a compact kit holds (Texas Water Development Board). It’s a little more assembly for a lot more first-flush capacity.
Disclosure: the product links here are affiliate links, so we may earn a commission if you buy through them at no extra cost to you. The sizing and install guidance here follows long-standing rainwater-harvesting practice, not any brand’s marketing.
If your setup routes rain from the downspout into the barrel through a diverter fitting, an integrated downspout diverter can pair with the first-flush chamber to feed the barrel neatly and shed overflow back down the spout.
Step 3: Install It on the Downspout
With parts in hand, the physical install is straightforward and takes most of an afternoon:
- Mark and cut the downspout at a comfortable working height above the barrel inlet, using a hacksaw. Deburr the cut edges so fittings seat tightly.
- Fit the diverter body into the cut, upstream of the barrel, sealing every connection so water can’t sneak past.
- Route the clean outlet into your barrel’s inlet with a short, sloped run so water flows freely instead of pooling.
- Set the slow-release drain — confirm the valve or small drilled drip hole at the base of the holding chamber is clear so the captured dirty water empties gradually between storms, and point it away from your foundation.
If you don’t yet have a barrel to plumb into, a food-safe barrel with a spigot and a screened inlet is the anchor of the whole system — the first-flush diverter feeds it, and the screen keeps mosquitoes and leaves out.
Step 4: Test It, Then Let It Run
The real proof is the next storm. Watch the system as rain begins: the holding chamber should fill first, and only once it’s full should clean water start flowing into the barrel. Afterward, confirm the slow-release drain empties the chamber so it’s armed for the next rain. If the first flush reaches the barrel too soon, your chamber is undersized — extend the pipe. If it never seems to pass clean water, the drain is emptying too fast or the chamber is too large — dial it back.
Maintenance is minimal: a few times a season, unscrew the cleanout cap, flush the sludge and leaves out of the chamber, and make sure the drip hole is clear. Two minutes of upkeep keeps the diverter diverting.
One Piece of a Bigger Water System
A first-flush diverter is the upgrade that turns a crude rain barrel into a genuinely clean catchment, but it’s one link in a larger chain. Once you’ve got clean water coming in, the next move is capacity — our guide to building a multi-barrel rainwater system on a budget shows how to link barrels so a big storm doesn’t overflow away the water you just cleaned up.
And harvested rainwater is only part of home water security. For the stored, treated water that carries you through an outage, see our guide to storing emergency water at home — together, a clean catchment and a rotated reserve mean you’re never caught dry.
Fall brings one more job: a barrel and diverter left full when the first hard freeze hits can crack plastic and split fittings. We’re covering how to drain, disconnect, and store the whole setup in an upcoming guide on how to winterize a rain barrel — worth a look before the cold moves in.
Frequently Asked Questions
- What does a first-flush diverter actually do?
- It throws away the dirtiest water of a rainstorm — the first flush that rinses your roof. When rain starts, it sweeps accumulated dust, pollen, bird droppings, grit, and debris off the roof and into the downspout. A first-flush diverter catches that opening surge in a separate chamber so it never reaches your barrel; only the cleaner water that follows is directed into storage. The result is clearer water, less sludge in the bottom of the barrel, and fewer clogged spigots.
- How much water should a first-flush diverter divert?
- A common rule of thumb is to divert roughly 10 gallons for every 1,000 square feet of roof area, though dirtier roofs and long dry spells call for more. In practice you size the diverter's holding chamber — usually a length of vertical pipe — to capture that first, dirtiest volume before the clean water starts flowing past. When in doubt, err toward diverting a little more; the water you lose is the water you least wanted.
- Do I really need a first-flush diverter if I'm only watering the garden?
- For pure irrigation you can get by without one, but it still pays off. Even garden-only barrels benefit because diverting the first flush means far less sediment and organic gunk settling into the barrel, which keeps spigots and drip lines from clogging and slows algae. If you ever want to use the water for anything beyond ornamental plants, a first-flush diverter is the cheap, sensible first upgrade — though roof-washed water is never drinking water without proper treatment.
- How do I empty and maintain a first-flush diverter?
- Most diverters use a slow-release valve or a small drilled hole at the bottom that lets the captured dirty water drain out gradually between storms, so the chamber is empty and ready for the next rain. Every so often, unscrew the cleanout cap and flush out the accumulated sludge and leaves, and check that the drip hole hasn't clogged. It's a two-minute chore a few times a season — skip it and the chamber fills and stops diverting.
- Can I add a first-flush diverter to an existing rain barrel setup?
- Yes — that's the usual case. A first-flush diverter installs on the downspout upstream of where the water enters the barrel, so you're plumbing it into the run you already have rather than replacing anything. You cut into the downspout, fit the diverter kit, and route the clean outlet to your barrel's inlet. Kits are designed to retrofit standard downspouts, so most existing barrel systems accept one with basic tools.
Sources & references
Before you go
The Renter's Homestead Pack
Self-reliance projects for the yard you don't own — container yields, a raised bed built to move with you, balcony preservation basics, and the landlord questions to ask first.
Free guide
The Renter's Homestead Pack
Self-reliance projects for the yard you don't own — container yields, a raised bed built to move with you, balcony preservation basics, and the landlord questions to ask first.