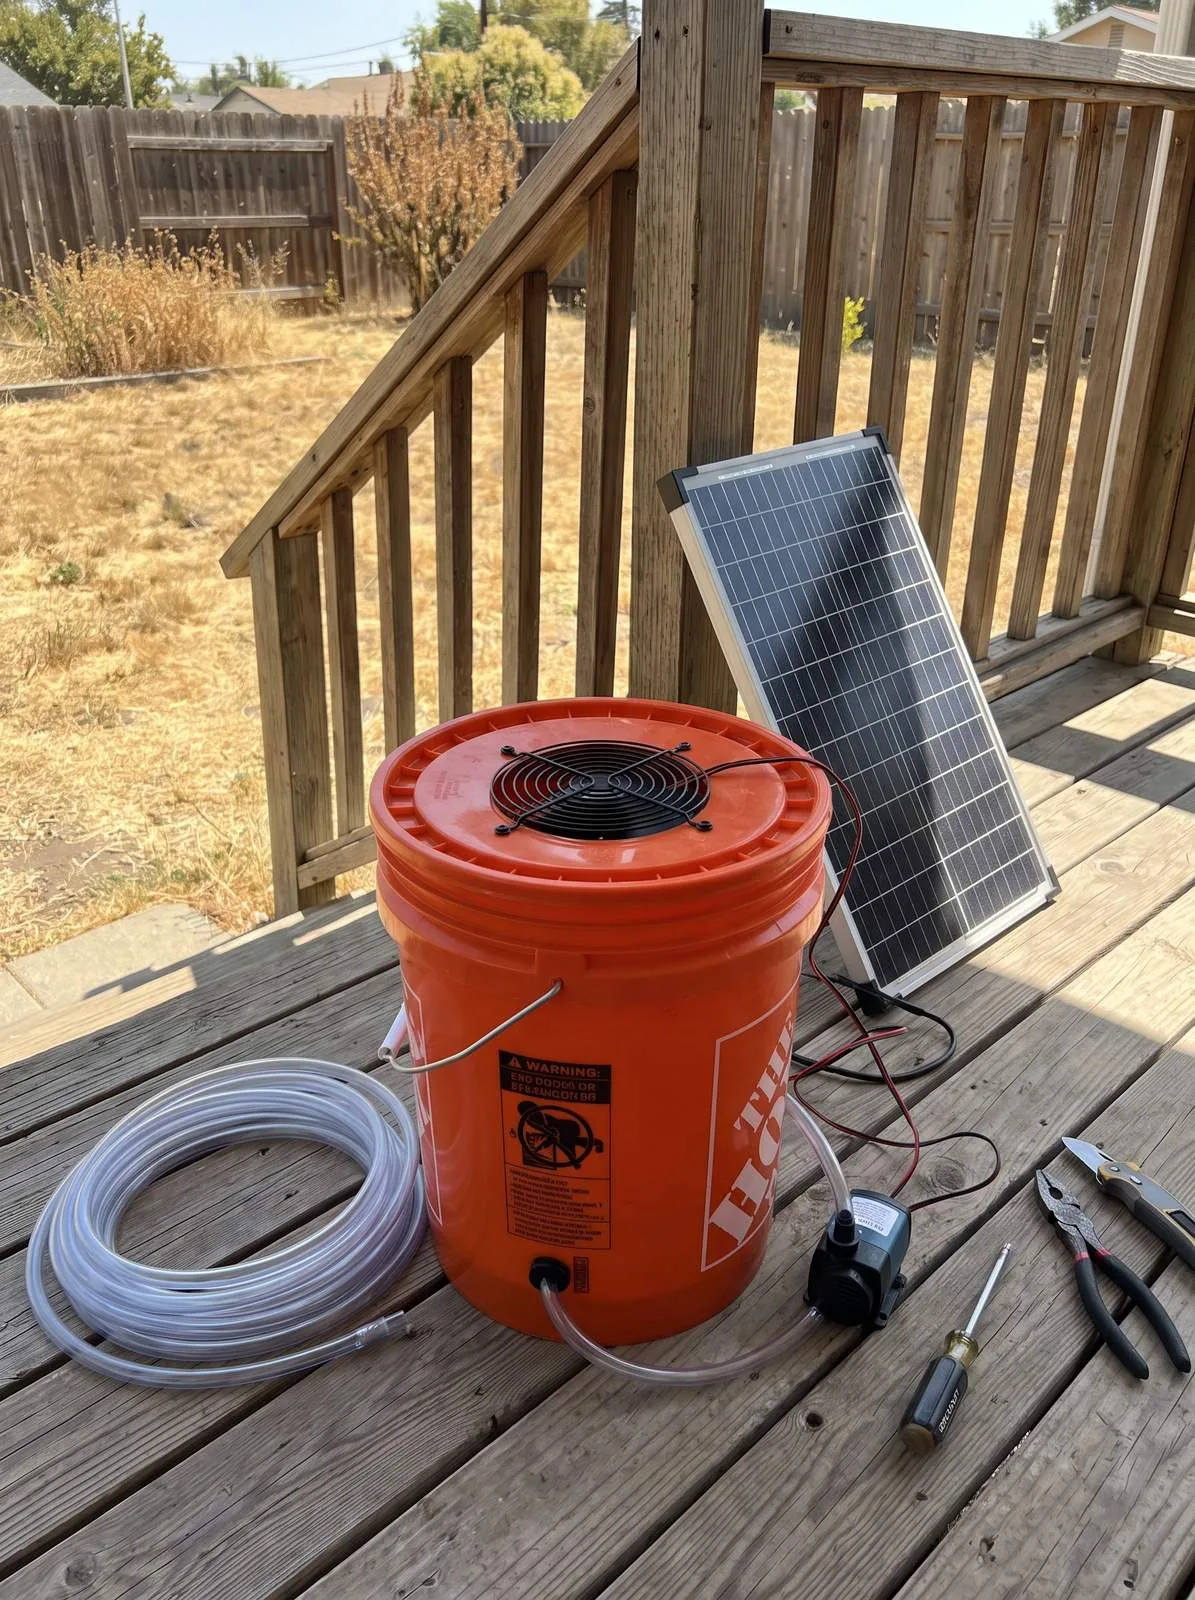
When a heat wave knocks out the grid, an air conditioner becomes dead weight — it draws far too much power to run off a battery or a modest solar setup. An evaporative “swamp” cooler is the opposite. It cools air by evaporating water, draws a tiny fraction of the power, and you can build one from a bucket, a fan, and a pump on a modest parts budget, then run it all day off a single solar panel.
Here is the short version. A DIY off-grid swamp cooler pulls warm, dry air through wet cooling pads; the water evaporates, and that phase change pulls heat out of the air, dropping the temperature by around 20°F in hot, dry conditions (USGS). The fan and pump together sip only a few tens of watts, so a 100W solar panel with a small battery runs the whole thing. The one hard rule: it only works in dry heat — low humidity, and the drier the better. Below is the full parts list and build.
A bucket cooler will not turn a room into a meat locker — but sitting in the airstream of one, in dry heat, is the difference between miserable and comfortable, for pennies of power.
How a Swamp Cooler Actually Cools
Evaporation absorbs heat. When water changes from liquid to vapor, it pulls energy — heat — out of whatever it touches, which is why stepping out of a pool into a breeze feels cold. A swamp cooler weaponizes that: a fan pulls hot, dry air through pads kept wet by a small pump, the water evaporates into the air, and the air comes out the far side cooler and more humid (PNNL Building America Solution Center).
That mechanism is also its limit. The drier the incoming air, the more water evaporates and the more it cools. In air that is already humid, little evaporates, so you get moisture without much cooling. Check your climate before you build:
| Relative humidity | Swamp cooler result |
|---|---|
| Low (dry climate) | Excellent — biggest temperature drop |
| Moderate | Useful — noticeable cooling |
| High (humid climate) | Poor — adds mugginess, little cooling |
If you live somewhere humid, spend your effort on shade, airflow, and the rest of a summer blackout prep checklist instead. This build is for the dry West and Southwest (USGS).
What You’ll Need
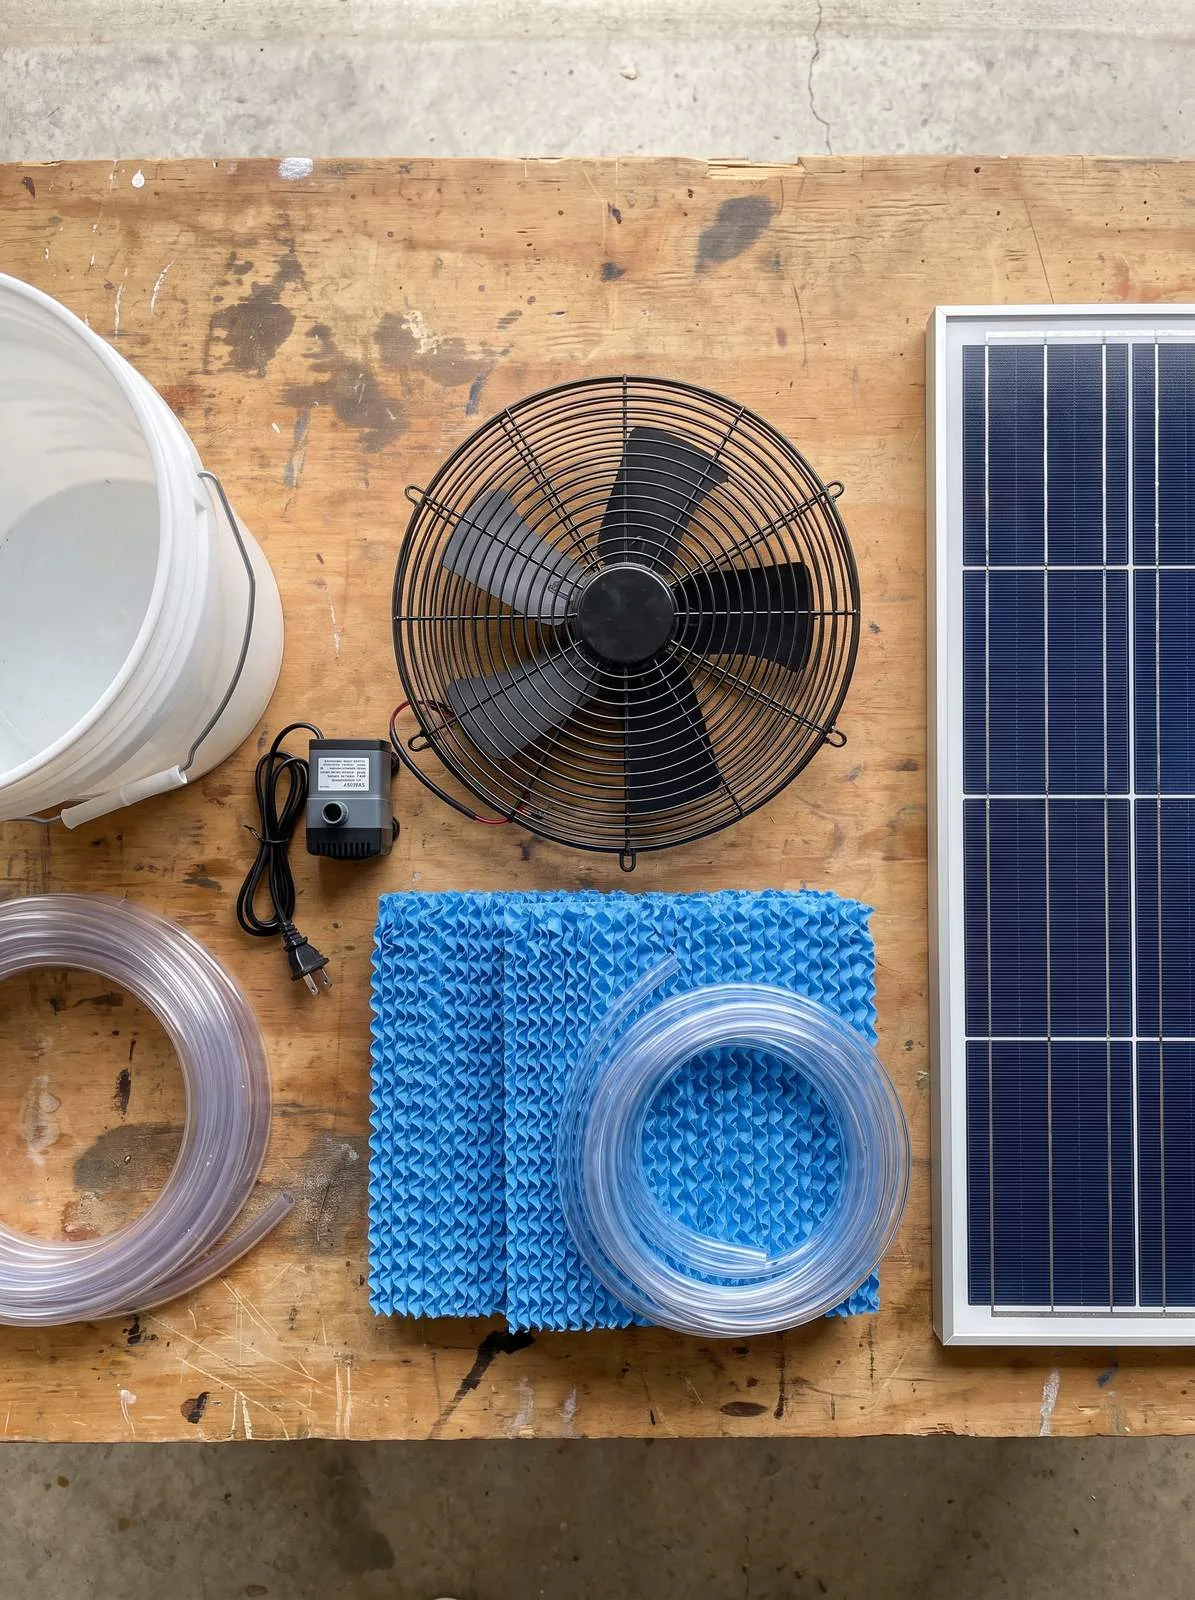
Cooler head:
- A 5-gallon bucket with lid, or a small insulated cooler
- A 12V DC fan (a computer or RV fan works well)
- A small submersible pump — a 400GPH submersible pump (Amazon) is more than enough and runs on low power (15W), but it is a 110–120V AC pump (VIVOSUN), so it needs a power station’s AC outlet or an inverter; for a straight 12V build, choose a 12V DC pump instead
- Evaporative cooling pads (or aspen/cellulose swamp-cooler pad, cut to fit)
- Flexible tubing and a few zip ties
Off-grid power (skip if you have a power station):
- A 100W portable solar panel (Amazon)
- A solar charge controller (Amazon)
- A 12V deep-cycle battery (Amazon), or a smaller 12V rechargeable battery (Amazon) for a compact build
Step-by-Step: Building the Swamp Cooler
Step 1: Cut the Airflow Openings
Trace your fan on the bucket lid and cut a round hole so the fan blows down into the bucket. Then cut several intake vents around the upper sides of the bucket, positioned where the cooling pads will sit. The path is simple: air enters through the wet side pads, gets pulled down and across by the fan, and exits cool. Some builders instead cut one large side outlet — either works, as long as intake air must pass through wet pad.
Step 2: Line the Walls With Cooling Pads
Line the inner walls with evaporative pad, covering the intake vents so all incoming air is filtered through wet material. Leave the bottom few inches clear — that is your water reservoir. The more pad surface the air contacts, the more evaporation and the more cooling you get.
Step 3: Install the Pump and Drip Line
Set the submersible pump (Amazon) in the bottom and run tubing up to a simple drip manifold above the pads — a loop of tubing with small holes poked in it works fine. The pump lifts water to the top of the pads and it trickles down, keeping them saturated while excess drains back to the reservoir. Add one to two gallons of water to start.
Step 4: Mount and Wire the Fan
Secure the 12V fan in the lid hole, blowing inward. Wire the fan, and a 12V DC pump if you use one, to your 12V source; an AC pump like the 400GPH model plugs into a power station’s AC outlet or an inverter instead. Off-grid, the 12V source means the 12V battery (Amazon) charged through the charge controller (Amazon) from the solar panel (Amazon). If you already own a portable power station, you can run the fan straight off its 12V or USB output (and an AC pump off its AC outlet) and skip the battery and controller entirely.
Step 5: Test, Then Position for Dry Air
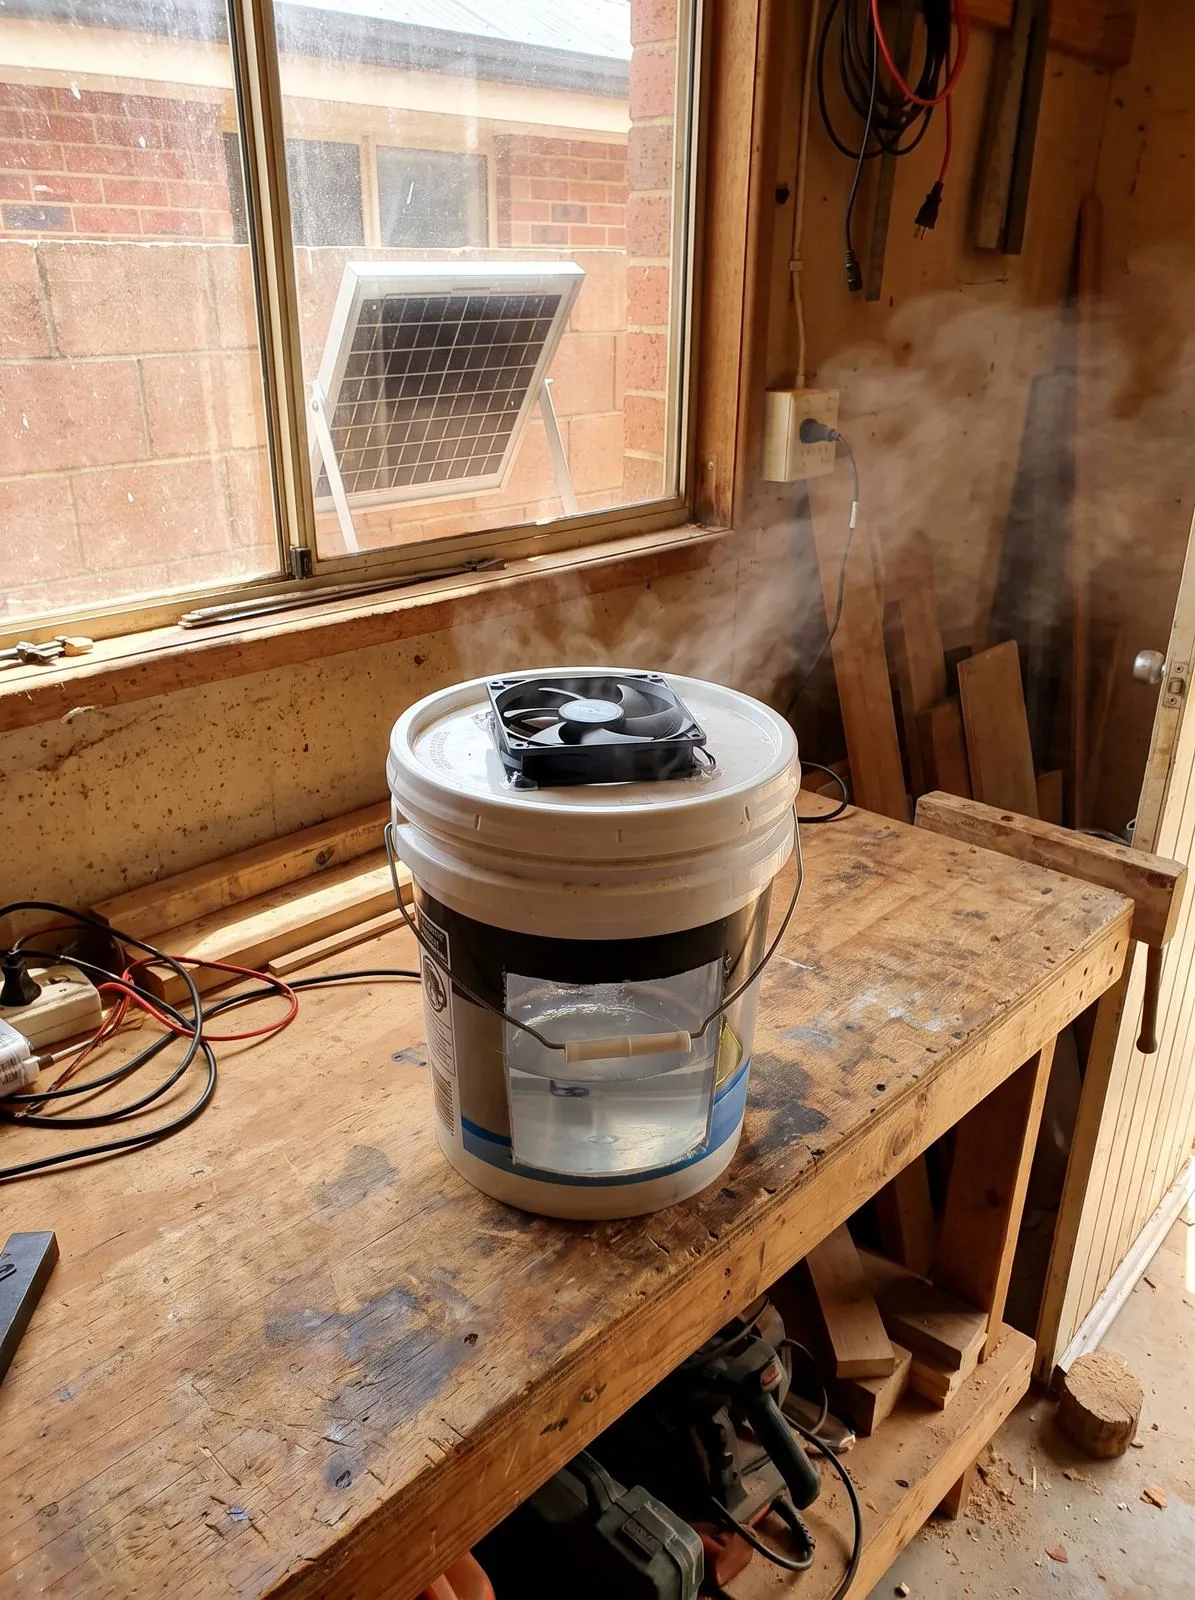
Power it up. Confirm the pads stay evenly wet and that the air coming out is noticeably cooler than the room. Then place the cooler so it draws the driest available air — near an open window or doorway with outside air, not recirculating already-humidified room air. Point the outlet at where people actually sit. Refill the reservoir as the water level drops; on a hot dry day it will go through water steadily.
Getting the Most From It
- Feed it the driest, coolest air you can. Position it at a shaded window on the cool side of the house, not baking in the sun.
- Use cold water. Starting with cold or even iced water in the reservoir gives a stronger initial cooling punch.
- Keep the pads clean. Rinse or replace pads periodically; mineral scale and grime cut evaporation efficiency.
- Run it with cross-ventilation. Swamp coolers work best with a path for the humid air to leave — crack a window on the far side of the room.
- Combine it with the basics. Shade, closed daytime blinds, and nighttime venting do the heavy lifting; the cooler adds the comfortable margin on top.
Where This Fits in Off-Grid Cooling
A swamp cooler is the highest cooling-per-watt tool an off-gridder in a dry climate has. It will not replace central air, but it does something central air cannot: run all day on one solar panel and a bucket of water. That makes it a natural companion to a small solar setup.
Build the cooler head this weekend, pair it with a 100W panel (Amazon) and a small battery, and the next dry heat wave becomes a lot more bearable — on a power budget small enough to run through a blackout. When you are ready to size a bigger battery for fridges and fans too, our best power stations for a heat-wave blackout guide runs the numbers.
Frequently Asked Questions
- How much does a DIY swamp cooler cost to build?
- A basic off-grid evaporative cooler is a low-cost build: a 5-gallon bucket or cooler body, a 12V fan, a small submersible pump, evaporative cooling pads, tubing, and a 100W solar panel with a charge controller and a small battery if you want it to run without the grid. If you already have a solar setup or a power station, you can skip the panel and battery and build the cooler head itself for much less.
- Do swamp coolers actually work in a heat wave?
- Yes, but only in dry heat. Evaporative coolers cool air by evaporating water, so they work best when humidity is low, and the drier the air, the better. In a hot, dry climate a swamp cooler can lower the air temperature by around 20°F. In humid climates they add moisture without much cooling and are not worth building; you are better off with fans and shade.
- How much power does an off-grid swamp cooler use?
- Very little. A 12V fan and a small pump together draw only a few tens of watts (the 400GPH pump in this build is rated at 15W), which is a fraction of what a window air conditioner uses. That is why a single 100W solar panel and a modest battery can run one all day. It is one of the highest cooling-per-watt options for off-grid living.
- What is the difference between a swamp cooler and an air conditioner?
- An air conditioner uses a refrigerant compressor to remove heat and works in any humidity, but draws far more power. A swamp cooler evaporates water to cool the air, uses a tiny fraction of the power, and adds humidity — which helps in dry climates and hurts in humid ones. For off-grid use in a dry region, the swamp cooler wins on power draw by a wide margin.
- Can a swamp cooler run on solar power?
- Easily. Because the fan and pump together draw only a few tens of watts, a 100W solar panel paired with a charge controller and a small 12V battery will run the cooler through the day and into the evening. During a heat wave you have long, sunny days — exactly the conditions that keep the battery topped up while the cooler runs.
Sources & references
Before you go
The Renter's Homestead Pack
Self-reliance projects for the yard you don't own — container yields, a raised bed built to move with you, balcony preservation basics, and the landlord questions to ask first.
Free guide
The Renter's Homestead Pack
Self-reliance projects for the yard you don't own — container yields, a raised bed built to move with you, balcony preservation basics, and the landlord questions to ask first.